
Celery has a reputation, and honestly, it earns it. Every time I recommend growing celery in containers to someone designing their first container garden, I watch their face do this thing where excitement and skepticism arrive at the same time. They’ve heard it’s demanding. They’ve probably already killed one.
So let me answer that upfront: yes, you can absolutely grow celery in containers, and yes, it is worth it. But only if you go in with the right setup and realistic expectations about what this plant actually needs from you.
Celery grown in the right container, in the right soil, with consistent moisture, rewards you with stalks that taste nothing like what you find wrapped in plastic at the grocery store. The flavor is sharper, more aromatic, and it carries a freshness that makes you wonder why you waited so long.
Is Celery Actually Worth Growing in a Container?
Celery is one of the more demanding vegetables you can grow in a container environment. It needs consistent moisture, and I mean consistent, not “I watered it three times this week.” It needs a long growing window of 80 to 100 days.
It wants nutrient-rich soil, regular feeding, and enough container depth to support its root system without stress.
Most people fail with celery because of one of three things: the container is too small, the watering is too inconsistent, or they start the seeds too late and run out of season before the plant matures. These are not mysterious failures. They are predictable ones, and every single one of them is preventable.
Celery does not fail quietly. When it struggles, it bolts, it turns bitter, or the stalks stay thin and stringy, no matter how long you wait. Understanding what drives those failures makes you a much better grower, even before you plant the first seed.
What You Actually Get Out of It
When celery works, and it does work reliably, when the setup is right, it gives you something genuinely different from the store.
Homegrown celery carries a stronger, more complex flavor, and the leaves, which grocery store varieties essentially discard, are packed with taste and work beautifully in soups, stocks, and sauces.
From a sustainable gardening perspective, growing your own celery also means stepping away from one of the most heavily pesticide-treated crops in commercial agriculture.
The Environmental Working Group consistently includes celery in its Dirty Dozen list of produce with high pesticide residues. For container gardeners already thinking carefully about what goes into their soil and their food, that matters.
And practically speaking, celery in containers fits into spaces that most people don’t expect to support a vegetable garden.
A 14-inch pot on a sunny balcony, a pair of deep window boxes on a rooftop terrace, a cluster of self-watering containers along a fence line. I’ve seen celery thrive in all of these when the fundamentals were right.
Who Should (and Shouldn’t) Try This
Before you order seeds, think honestly about your schedule and your setup. Celery grows well for you if:
- You have a spot that gets at least 6 hours of direct sun
- You can water consistently, ideally once a day in warm weather, or you’re willing to invest in a self-watering container
- You have an 80 to 100-day growing window before extreme summer heat or first frost
- You’re comfortable doing light fertilizing every two weeks
If you travel frequently for weeks at a time, have no shade management for hot afternoon sun, or you’re starting in a climate where summers arrive hard and fast, celery is going to test you.
That doesn’t mean skip it. It means set it up correctly from the beginning, and you’ll be fine.
Understanding Celery Before You Grow It
Celery’s Natural Growth Habit and What It Tells You About Container Needs
Celery (Apium graveolens) is a biennial plant by nature, meaning it completes its lifecycle over two growing seasons.
In the first year, it puts its energy into producing the leafy stalks you want to eat. In the second year, it bolts, sends up a flower stalk, sets seed, and that’s the plant’s main priority.
For container growers, this means you’re working entirely within that first year, harvesting before the plant ever gets the chance to shift into reproductive mode.
What’s useful to understand about celery’s root system is that it’s surprisingly shallow. The roots spread outward more than downward, which is actually good news for container growing.
You don’t need a massive deep pot, but you do need one with enough width and adequate depth to prevent the roots from drying out too quickly between waterings.
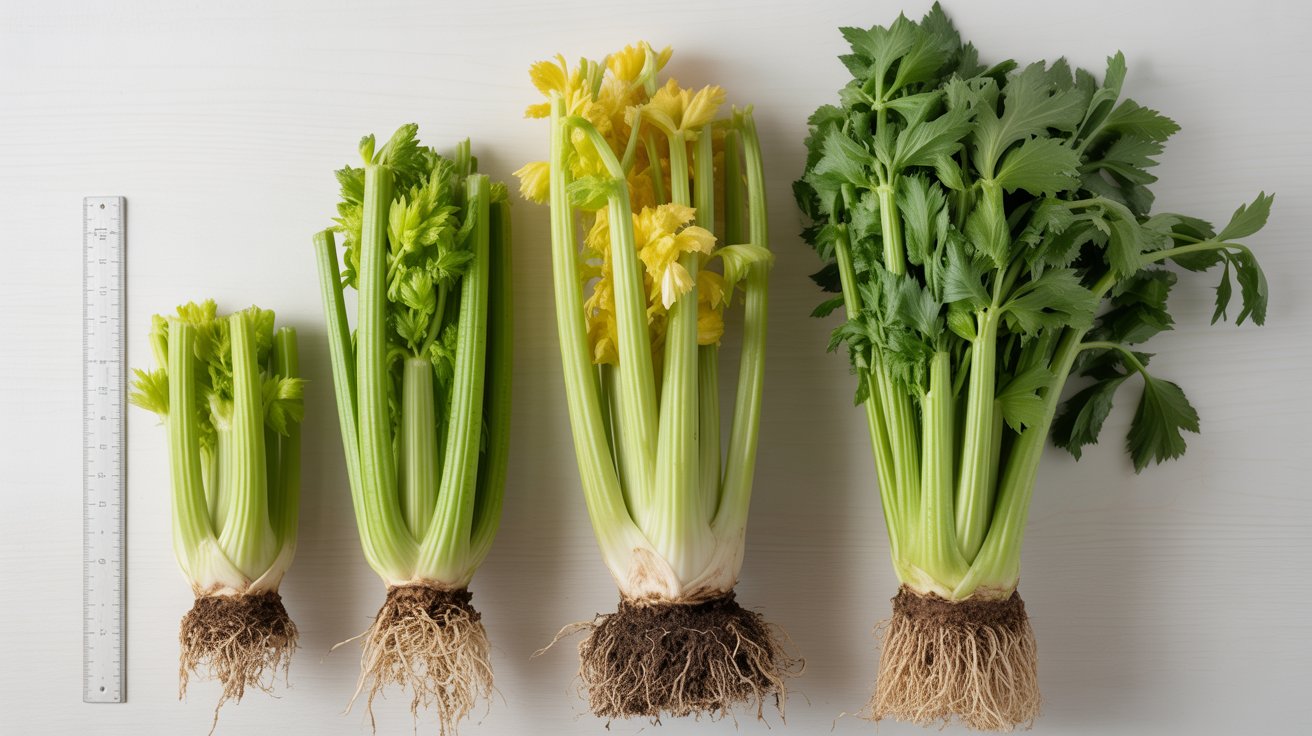
The Best Celery Varieties for Container Growing
Most resources point you toward Utah celery, and it’s a fine choice. But it’s worth knowing your options before you decide.
| Variety | Stalk Height | Container Suitability | Flavor Profile | Notes |
|---|---|---|---|---|
| Utah 52 | 18-24 inches | Excellent | Rich, classic celery | Most widely available, reliable producer |
| Tall Utah | 24-28 inches | Good (needs deeper pot) | Bold, aromatic | Slightly longer maturity time |
| Tango | 12-16 inches | Outstanding | Mild, sweet | Compact size ideal for tight spaces |
| Golden Pascal | 16-20 inches | Excellent | Mild, nutty | Naturally blanches to pale yellow |
| Par-Cel (Leaf Celery) | 12-18 inches | Outstanding | Intense, herb-like | Best for leaves and seasoning |
If I had to pick one for a first-time container grower, I’d go with Tango or Utah 52.
Tango’s compact size reduces the moisture and nutrient demands slightly, making it more forgiving in a container environment.
Utah 52 gives you the classic celery experience and performs consistently across different climates.
How Celery Grows Through the Seasons: A Realistic Timeline
One of the things that trips people up with celery is how spread out the growing process feels. Here’s a rough week-by-week journey from seed to harvest so you can see the whole picture at once:
- Weeks 1 to 3: Seeds germinating indoors. Growth is invisible and slow.
- Weeks 4 to 6: Seedlings emerge, grow their first true leaves. Still indoors.
- Weeks 7 to 10: Seedlings reach 3 to 4 inches, begin hardening off outdoors.
- Week 10 to 11: Transplant into a container.
- Weeks 12 to 16: Active growth phase. Plants establish, and stalks begin developing.
- Weeks 17 to 22: Stalks thicken and reach harvestable size. Outer stalks are ready first.
- Weeks 22 to 24 and beyond: Full maturity. Continued outer stalk harvesting extends the season.
Seeing it laid out this way, the 80 to 100 days feel less daunting. You’re not sitting and waiting. Each phase has its own set of tasks that keep you engaged with the plant.
Choosing the Right Container for Growing Celery
Container Size and Depth (Non-Negotiables)
I’ll be direct here because this is where the majority of container celery failures begin: your pot is probably too small.
The minimum container depth for celery is 8 inches, and that’s the absolute floor.
Aim for 10 to 12 inches of depth if you want a comfortable margin. In terms of width, each celery plant needs roughly 6 to 8 inches of space around it to develop properly.
A practical way to think about it: a 12-inch wide, 12-inch deep pot fits 2 celery plants comfortably.
A 16-inch wide pot at the same depth fits 3. A long rectangular planter, say 24 inches wide and 12 inches deep, gives you space for 4 plants in a row and tends to work very well on balcony railings or along a patio edge.
Going bigger always benefits celery. A larger soil volume retains moisture longer, buffers temperature fluctuations, and gives the root system more room to spread before it hits a wall.
When I work with clients on container vegetable gardens, I steer them toward the largest container they have space for, especially for thirsty plants like celery.
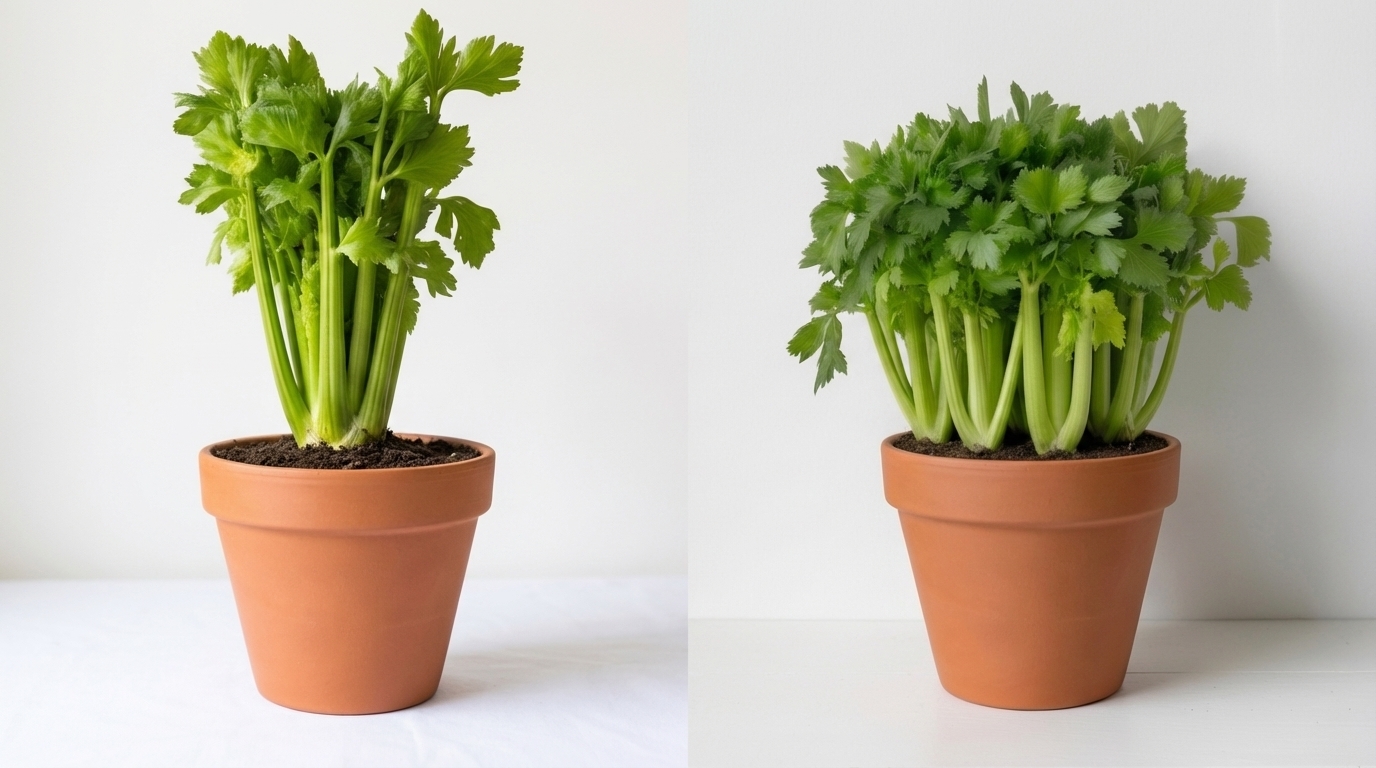
Material Matters: Which Container Types Work Best
| Container Material | Moisture Retention | Weight | Best For | Watch Out For |
|---|---|---|---|---|
| Terracotta | Low (porous) | Heavy | Aesthetic patio setups | Dries out fast, bad for celery |
| Plastic | High | Light | Budget-friendly option | Heats up in direct sun |
| Glazed Ceramic | Medium-High | Very heavy | Decorative, long-term setups | Difficult to move if needed |
| Fabric Grow Bags | Medium | Light | Excellent drainage and air pruning | Water more frequently |
| Self-Watering Containers | Excellent | Medium | The best option for celery | Higher upfront cost |
Terracotta is beautiful, and I use it constantly in my garden designs. But for celery specifically, its porosity works against you.
The soil dries out much faster in terracotta than in plastic or glazed ceramic, and because celery needs constant moisture, you’ll find yourself watering twice a day in warm weather, which most people simply don’t keep up with.
My personal recommendation for container celery is a self-watering container or a high-quality plastic pot in a 12 to 16-inch diameter range.
Self-Watering Containers and Drip Irrigation: Are They Worth It for Celery?
For celery specifically, self-watering containers aren’t a luxury. They’re a practical advantage that directly improves your success rate.
A self-watering container works by drawing water upward from a reservoir in the base through capillary action, keeping the soil evenly moist from the roots up. Celery, which evolved in wet, marshy Mediterranean environments, responds extremely well to this kind of bottom-up, consistent moisture delivery.
The plant never goes through the boom-and-bust cycle of soaking wet after watering, then bone dry two days later, that regular containers create in warm weather.
If a self-watering container feels like too much investment for a first attempt, a drip irrigation system connected to a basic timer achieves a similar result.
A slow drip for 10 to 15 minutes twice a day in summer keeps container celery in its happy zone without you having to remember to water it every single day.
Soil Setup That Supports Growing Celery in Containers
Why Standard Potting Mix Isn’t Enough?
You can pick up a bag of standard all-purpose potting mix at any garden center, and it will grow a lot of things adequately. Celery isn’t one of them, at least not on its own.
Standard mixes drain too freely and hold too little nutrition to support a plant that feeds as heavily as celery does over an 80 to 100-day season.
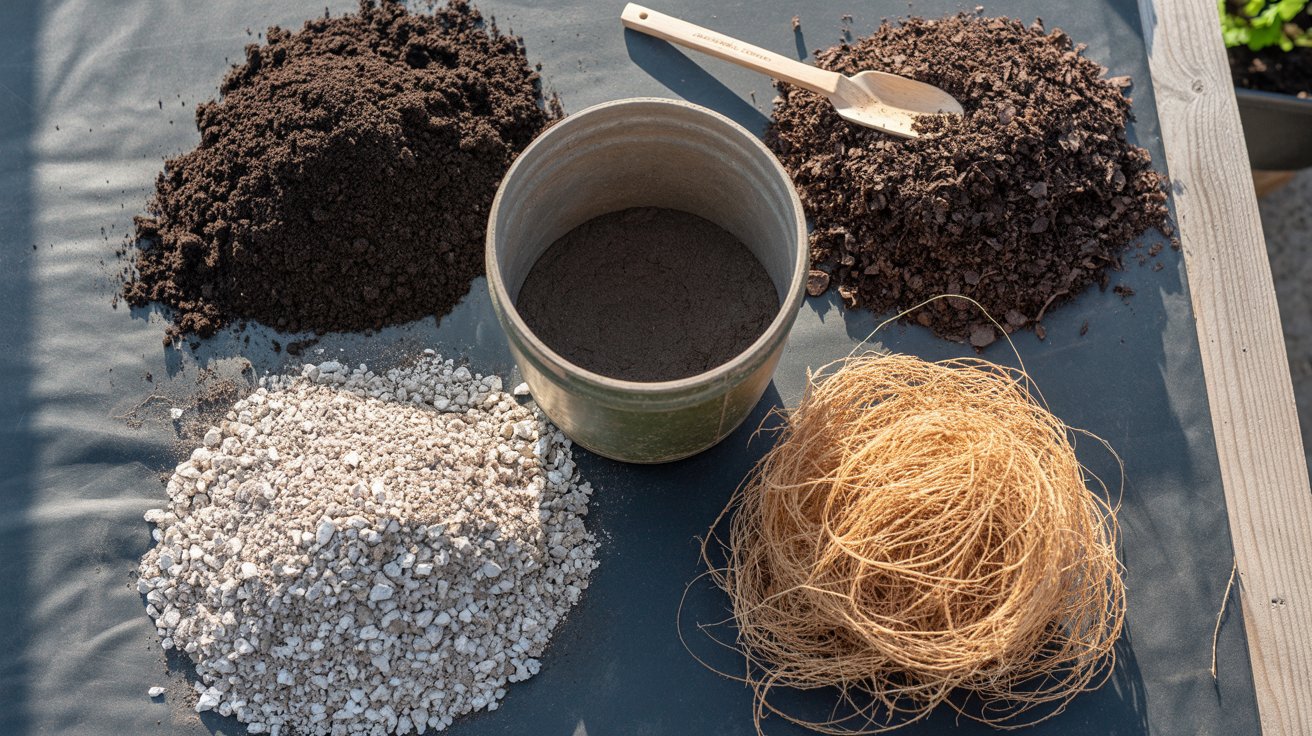
The soil blend I use for container celery, refined over several seasons of working with clients on edible garden setups, looks like this:
- 50% high-quality potting mix (look for one with compost already incorporated)
- 30% mature compost (homemade or bagged, adds organic matter and slow-release nutrition)
- 10% perlite or coarse grit (improves drainage so roots don’t rot despite the moisture demands)
- 10% coconut coir (exceptional moisture retention that helps buffer dry spells)
This blend holds moisture well, drains excess water so roots don’t sit in waterlogged soil, and starts the plant off with a solid nutritional foundation.
Getting Soil pH Right Without Overthinking It
Celery grows best in a slightly acidic to neutral pH range of 6.0 to 7.0, with 6.5 being the sweet spot most consistent with the nutrient availability the plant needs.
If you’ve built your mix with quality compost and potting soil, you’re probably already close to this range without testing. But if you want to check, a basic soil pH test kit costs a few dollars at any garden center and gives you a reliable reading in a couple of minutes.
- To raise pH (make less acidic): work in a small amount of garden lime.
- To lower pH (make it more acidic): incorporate a little sulfur or peat moss.
Neither adjustment requires precision chemistry. A handful of soil worked into your container and retested a week later puts you right where you need to be.
Plant Spacing in Containers: Give Celery Room to Breathe
Celery grown too close together puts out thin, weak stalks and creates conditions where moisture stays trapped between plants, inviting fungal problems.
Each plant needs 6 inches of space on all sides, and if you’re planting multiple plants in one container, hold strictly to that spacing, even if it means fitting fewer plants than you’d like.
A common temptation is to squeeze in an extra plant and hope they’ll sort themselves out. They won’t. Tight spacing produces exactly the stringy, underdeveloped celery that makes people think the plant failed when really the setup failed the plant.
Starting Celery From Seed Indoors: A Step-by-Step Walkthrough
When to Start Celery Seeds Indoors
Celery seeds need to start indoors 10 to 12 weeks before your last expected frost date. This is earlier than most vegetables, and skipping this lead time is one of the most reliable ways to run out of growing season before the plant matures.
A quick reference by climate zone:
- USDA Zones 3 to 4: Start seeds in late January to early February
- USDA Zones 5 to 6: Start seeds in February to early March
- USDA Zones 7 to 8: Start seeds in February (for spring crop) or late summer (for fall crop)
- USDA Zones 9 to 10: Start seeds in September for a winter and spring harvest
If you’re in a warmer zone and you missed the spring window, a late summer start for a fall harvest actually works extremely well for celery. The plant prefers cool, mild temperatures for its final growth push, and fall provides that naturally.
Seed Depth, Spacing, and the Patience Germination Requires
Celery seeds are genuinely tiny, almost dust-like, and they have specific germination needs that differ from most vegetables:
- Surface sow or barely cover the seeds with 1/8 inch of soil at most. Celery seeds need light to germinate, and burying them too deeply significantly reduces germination rates.
- Press the seeds gently into moist seed-starting mix and cover the tray with a clear plastic dome or plastic wrap to maintain humidity.
- Keep the tray at 65 to 75 degrees F. Celery seeds germinate poorly below 55 degrees F and above 85 degrees F.
- Germination takes 10 to 21 days. People see nothing happening for two weeks and assume the seeds are dead. Keep the tray warm and moist, and wait.
- Bottom watering, which means setting the tray in a shallow dish of water and letting the soil draw it up, prevents disturbing the seeds and keeps moisture even.
What Healthy Seedlings Look Like: and What to Do When They Don’t Look Right
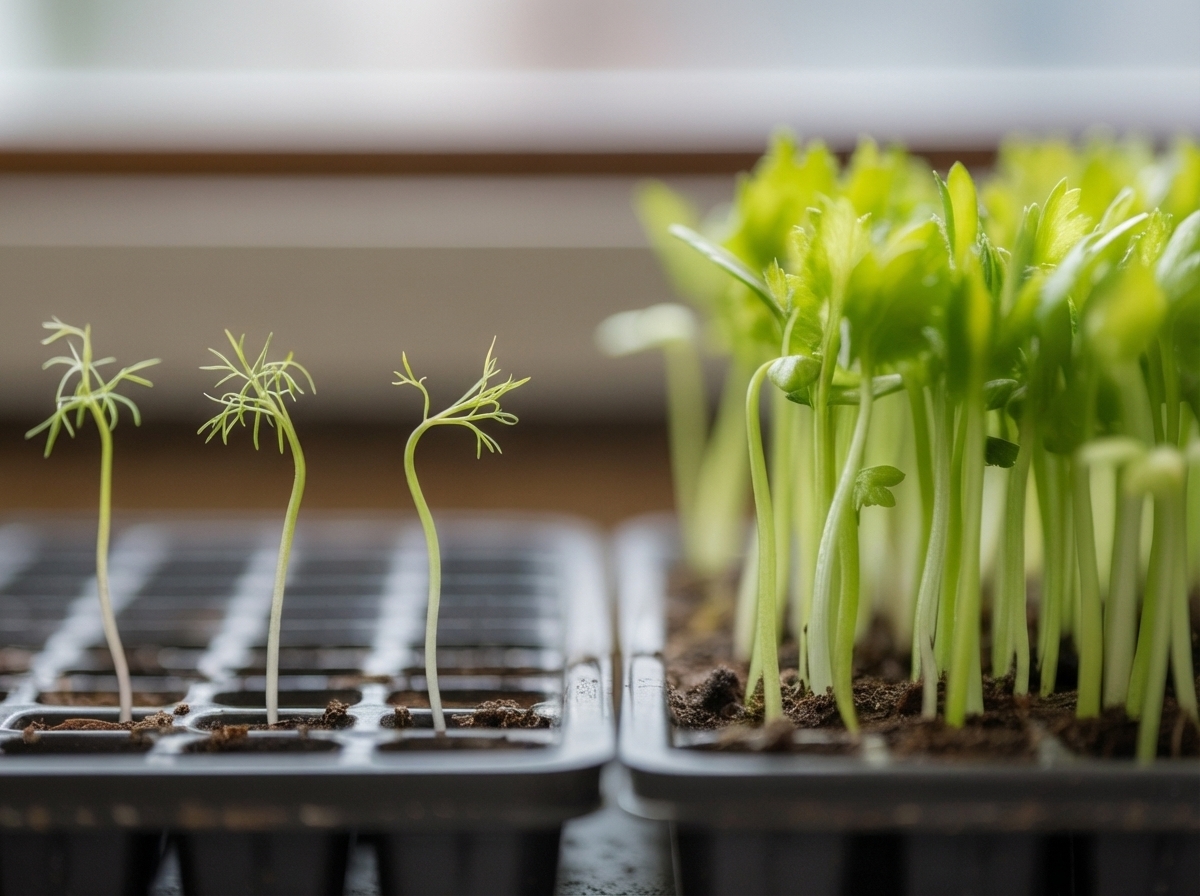
Once germination happens, you’ll see thin, thread-like seedlings that look almost too fragile to survive. This is normal. Within a week or two, they thicken slightly and produce their first true leaves, the small, unmistakably celery-shaped leaves that confirm you have the right plant.
Leggy, stretched seedlings usually mean insufficient light. Move them closer to a grow light or a south-facing window immediately. The longer they stretch, the weaker the stems become.
Damping off, where seedlings collapse at the soil line and die suddenly, comes from overwatering and poor air circulation. If you see it, remove affected seedlings, allow the surface to dry slightly, and improve airflow around the tray.
Slow or patchy germination is often a temperature issue. A seedling heat mat set to 70 degrees F makes a significant difference and is worth the investment if you plan to start seeds annually.
Transplanting Into Containers: Doing It Without Stressing the Plant
When Seedlings Are Ready to Move
Celery seedlings are ready to transplant when they reach 3 to 4 inches tall and have developed at least 2 to 3 true leaves. Before moving them directly into their outdoor container, they need a hardening off period, a gradual introduction to outdoor conditions that prevents transplant shock.
The hardening off process works like this:
- Days 1 to 2: Place seedlings outside in a shaded, sheltered spot for 1 to 2 hours, then bring them back in.
- Days 3 to 4: Increase outdoor time to 3 to 4 hours, still in partial shade.
- Days 5 to 7: Move them to their eventual sun exposure for 4 to 5 hours at a time.
- Days 8 to 10: Leave them outside through the day, bringing them in only if nighttime temperatures drop below 50 degrees F.
- Days 10 to 14: They’re ready for permanent outdoor placement.
Rushing this process produces visibly stressed plants, pale, slightly wilted, or with leaf edges that look scorched. Taking two weeks to harden off properly saves you several weeks of recovery time.
Transplant on an overcast day or in the early evening if possible. Direct midday sun on freshly transplanted seedlings adds unnecessary stress to an already demanding transition.
The Crown Rule: Why How Deep You Plant Matters More Than You Think
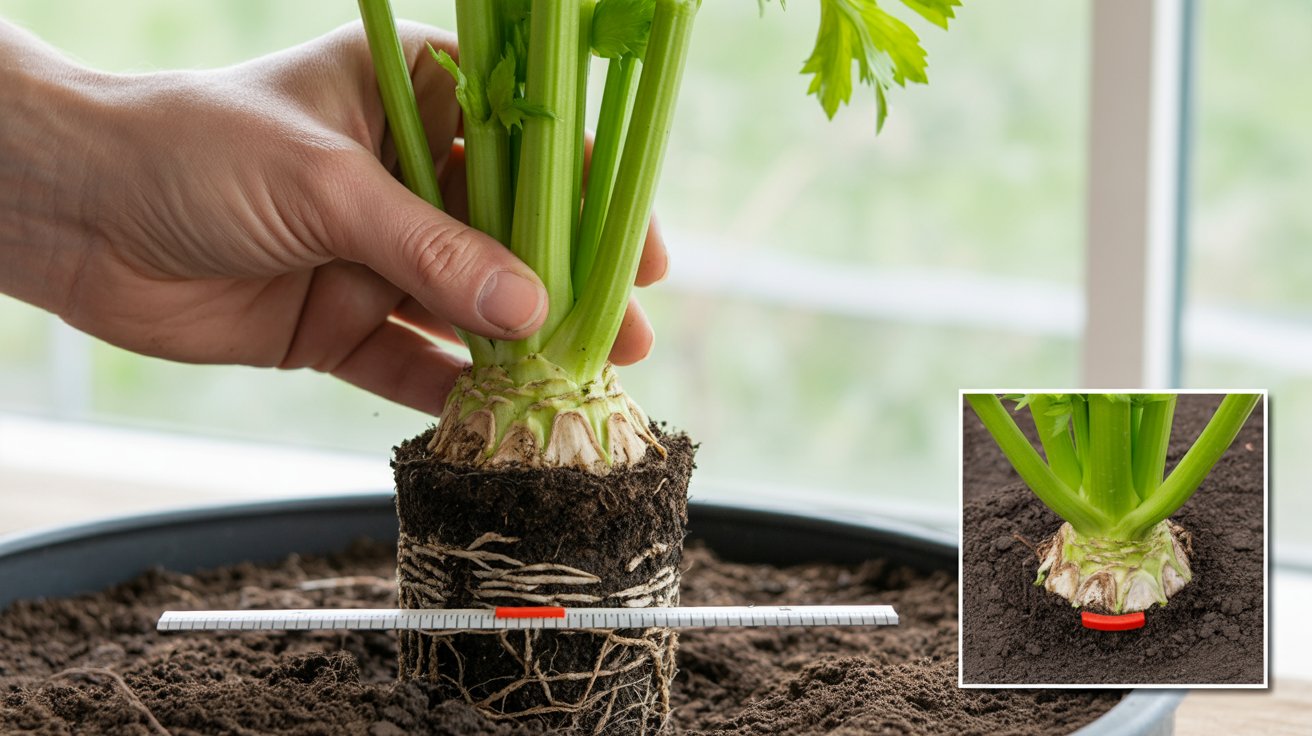
Here is one of those transplanting details that most people learn the hard way: keep the crown of the celery plant above the soil line.
The crown, the point where the stalks meet the roots just at or slightly above the soil surface, is the growth center of the entire plant. Burying it, even by just half an inch, creates conditions for rot that will slowly undermine the plant over weeks.
You might not notice immediately, but by mid-season, you’ll find stalks dying from the base with no obvious cause.
When you set the transplant into the container, fill the soil up to just below the crown. The crown itself should sit at soil level or a few millimeters above it. Firm the soil gently around the base, water thoroughly, and you’re done.
Thinning Seedlings Without Second-Guessing Yourself
If you started multiple seeds per cell or scattered seeds into a flat, you’ll reach a point where seedlings need thinning to their final spacing.
Use this simple rule: keep the strongest, most upright seedling in each position and snip the others at the soil level with small scissors.
Pulling them out risks disturbing the roots of the keeper.
Thinning feels like a waste, and I understand the hesitation. You’ve spent weeks growing these seedlings. But keeping overcrowded plants together produces a cluster of weak plants rather than one strong one, and the strong one will always outperform the cluster by a wide margin at harvest.
The Skill of Watering Celery in Containers for Harvest
Celery’s moisture requirements come from its origins. The wild ancestors of cultivated celery grew in marshes and wet meadows along the Mediterranean coast, environments with consistently moist soil and no real dry season.
Your container is a long way from a Mediterranean marsh, which is why moisture management takes active attention.
Here’s a practical way to read your plant’s moisture status:
Properly watered celery:
- Stalks stand upright and firm
- Leaves are deep green and spread outward
- Soil feels moist 1 to 2 inches below the surface
Under-watered celery:
- Stalks lean or droop slightly, even in the morning
- Leaf edges curl inward
- Soil feels dry an inch below the surface
- Stalks may feel slightly soft or rubbery
Over-watered celery:
- Lower stalks show yellowing or brown edges
- Soil smells musty or sour
- The root area feels constantly saturated even after a day without watering
Interestingly, both overwatering and underwatering can produce similar symptoms in the early stages, drooping and pale coloring, which is why checking the soil before adding water saves you from overcorrecting in the wrong direction.
Building a Watering Routine That Actually Works With Your Schedule
In cool spring and fall weather, container celery typically needs watering every 1 to 2 days. In summer heat above 80 degrees F, that frequency moves to once or even twice daily for containers without a reservoir.
Morning watering is ideal because the soil holds moisture through the hottest part of the day without sitting wet overnight, which reduces fungal risk. Evening watering works acceptably. Just avoid wetting the foliage in the late evening if your area has humid nights.
Container material significantly affects how often you water. Terracotta dries out in 24 hours on a warm day, while plastic containers in the same conditions might hold moisture for 36 to 48 hours.
Learning your specific container’s drying rate takes about a week of observation and then becomes intuitive.
Mulching the Container: A Simple Trick That Reduces Your Watering Burden
Most container vegetable guides skip this, and I can’t figure out why, because it makes such a visible difference. Applying a 1 to 2 inch layer of mulch, straw, shredded leaves, or even untreated wood chips across the top of the container soil reduces evaporation dramatically.
In a series of container plantings I’ve set up for clients in exposed patio environments, mulched containers in summer consistently held soil moisture 30 to 40 percent longer than unmulched containers of the same size and material.
For a plant as moisture-sensitive as celery, that buffer can mean the difference between a healthy plant and a stressed one on the days when watering slips your mind.
Keep mulch slightly away from the crown of the plant to maintain airflow at the base.
Sunlight, Shade, and the Flavor Connection
How Much Sun Does Celery Need?
Celery grows best with 6 to 8 hours of direct sun per day, but it tolerates partial shade better than many vegetables. In fact, some shade during the hottest afternoon hours in summer actually protects the plant from heat stress and slows bolting.
If your container spot gets 4 to 5 hours of morning sun and shade from midday onward, your celery will grow, perhaps a little more slowly, but without the wilting and bitterness that intense afternoon heat can create. South- or east-facing locations tend to work best for container celery in most climates.
What celery genuinely struggles with is dense, all-day shade. Less than 3 to 4 hours of direct sun produces weak, pale, thin stalks that take forever to reach harvestable size and taste flat when they finally do.
Shading Celery Stalks to Control Flavor: What Blanching Is and Why It Works
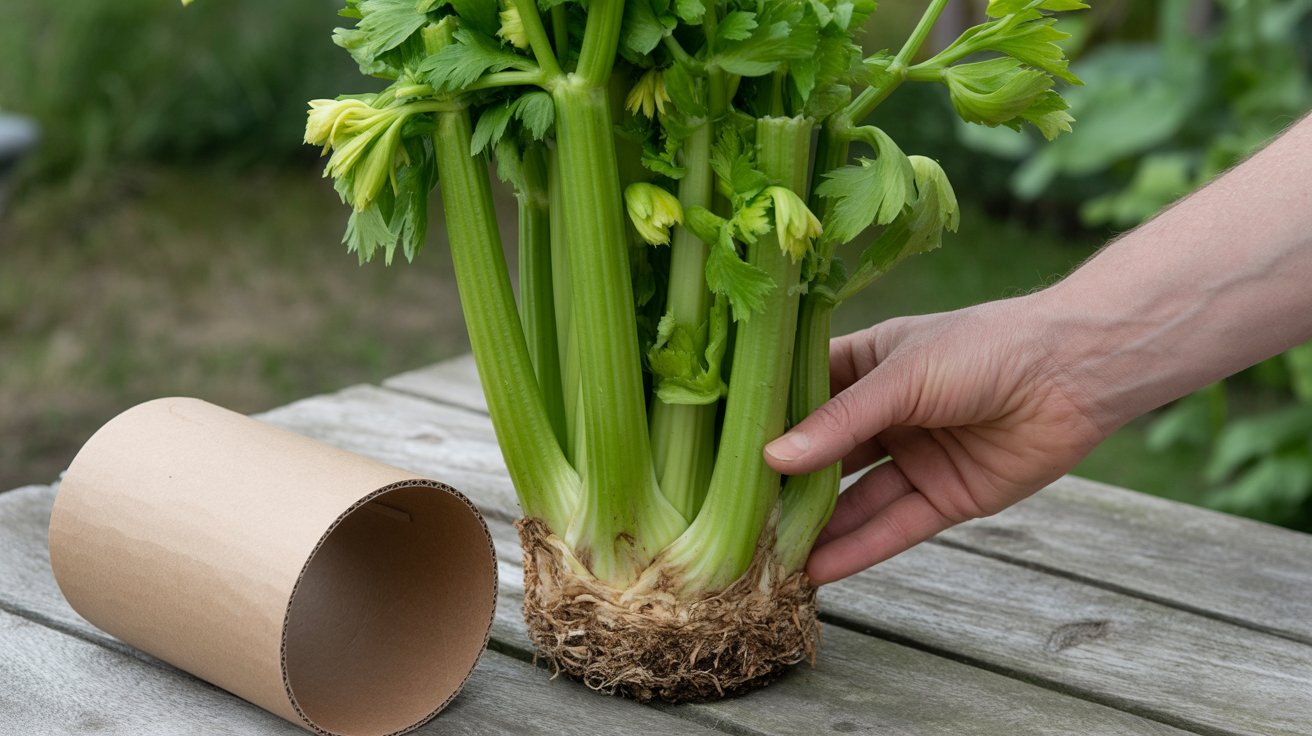
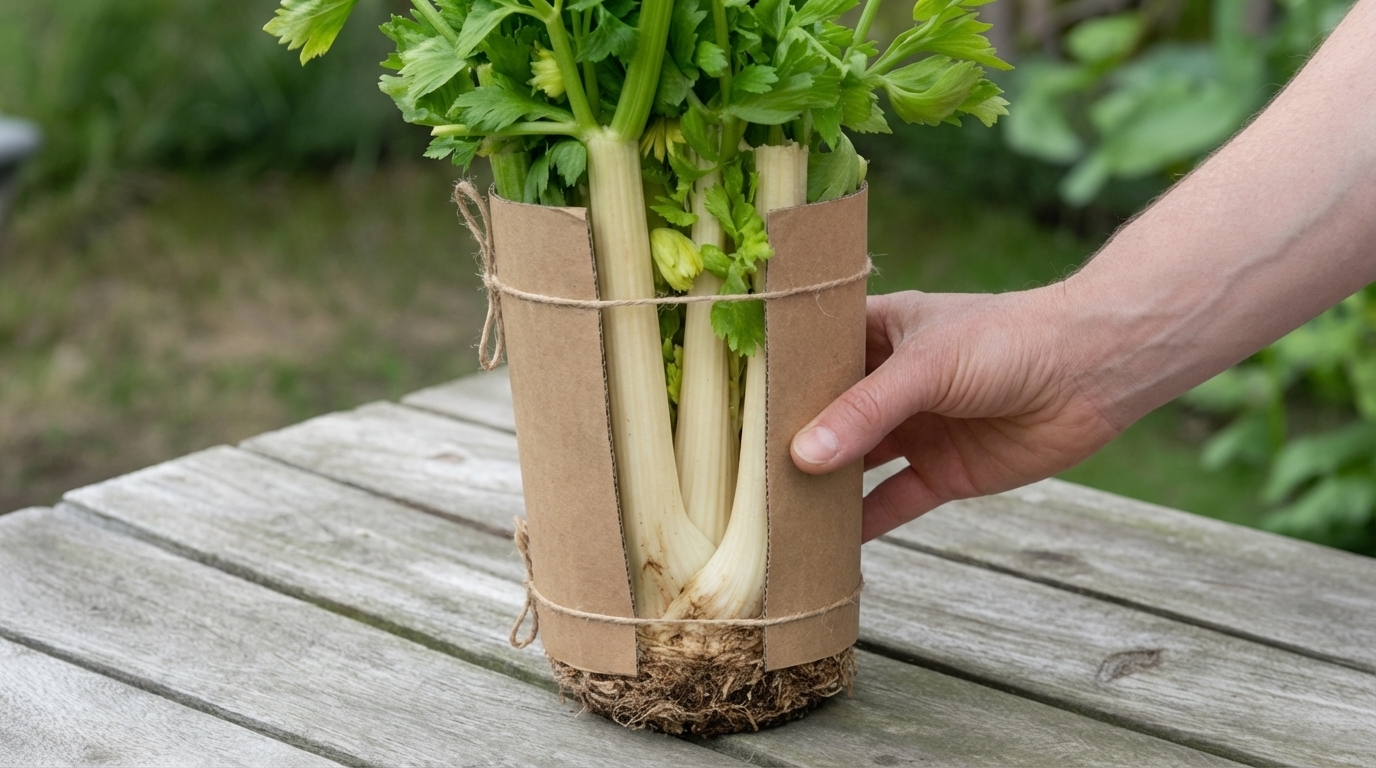
Blanching is the practice of blocking light from the celery stalks during the final 1 to 3 weeks before harvest, and it produces a noticeably milder, sweeter flavor with a paler color.
Commercial white celery is produced through this technique, and you can replicate it at home with nothing more than paper, cardboard, or cloth.
Here’s how the process works in practice:
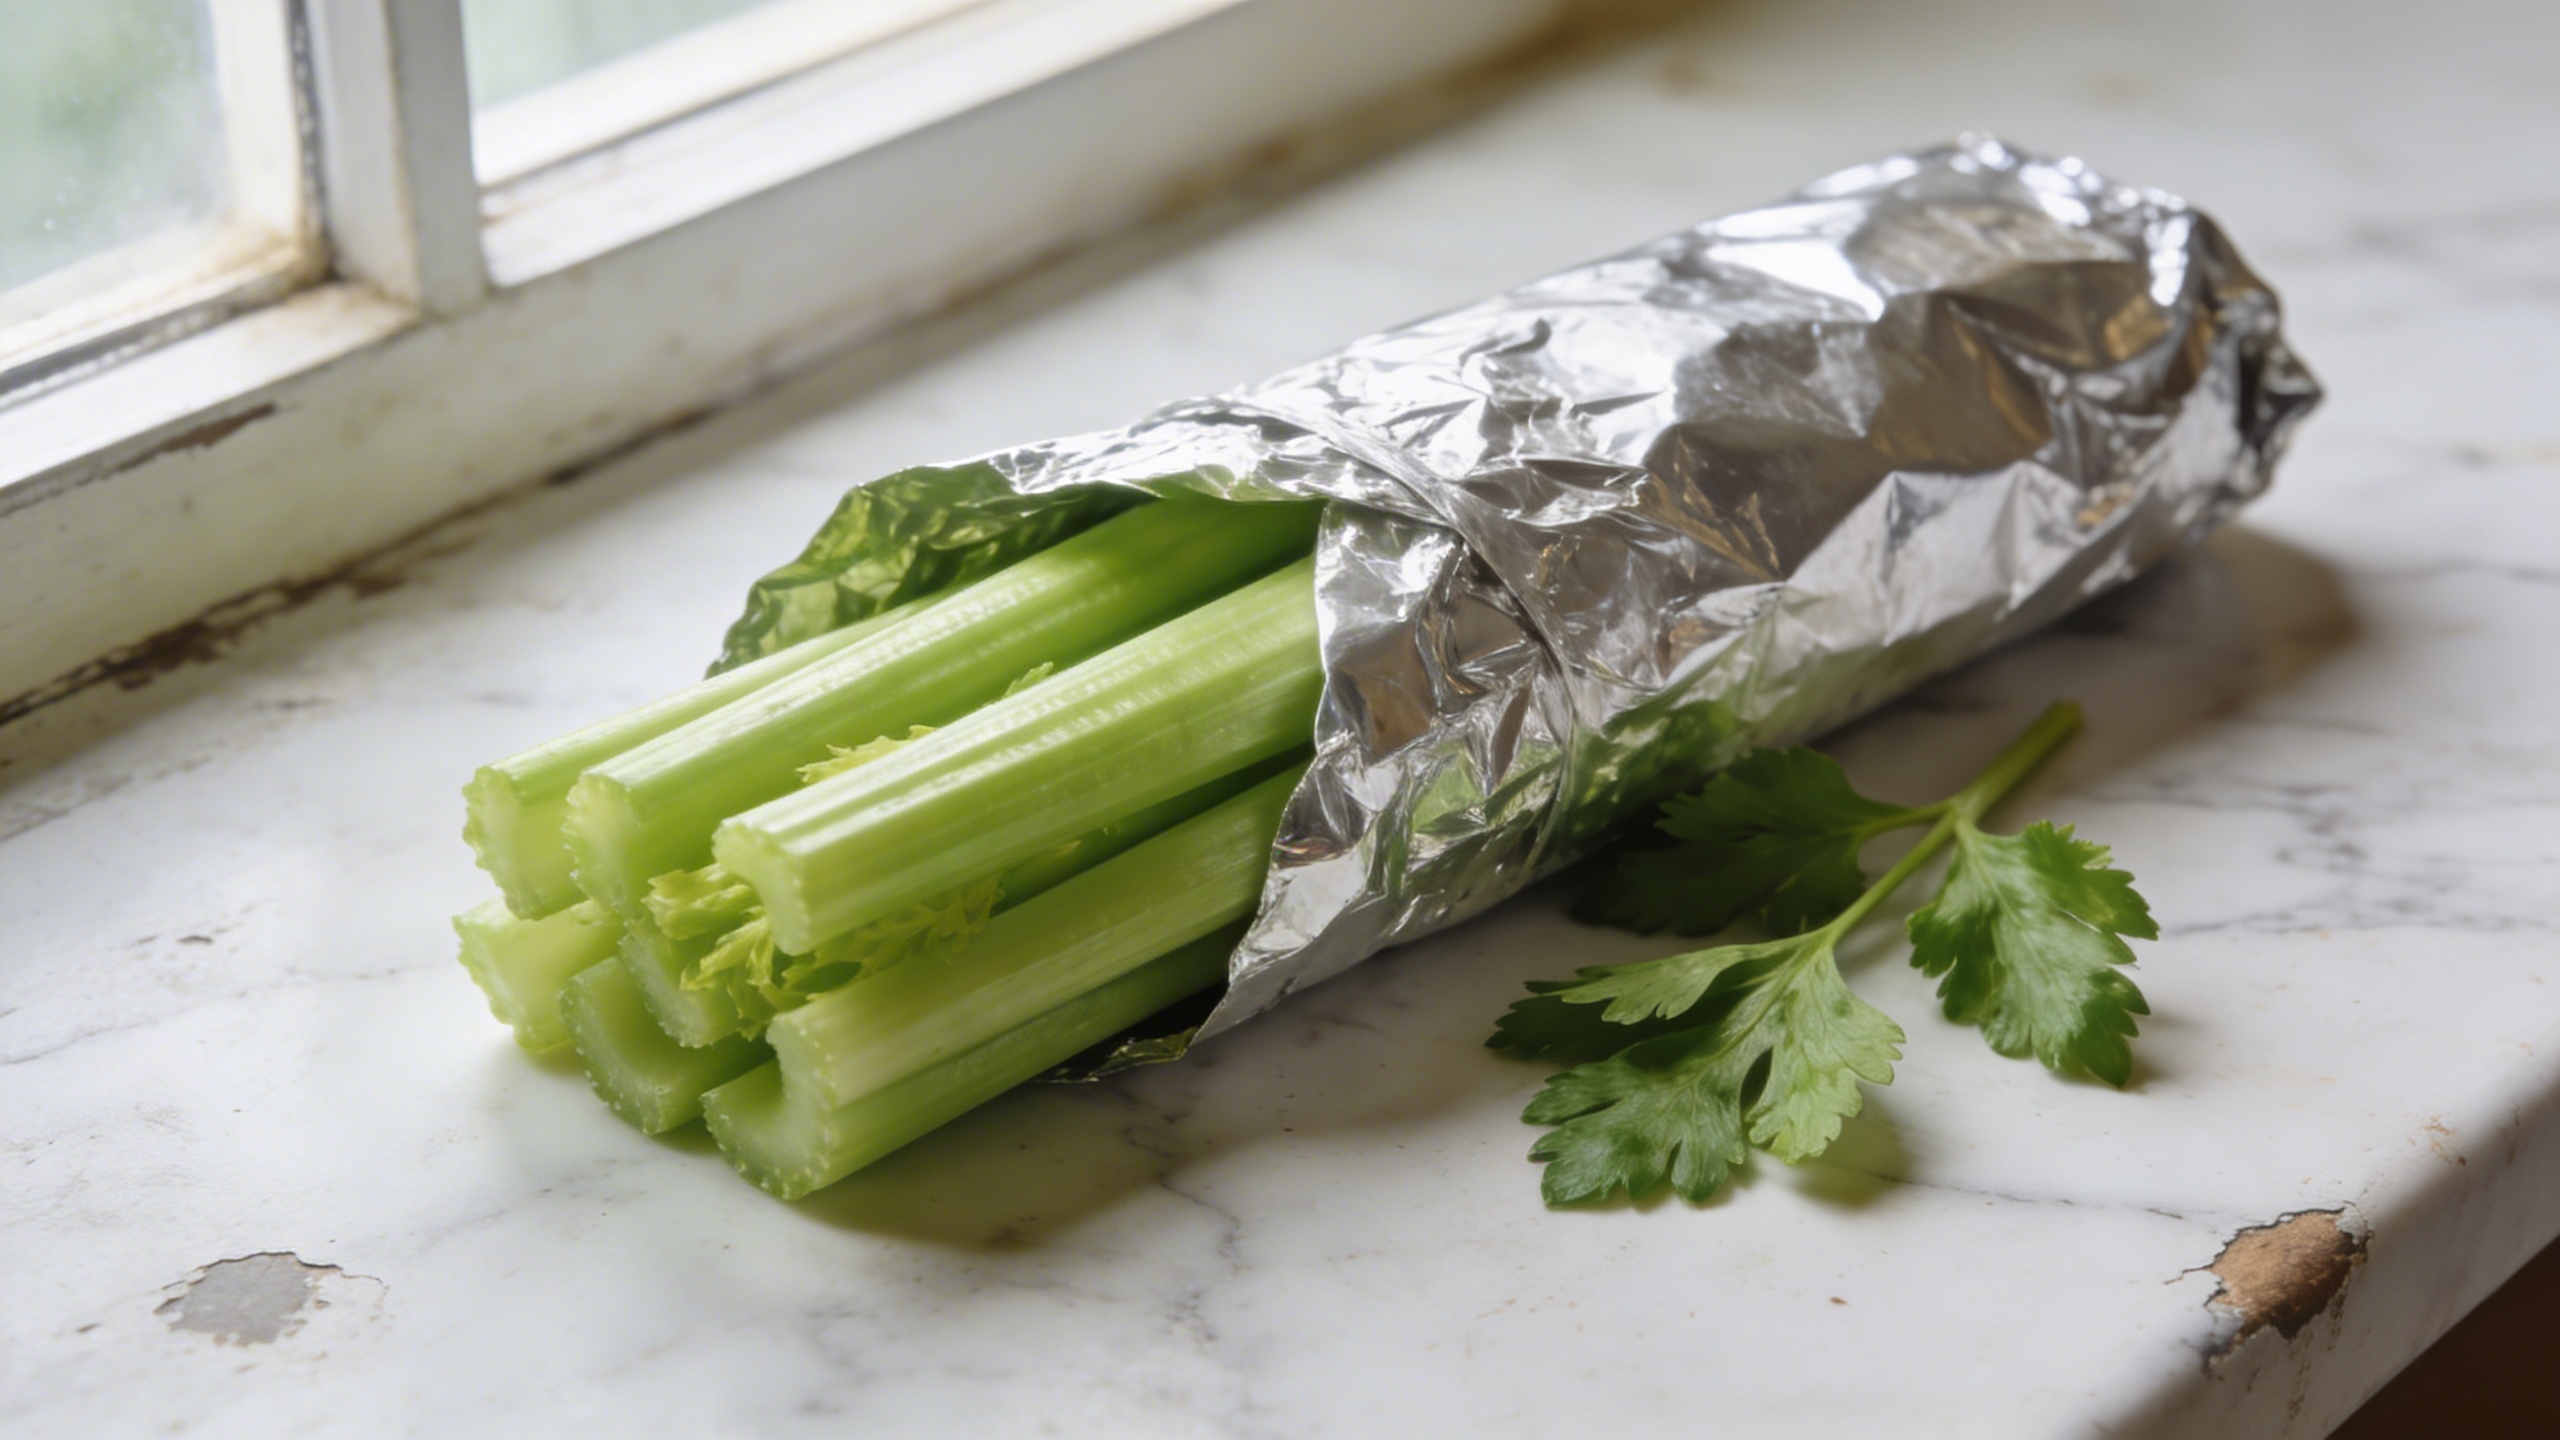
- About 2 to 3 weeks before you plan to harvest, gather the outer stalks loosely together and wrap them with a sleeve of cardboard, thick paper, or a section of black fabric.
- Tie the wrap gently at the top and bottom, firmly enough to block light, loosely enough to allow airflow and prevent rotting.
- Leave the top leaves exposed so photosynthesis continues.
- After 2 to 3 weeks, the stalks beneath the wrap will have lightened to pale green or cream, and the flavor will be noticeably less bitter.
The reason this works is straightforward: celery develops its characteristic sharp, slightly bitter flavor compounds, primarily phthalides, partly in response to light exposure. Reducing light during final development slows this process and shifts the flavor profile toward a milder sweetness.
You don’t need to blanch celery to enjoy it. Green, unblanched celery is excellent for cooking and has a more robust flavor that many people prefer. But if you find homegrown celery too sharp for fresh eating, blanching solves it completely.
Positioning Your Container for Seasonal Light Changes
One advantage of container growing that in-ground gardeners don’t have is the ability to move the plant as light conditions shift through the season.
In early spring, a spot that receives all-day sun may shift to afternoon shade by summer as neighboring trees leaf out. Conversely, a spot that seemed partially shaded in March may open up considerably by May.
Celery benefits from being repositioned as the season develops. Full sun in cool spring weather, with more afternoon shade protection as temperatures climb in June and July.
A container on wheels or a simple plant caddy makes this completely effortless and is one of those small investments I recommend constantly to anyone building a container vegetable garden.
Feeding Celery in Containers: What, When, and How Much
Why Container Celery Needs More Fertilizing Than In-Ground Plants
Every time you water a container plant, which for celery is once or twice daily in summer, you flush a small amount of soluble nutrients out through the drainage holes.
This is simply the physics of container growing, and it means container plants deplete their soil nutrition significantly faster than the same plant in the ground.
Celery is a heavy feeder to begin with.
Its rapid stalk growth and long growing season place consistent nutritional demands on the soil, particularly for nitrogen, which drives leafy vigorous growth, and potassium, which supports cellular strength and water movement through the plant.
In a container, without regular supplementation, the initial soil nutrition runs out partway through the season, and the plant stalls.
The reliable approach: feed every two weeks from transplant through to the final 2 weeks before harvest.
The Best Fertilizers for Container Celery
From a sustainable gardening standpoint, I lean toward organic liquid fertilizers for container vegetables because they feed the soil biology as well as the plant, and they’re gentler with less risk of burning roots in the confined space of a container.
My preferred options:
- Fish emulsion (e.g., Neptune’s Harvest 2-3-1): Excellent for nitrogen-driven leafy growth. Dilute according to package directions and apply bi-weekly. Smells unpleasant for a day or two, but it is highly effective.
- Balanced liquid kelp and seaweed blend: Provides broad-spectrum micronutrients and natural growth hormones. Excellent as a complement to fish emulsion rather than a replacement.
- Compost tea (homemade): Brewed by steeping finished compost in water for 24 to 48 hours, then applying the liquid to the soil. Delivers a wide range of nutrients and beneficial microorganisms. Particularly useful mid-season to reinvigorate the soil biology.
- Balanced synthetic fertilizer (20-20-20 or similar): If you prefer a simpler approach, a water-soluble balanced fertilizer applied at half the recommended strength every two weeks works reliably. The risk with synthetics at full strength in a container is root burn. Always dilute below the package recommendation for contained growing.
Reading Yellowing Leaves: Nutrient Deficiency Diagnosis Made Simple
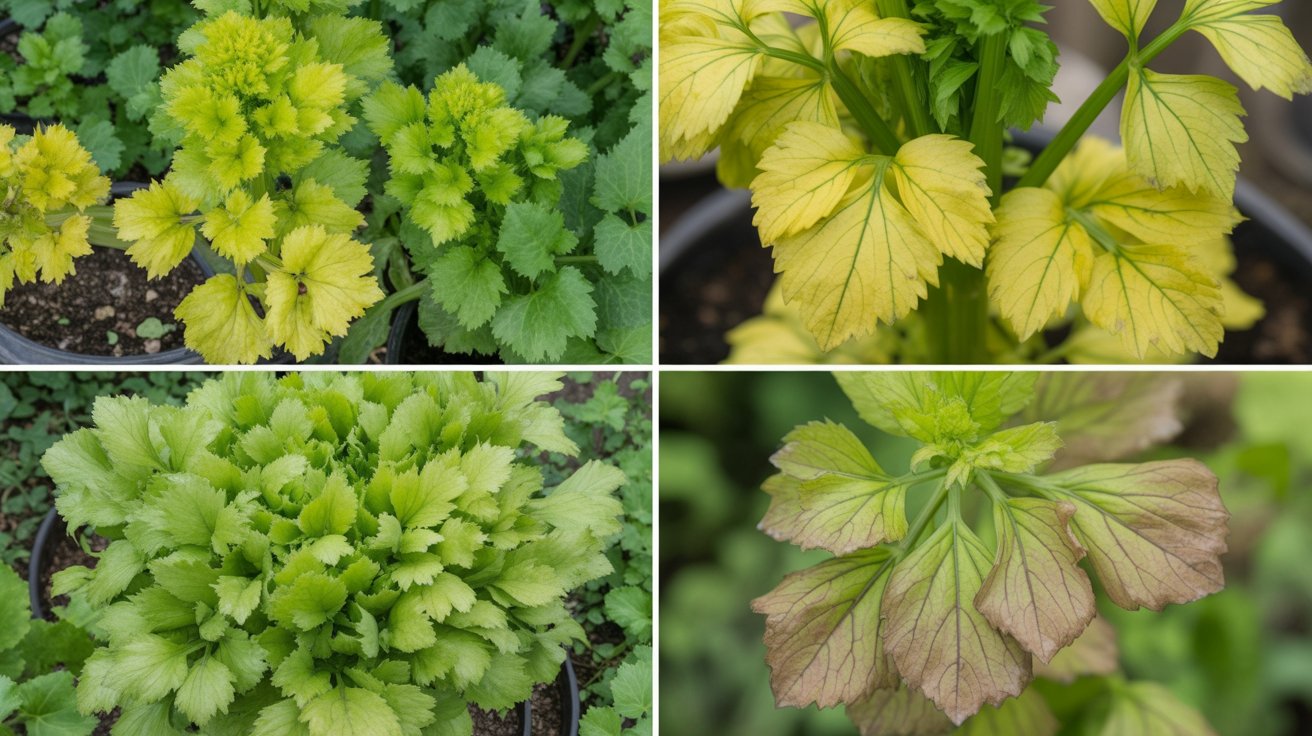
Yellowing leaves on container celery are common and almost always correctable. The pattern of yellowing tells you what’s going on:
| Yellowing Pattern | Likely Cause | Fix |
|---|---|---|
| Older and lower leaves yellowing first | Nitrogen deficiency | Apply fish emulsion or nitrogen-rich fertilizer |
| Yellowing between veins on new leaves | Iron or magnesium deficiency | Check pH (may be too high), apply chelated iron or Epsom salt |
| All leaves pale and washed out | Overall nutrient depletion | Refresh with compost top-dress and liquid feed |
| Yellowing at leaf edges with browning | Potassium deficiency or salt buildup | Flush the container thoroughly with water, then apply a potassium-containing fertilizer |
| Yellow leaves with wilting | Overwatering and root rot | Reduce watering, check drainage |
Catching deficiencies early and responding promptly keeps the plant on track.
A celery plant that goes 3 to 4 weeks with insufficient nutrition doesn’t just stall. It produces stalks with poor texture and flavor that no amount of late-season feeding will fully recover.
Harvesting Celery: Knowing When and How to Pick for the Best Flavor
Harvesting Young Stalks vs. Waiting for Full Maturity
Here’s a question worth thinking about before you harvest: What are you actually planning to do with the celery?
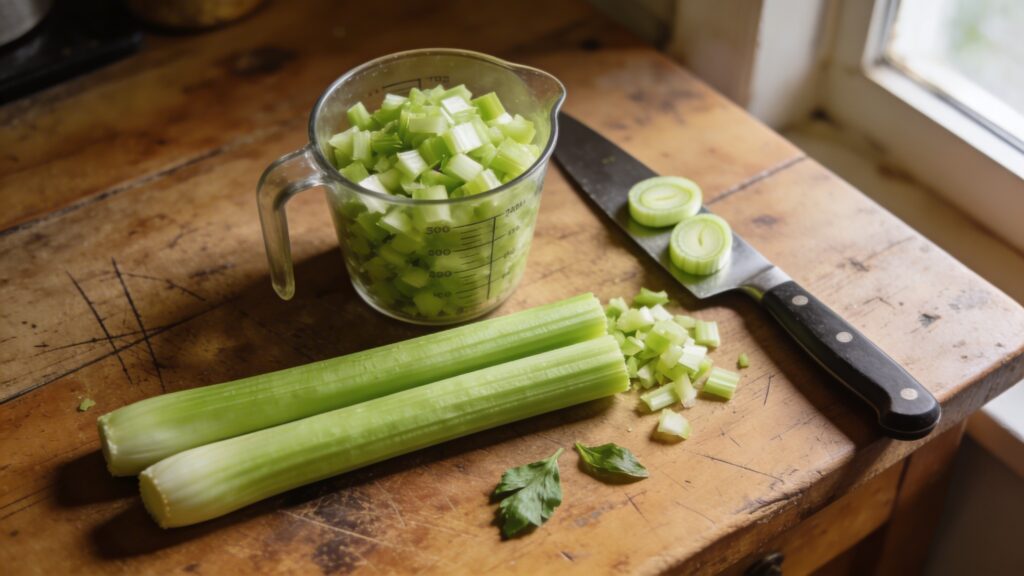
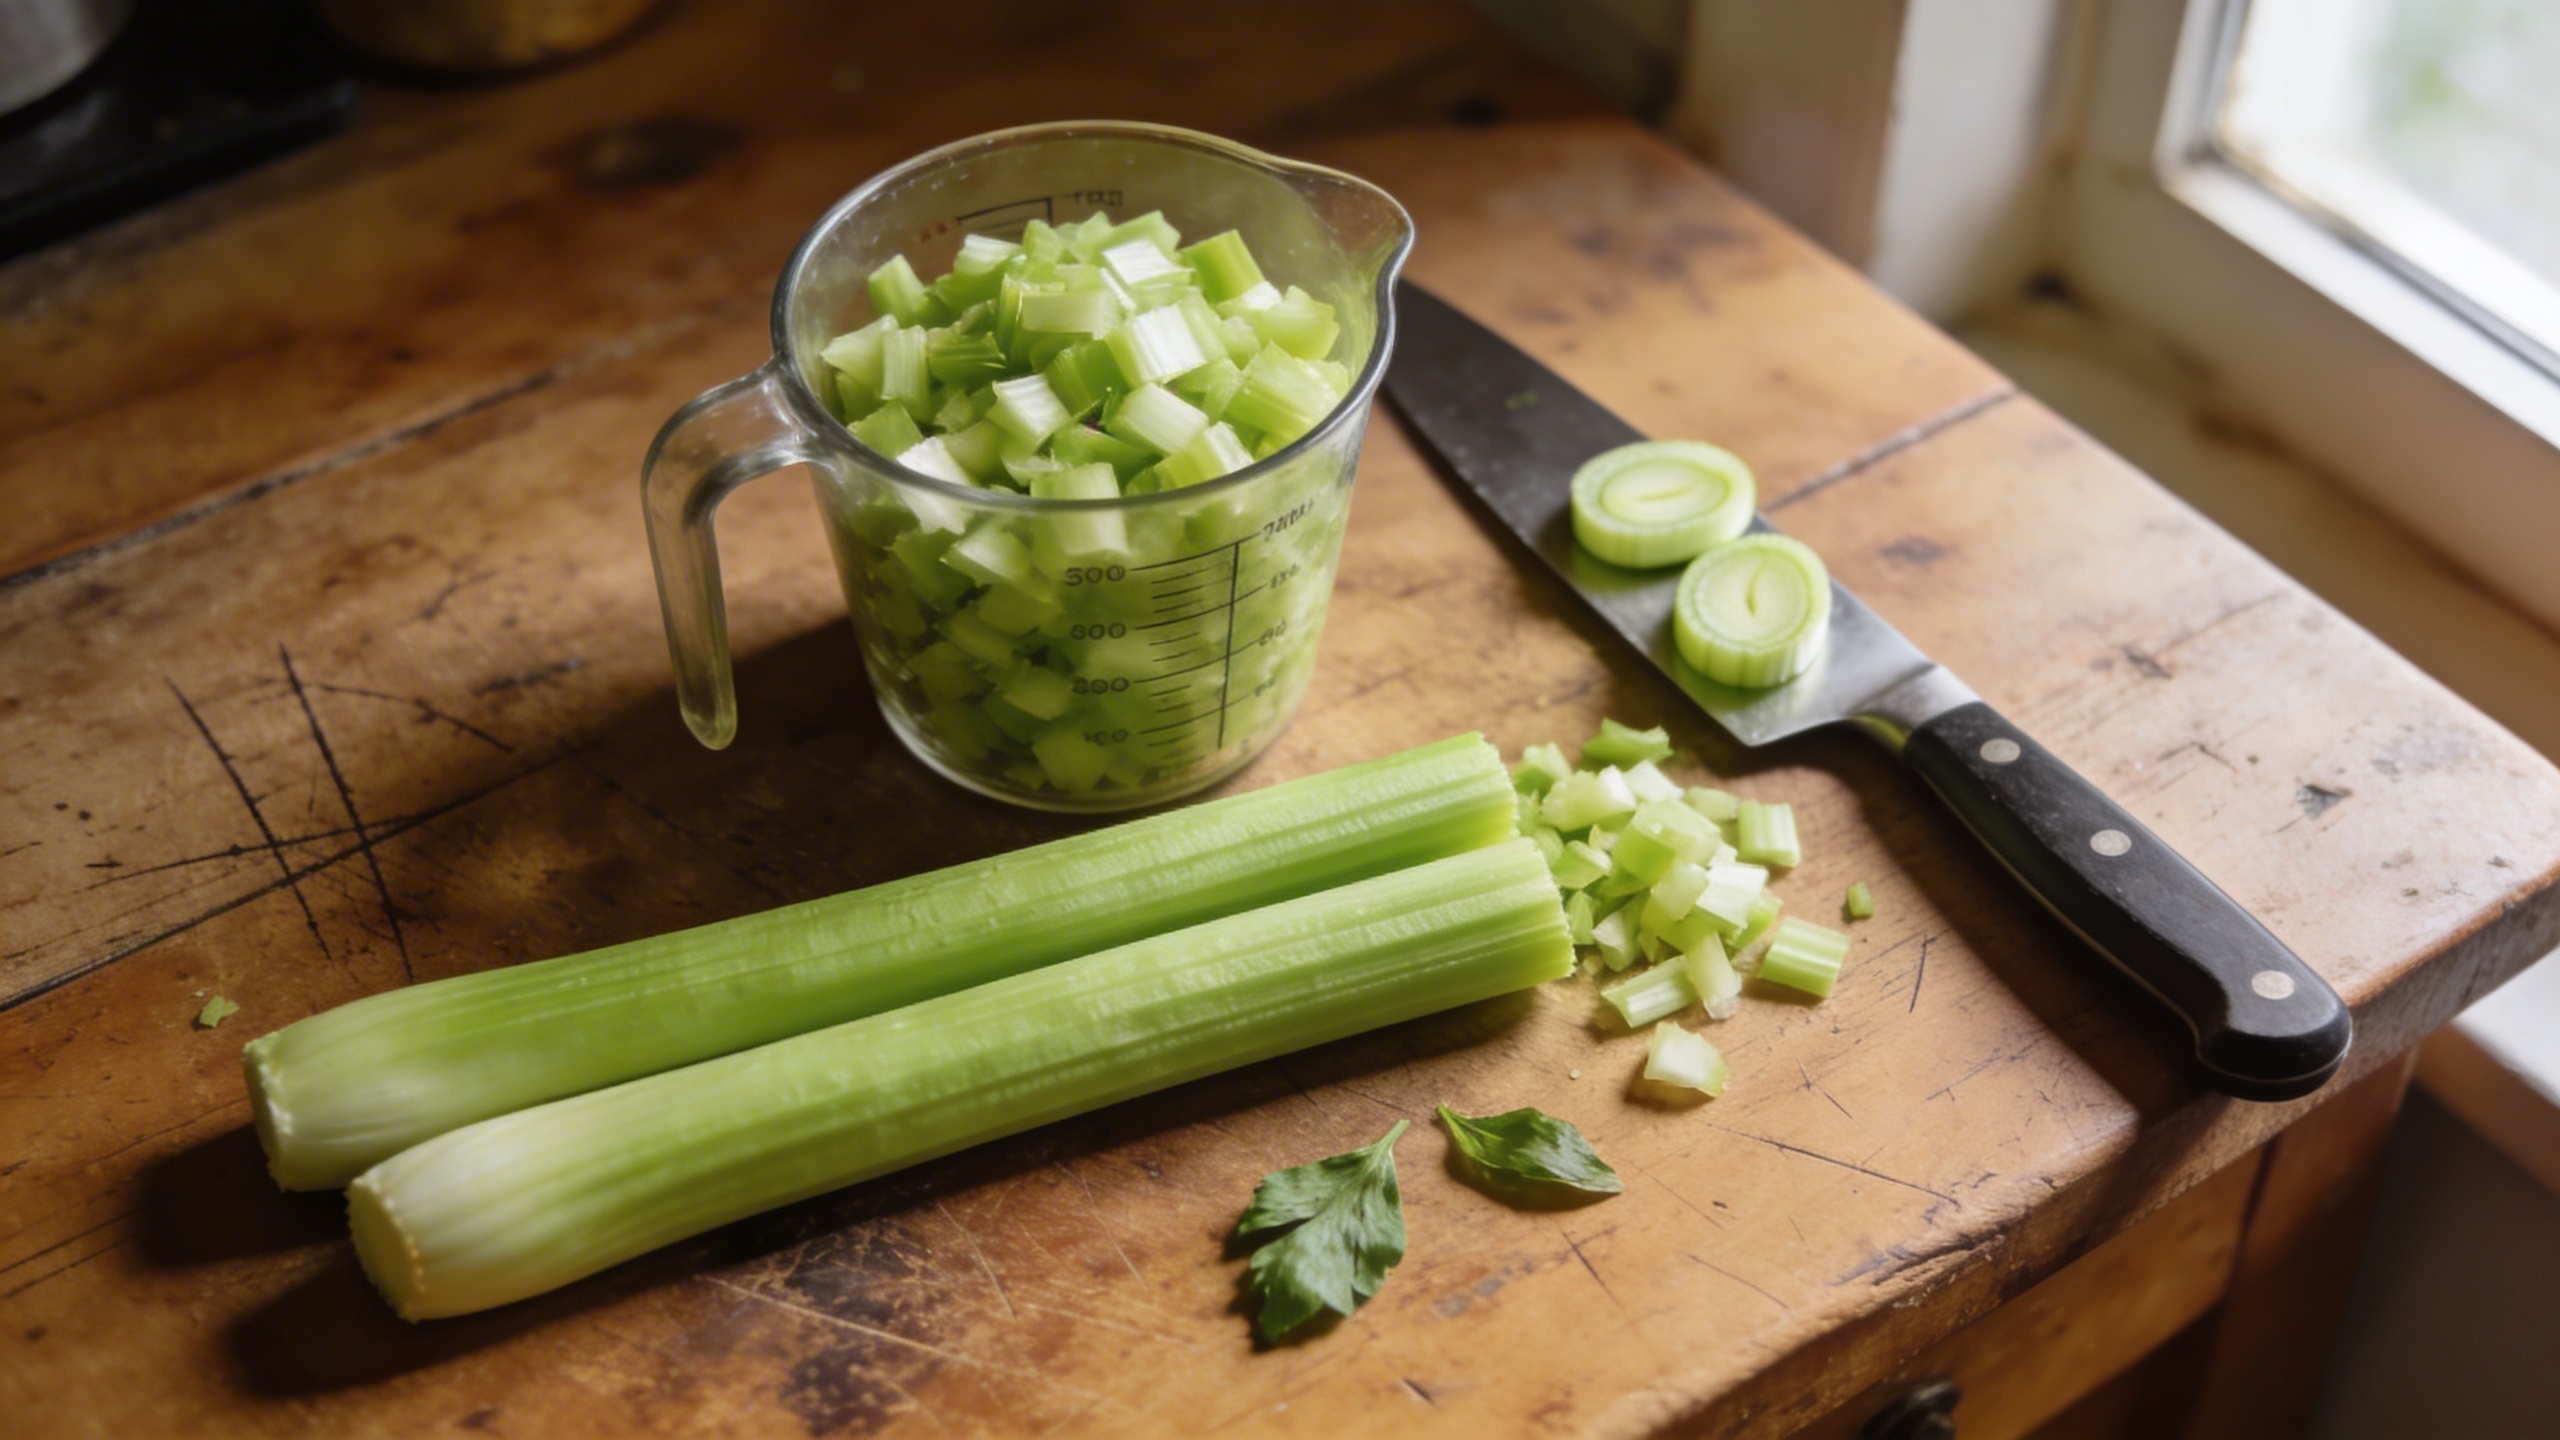
Young stalks harvested at 8 to 10 inches are tender, mild, and work beautifully in fresh applications, sliced into salads, served with dips, or eaten raw. The flavor at this stage is clean and less intense than that of fully mature celery.
Mature stalks harvested at 12 to 18 inches after 80 to 100 days have more developed flavor, firmer texture, and hold up better in cooking, in soups, stews, braises, and stocks where the celery needs to maintain some presence over a long cooking time.
For most home growers, a combination approach produces the best overall yield. Begin harvesting outer stalks early once they reach a usable size, and allow the inner stalks to continue developing toward full maturity.
This continuous outer-stalk harvesting keeps the plant productive for weeks longer than waiting for a single full harvest.
How to Harvest Celery Without Damaging the Plant
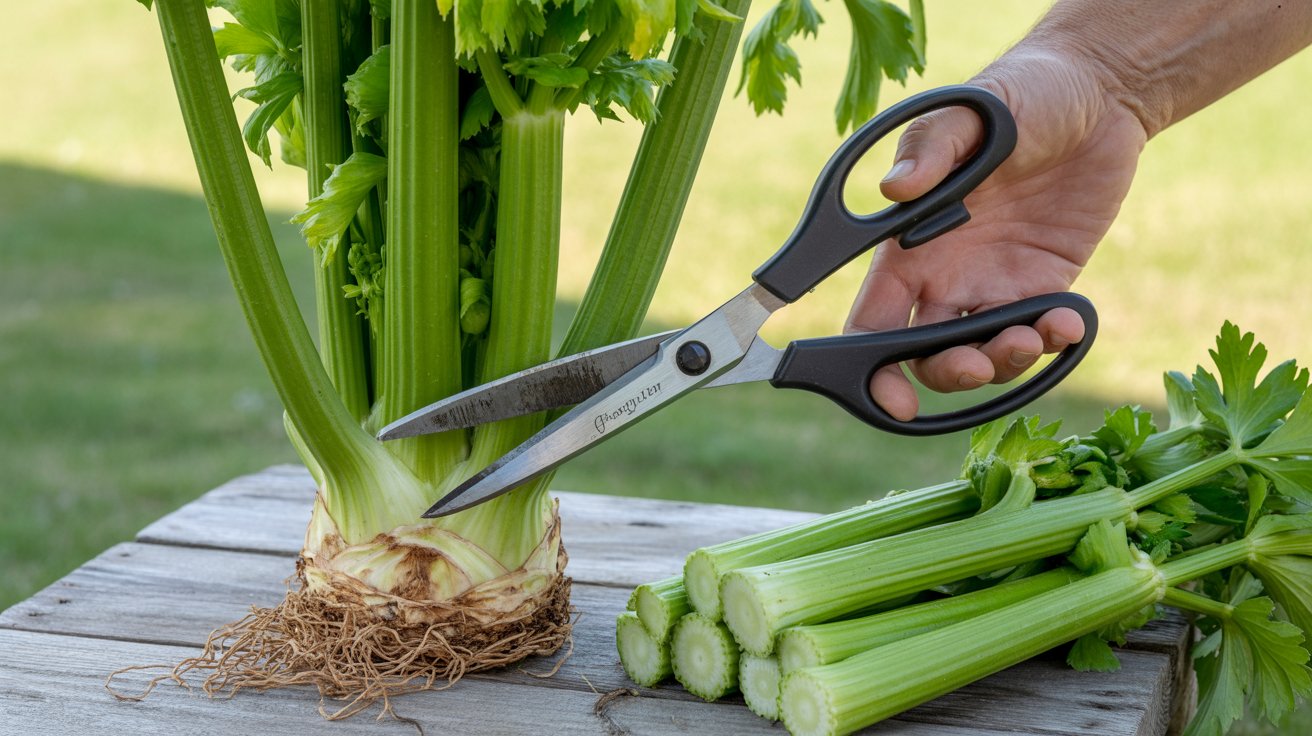
The technique matters here. To harvest outer stalks cleanly:
- Select the outermost stalks that have reached your desired size.
- Using a sharp knife or clean scissors, cut or snap the stalk at its base, as close to the crown as possible without cutting into the crown itself.
- Work from outside in, always leaving the inner, younger stalks to continue developing.
- Remove no more than one-third of the plant in a single harvest session to avoid shocking the plant and slowing regrowth.
The crown, that dense central growing point at the base, is the plant’s regeneration hub. As long as it remains intact and undamaged, the plant continues producing new stalks from the center outward.
Regrowing Celery: Getting More From What You Already Have
How to Regrow Celery From the Crown After Harvest
Once you’ve harvested most of the stalks, the crown at the base of the plant still holds significant growing potential. If you leave it in the container with consistent care, it pushes out new growth from the center.
Smaller and somewhat less vigorous than the first harvest, but genuinely productive.
To encourage crown regrowth:
- After a significant harvest, top-dress the container with a thin layer of fresh compost.
- Apply a dose of balanced liquid fertilizer to replenish nutrients depleted by the first round of production.
- Maintain consistent moisture and continue your regular watering schedule.
- New growth appears from the center within 7 to 14 days under good conditions.
Realistically, a container crown produces one to two regrowth cycles of quality stalks before the plant’s energy and the soil’s nutrition become too depleted to support further production.
By the third cycle, stalks tend to be thin and slow to develop. At that point, it’s worth refreshing the soil and starting a new plant rather than continuing to coax diminishing returns from an exhausted crown.
Regrowing Celery From a Store-Bought Base: Does It Actually Work?
This is one of those gardening ideas that circulates endlessly on social media, usually in a video where a grocery store celery base transforms into a lush plant in what appears to be about 72 hours. The reality is more modest, but it does work, with the right expectations in place.
Here’s what actually happens when you regrow celery from a store-bought base:
The base produces new growth from the center almost immediately when placed in water on a sunny windowsill. Within 5 to 7 days, you’ll see small green shoots emerging from the central leaves.
After 2 to 3 weeks in water, roots develop from the base. At this point, you can transfer it to a container with your prepared soil mix.
What you get: tender, mild inner stalks, useful for cooking, soups, and seasoning. The plant will produce new leaves readily and is especially good as a source of celery leaves if you use them regularly.
What you won’t get: the full-sized, thick outer stalks of a celery plant started from seed. A regrown base prioritizes leaf production and inner stalk regeneration, and it rarely develops the substantial outer stalks that come from a seed-started plant given a full growing season.
I’d use a store-bought base as a functional kitchen herb, a source of fresh celery leaves and small inner stalks for cooking, rather than as a substitute for growing a full plant from seed.
Real Challenges of Growing Celery in Containers (And How to Handle Them)
Bolting: Why Celery Goes to Seed Early and How to Delay It
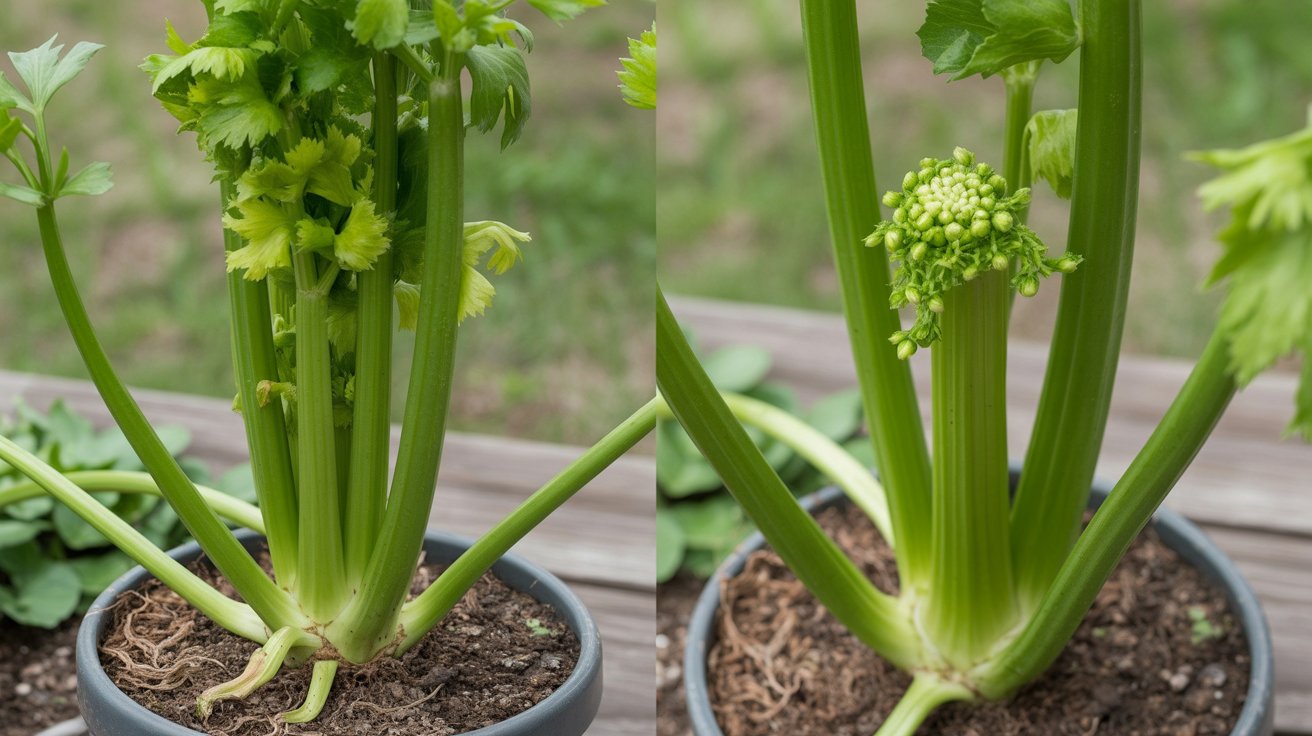
Bolting, where the plant sends up a tall central flower stalk and shifts its energy away from producing edible stalks, is celery’s most frustrating behavior, and it happens for predictable reasons.
Temperature fluctuations are the primary trigger. Celery that experiences extended exposure to temperatures below 55 degrees F for more than 10 consecutive days can interpret this as its first winter and initiate the flowering process it biologically associates with its second year.
Container celery is particularly vulnerable to this because containers lose heat faster than in-ground soil. A cold snap that an in-ground plant can weather comfortably can push a container plant into premature bolting.
How to delay bolting:
- Avoid planting out too early in spring when cold snaps are still possible. Wait until nighttime temperatures stay reliably above 55 degrees F.
- In midsummer, use afternoon shade to keep the plant cool and prevent heat-triggered bolting.
- Choose bolt-resistant varieties like Tango or Golden Pascal if you’re in a climate with unpredictable temperature swings.
- If you see the central stalk beginning to elongate and reach upward, harvest immediately. Once bolting begins, it cannot be reversed, but you can capture the remaining stalks before the plant’s quality deteriorates.
Pests and Diseases to Watch For in Container Celery
Container growing naturally reduces some pest and disease pressure compared to in-ground gardens. You have more control over the environment; you can move the plant, and the isolation from soil-dwelling organisms helps. But a few issues do still appear regularly.
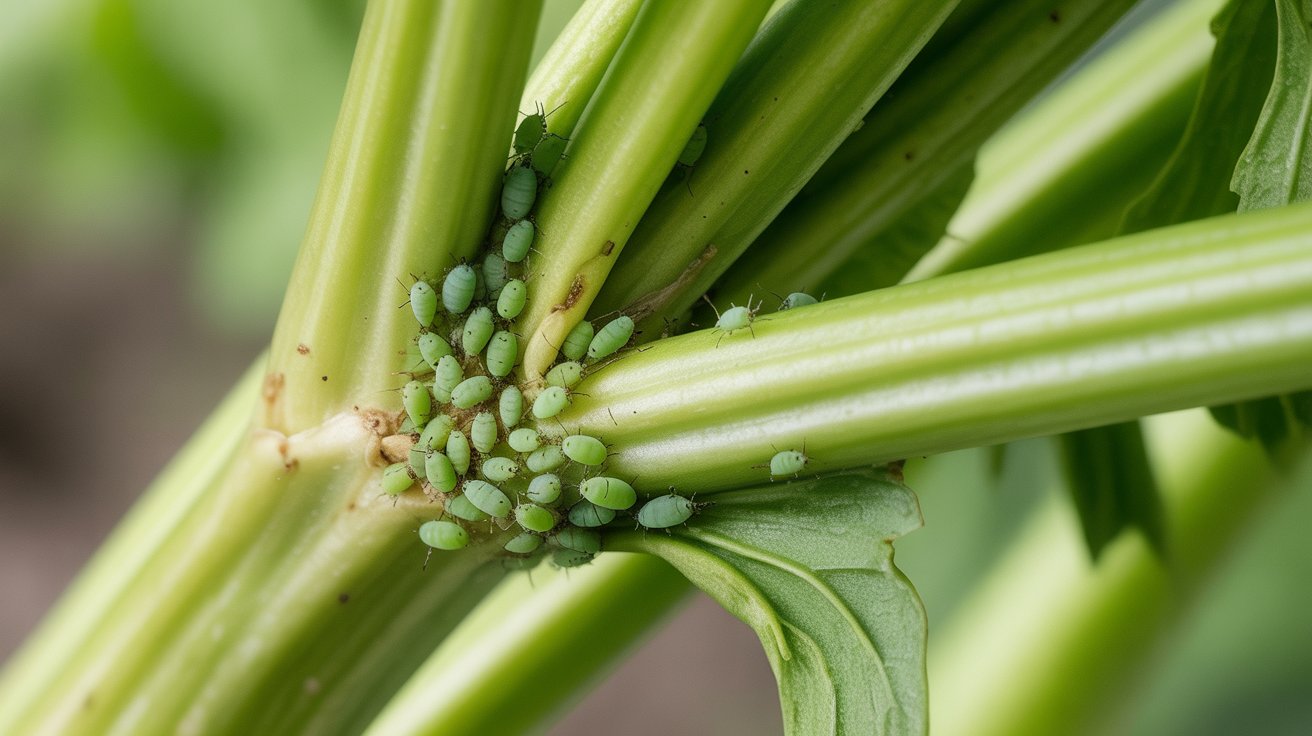
Aphids: The most common pest on container celery. They cluster on the undersides of leaves and the tender growing tips, sapping plant sap and causing curled, distorted growth.
In my experience, container celery on exposed balconies gets hit with aphids earlier in the season than sheltered patio setups, usually because the isolation makes it a more obvious target for flying colonies.
A strong jet of water knocks them off effectively, and neem oil spray applied in the evening handles persistent infestations without harming beneficial insects.
Leaf blight (early and late): Fungal diseases that produce tan or brown spots on leaves. They thrive in conditions of high humidity and poor airflow, exactly what happens when plants are overcrowded or when water sits on leaves overnight.
I’ve found that clients who water overhead in the evenings are the ones who deal with blight most consistently. Proper spacing, morning watering, and good container positioning prevent most blight issues. Copper-based fungicide spray handles active infections.
Root fly: The celery fly (Euleia heraclei) lays eggs near the base of the plant, and the larvae mine through leaves, creating pale, blistering trails. Fine mesh insect netting placed over the container from transplant through the season provides reliable protection.
Once you’ve had a root fly problem in a container, the netting goes on every season without debate.
Dealing With Heat Stress in Summer Container Growing
Container celery in hot climates faces a particular challenge in midsummer. The combination of direct sun, radiant heat from surrounding surfaces like paving and walls, and the relatively small soil volume of a container creates conditions that stress the plant quickly.
Practical ways to manage summer heat in containers:
- Move the container to a location that receives direct morning sun but afternoon shade once temperatures regularly exceed 85 degrees F.
- Double-pot the celery container by placing it inside a larger outer container, with the gap packed with damp moss or bark. This insulates the inner root zone from radiant heat.
- Water in the early morning so the plant enters the hottest part of the day with fully hydrated roots.
- Apply a shade cloth (30 to 40 percent density) over the plant during heat waves. It reduces leaf temperature significantly and slows moisture loss from the foliage.
When to Accept a Failed Plant and Start Over
Some plants don’t make it, and after enough seasons in garden design and management, I’ve genuinely made peace with that reality.
A container celery plant that has bolted fully, developed severe root rot, or been knocked back by repeated pest damage to the point where it has fewer than three or four healthy stalks remaining is worth replacing rather than trying to nurse it back.
The practical path forward: remove the spent plant, refresh the container soil, either with new potting mix or by mixing in fresh compost at a 50 percent ratio, and start a new plant.
If you started your seeds in staggered batches, which I’d recommend if you want a longer harvest window, a replacement plant slots right into the rotation.
Olivia’s Container Celery Setup: What I’d Actually Do in a Small Space
People sometimes ask me what I’d plant if I had only a 6-by-6-foot patio space and wanted fresh vegetables through the season. Celery is always on that list, and the way I’d set it up looks something like this.
My container choice: A 16-inch diameter self-watering container in a warm-toned terracotta-look resin. The visual warmth of terracotta without the moisture-management headache. In that container, I planted three Utah 52 plants, spaced evenly, started from seed 10 weeks before my last frost date.
My soil blend: Half commercial potting mix with compost incorporated, a generous scoop of additional mature compost, perlite for drainage, and coconut coir for moisture retention. Mixed thoroughly before filling the container about 85 percent full, leaving room for a mulch layer on top.
My positioning: East-facing, where it gets strong morning light from about 7 am to 1 pm and is shaded by a nearby trellis structure after that. In spring, I move it to a sunnier position on the south-facing side. Once summer heats up, it comes back east.
My watering approach: The self-watering reservoir handles most of the work. I top it up every 2 to 3 days in spring and every day in summer. I also hand-water overhead very lightly on hot afternoons if the leaves look like they’re under stress. This cools the foliage quickly, and they recover within an hour.
My feeding schedule: Fish emulsion every two weeks from transplant, alternating with a balanced kelp and seaweed blend. I top-dress with a thin layer of compost at the six-week mark to reinforce the soil’s organic matter.
My harvest approach: I start pulling outer stalks as soon as they reach 8 inches, using them in cooking throughout the season. I leave the inner stalks to develop fully and harvest the main crop around day 85 to 90. I keep the crowns in the container and get one regrowth cycle from them before refreshing the soil for a fall planting.
The entire setup takes me about 15 minutes a week to maintain once established. It’s not a dramatic undertaking. It’s just a plant that rewards consistency and punishes neglect. And in my experience, once people have their first successful container celery harvest, they make room for it every season after that without question.
Closing Thoughts
Growing celery in containers is one of those things that looks intimidating from the outside and becomes genuinely straightforward once you understand what the plant actually needs.
The long growing season, the moisture demands, and the specific soil requirements. None of these are obstacles once you’ve set up the right container, the right soil, and the right watering system.
The decisions that matter most: get a container deep and wide enough, build a soil mix that holds moisture while draining well, water consistently (a self-watering container makes this much easier), and start your seeds early enough to have a full growing window.
Those four things account for the majority of container celery successes and failures.
Everything else, blanching, variety selection, fertilizing, regrowth, these are the refinements that come with experience and make the results better each season. You don’t need to get all of them perfect the first time. You just need to start.
Once you’ve harvested your first batch, you’ll naturally want to understand the full picture of this vegetable: what different cuts look like, how the anatomy of the stalk affects flavor, and how to get the most out of every part of the plant in the kitchen.