Every spring, I see the same thing in gardens I visit for consultations. Someone laid a beautiful layer of mulch the previous year, and by the time we meet again, it has either thinned into a patchy mess or compacted into a crust that is actively working against the garden.
The question is always the same one you are probably asking right now.
So, how long does mulch last?
Organic mulches like wood chips and bark last 1 to 3 years. Straw lasts 6 to 12 months. Compost breaks down in 3 to 6 months. Inorganic mulches like gravel and rubber can last a decade or longer.
The reason I keep coming back to mulch in nearly every garden plan I develop is that lifespan is only half the story. Understanding why mulch breaks down at the pace it does, and how to make every application work smarter, changes how you garden entirely.
Let me walk you through everything I have figured out over years of trial, error, and a fair amount of muddy boots.
Why Mulch Lifespan Matters More Than Most People Realise
Most gardeners treat mulch as a cosmetic finish. They lay it and then forget about it until things start looking bare. I did the same thing in my early years, and it cost clients unnecessary re-mulching bills.
Mulch serves several functions at once. It regulates soil temperature, retains moisture, suppresses weeds, and, for organic types, actively feeds your soil biology as it decomposes.
When mulch degrades below roughly 1 to 2 inches of remaining depth, all of those benefits begin to disappear quietly. Your plants may look fine while the soil underneath heats up faster, dries out more quickly, and loses the biological activity that keeps it healthy.
Understanding lifespan helps you plan. And planning is what turns a maintenance-heavy garden into one that practically manages itself through the season.
How Long Each Type of Mulch Actually Lasts
I have worked with almost every mulch material available across dozens of residential projects. The numbers below come from both published horticultural research and what I have consistently observed on the ground.
Organic Mulches
| Mulch Type | Average Lifespan | Best Use Case |
|---|---|---|
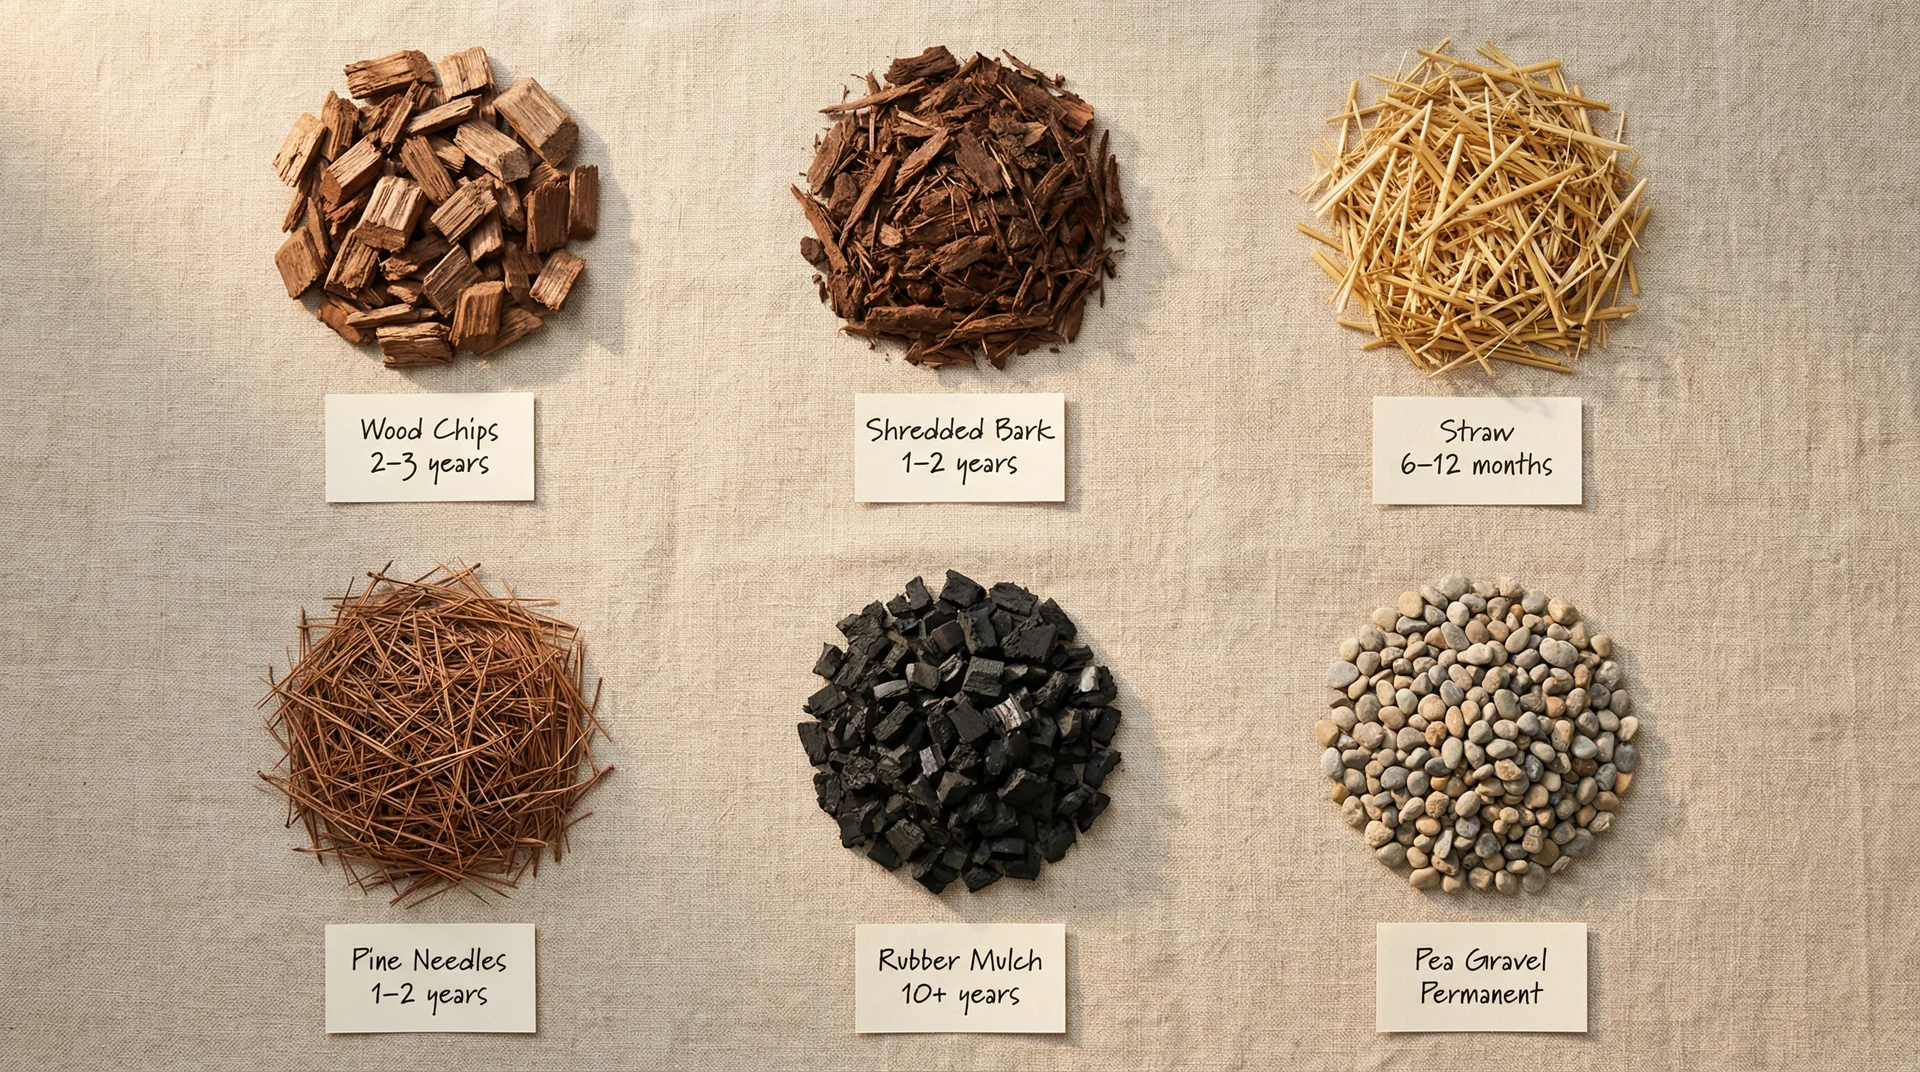
| Wood Chips | 2 to 3 years | Trees, shrubs, perennial beds |
| Shredded Bark | 1 to 2 years | Ornamental beds, pathways |
| Pine Needles | 1 to 2 years | Acid-loving plants like blueberries and azaleas |
| Straw | 6 to 12 months | Vegetable gardens, winter protection |
| Leaf Mold | 6 to 12 months | Under shrubs, woodland beds |
| Compost | 3 to 6 months | Soil enrichment, planting season prep |
| Grass Clippings | 4 to 8 weeks | Quick moisture retention between tasks |
A note on wood chips specifically: Freshly chipped arborist wood breaks down faster in the first year than kiln-dried bagged bark. Fresh chips carry more moisture and expose more surface area to microbial activity. After that initial flush of decomposition, the coarser remaining pieces hold on reliably for another year or two.
Inorganic Mulches
| Mulch Type | Average Lifespan | Best Use Case |
|---|---|---|
| Gravel or River Stone | Effectively permanent | Xeriscaping, Mediterranean gardens |
| Lava Rock | Effectively permanent | Desert gardens, drainage-focused beds |
| Rubber Mulch | 10 or more years | Play areas, low-maintenance utility zones |
| Landscape Fabric | 5 to 10 years | Under stone mulch, commercial borders |
| Plastic Film Mulch | One growing season | Vegetable rows, strawberry beds |
Rubber mulch lasts a very long time and suppresses weeds effectively.
However, it retains heat intensely in summer (which can stress shallow-rooted plants), contributes nothing to soil health, and carries a meaningful environmental footprint.
I recommend it specifically for play areas and utility zones, and I am upfront with clients about those trade-offs.
How Long Does Dyed Mulch Last?
This comes up constantly, so it deserves its own answer. Dyed mulches, including popular black, red, and brown bagged varieties, last roughly the same physical duration as their undyed equivalents.
What changes first is the colour, which typically fades within 1 to 2 months of UV exposure. The wood material underneath continues to decompose on its natural timeline, usually 1 to 2 years for shredded dyed bark.
If colour consistency matters for your garden’s appearance, dyed mulch will need a cosmetic refresh before it actually needs a functional one.
Many homeowners end up replacing it earlier than necessary purely for aesthetic reasons, which adds unnecessary cost. A thin top-up application of fresh dyed mulch over still-functional existing material solves this without waste.
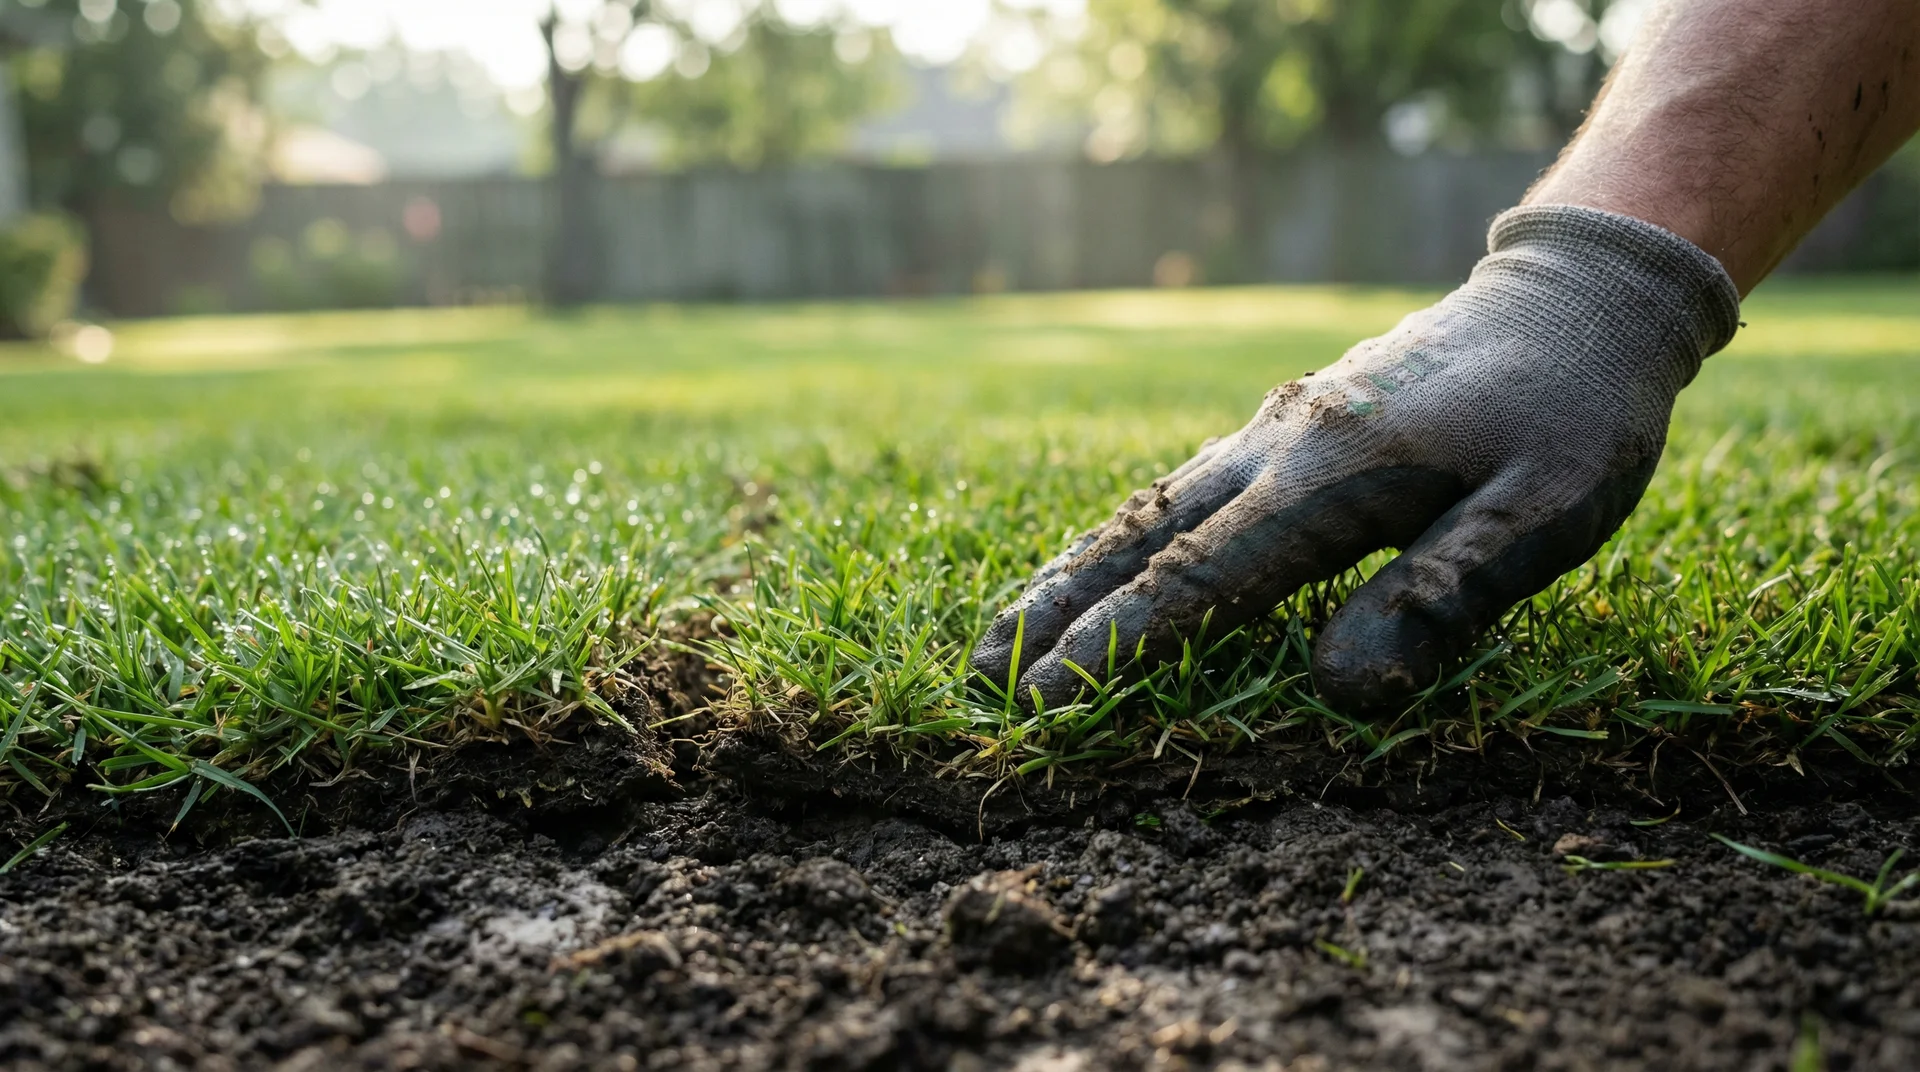
Does Old Mulch Turn Into Soil?
Yes, and this is something I want you to genuinely understand because it reframes how you think about mulch breaking down.
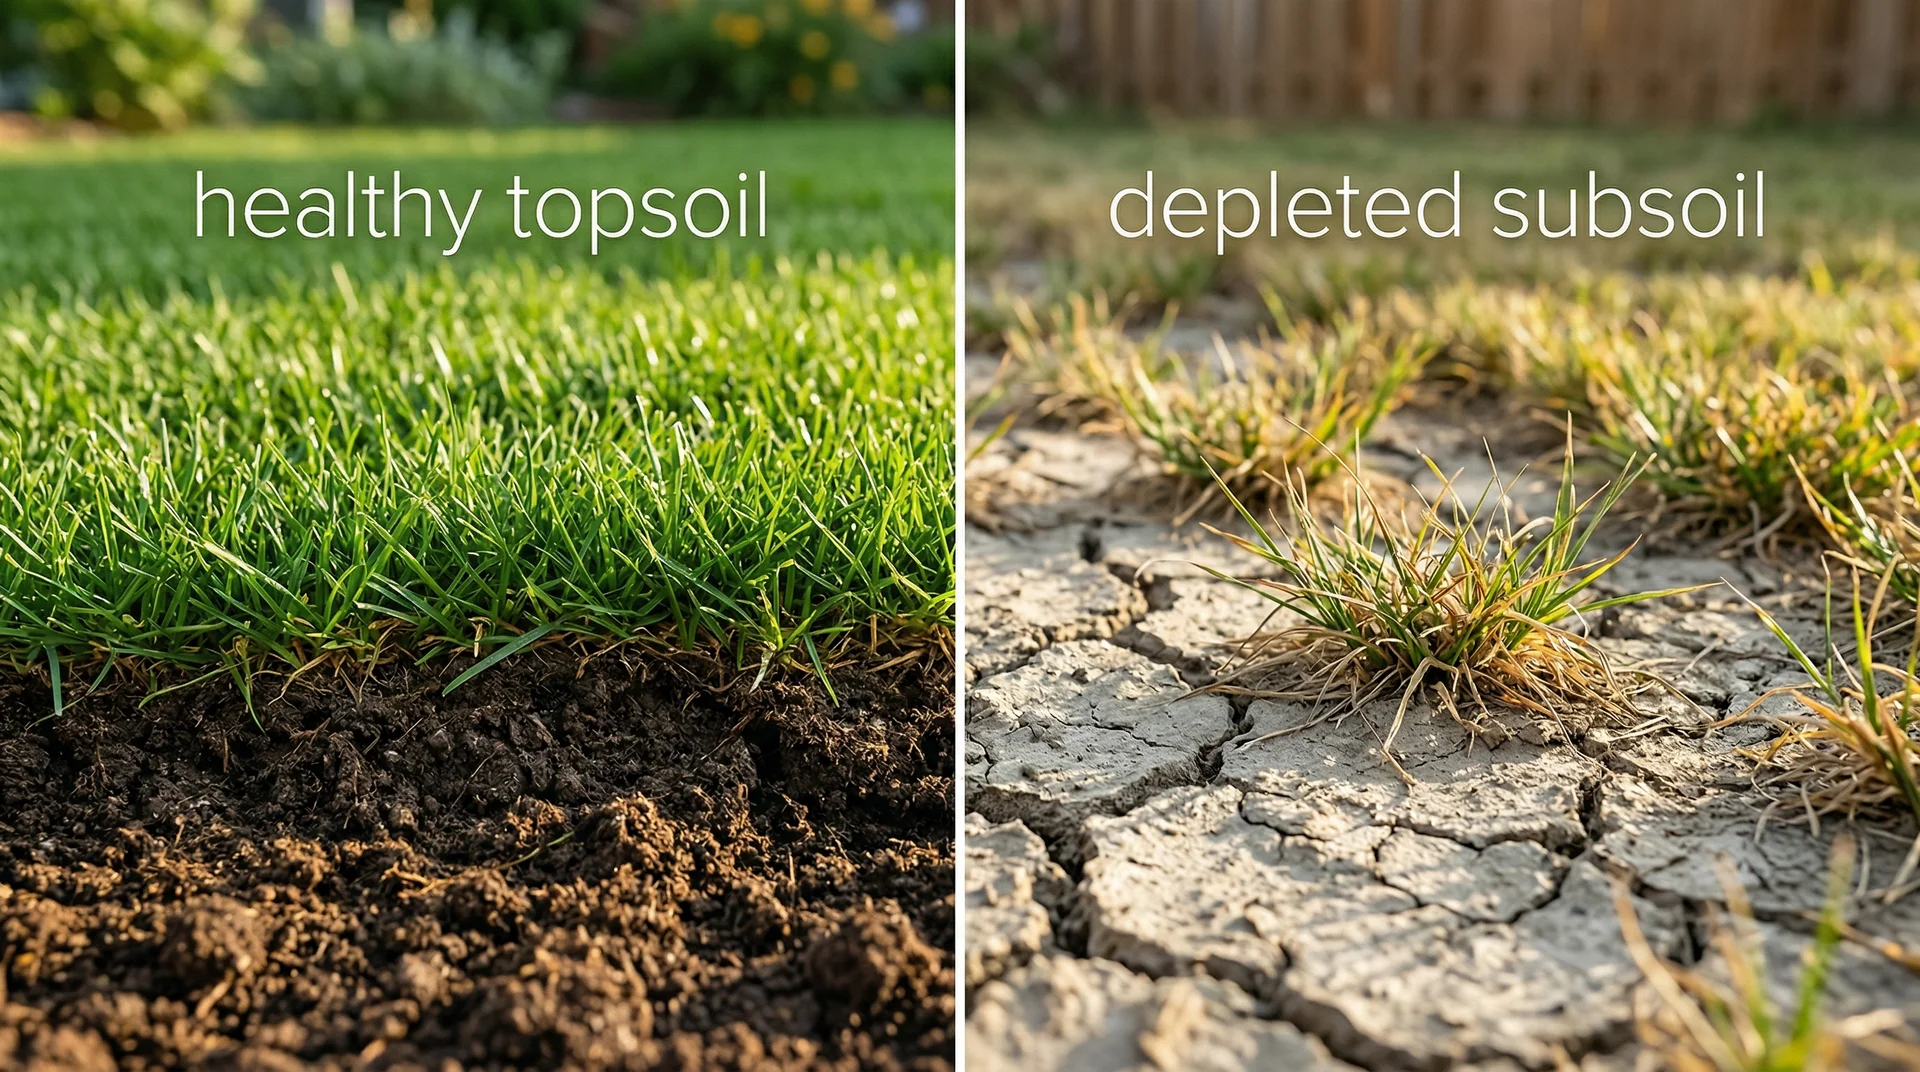
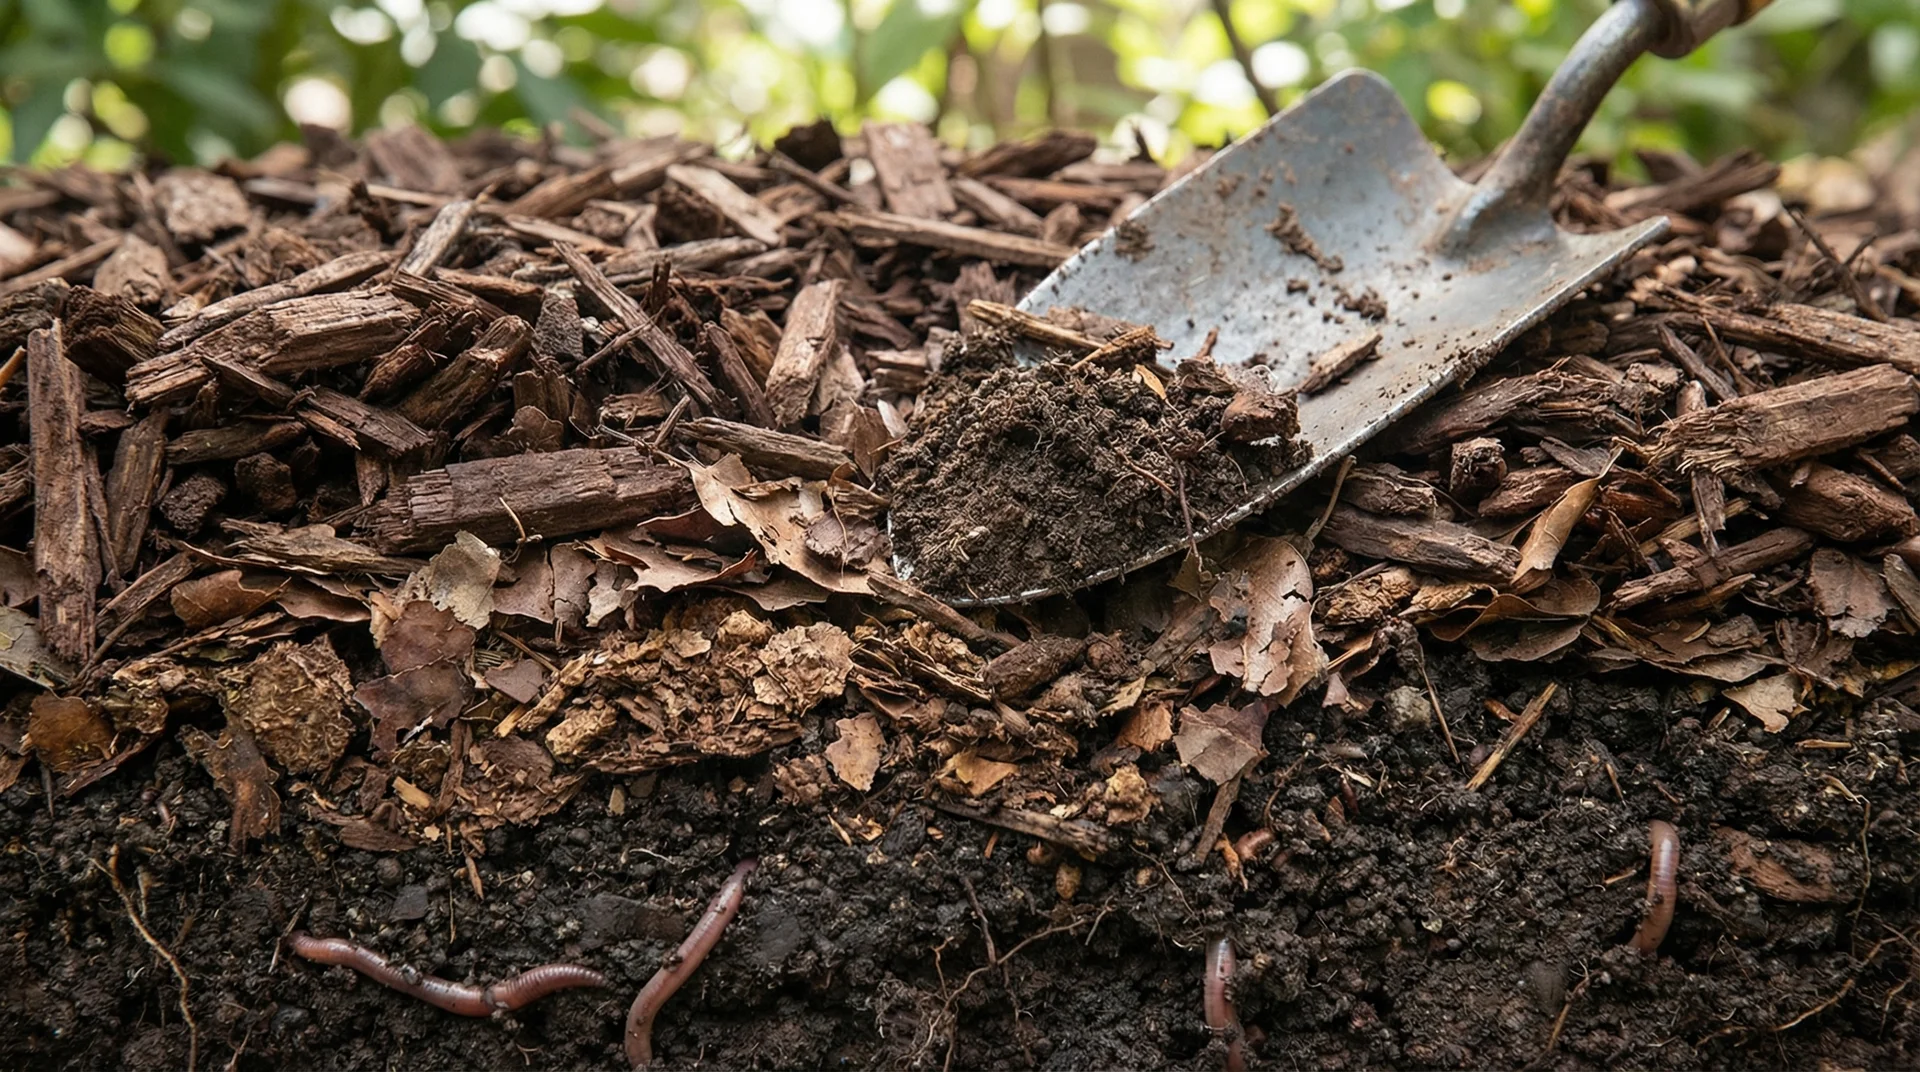
When organic mulch decomposes, it does not disappear. It transforms into a dark, fine organic matter that integrates into the top layer of your soil.
This process feeds the soil biology, adds organic carbon to the root zone, and gradually improves the structure and water-holding capacity of the soil beneath.
Soils under continuous organic mulch cover consistently develop richer microbial communities, better water infiltration, and improved aggregate structure compared to bare or inorganically mulched soils.
I have worked on gardens where the previous owners maintained wood chip mulch for over a decade without any additional soil amendment, and the soil quality in those beds is outstanding when I dig into it.
When you see your mulch thinning, your garden is eating well and needs a refill.
Think of it that way, and the whole maintenance rhythm becomes a lot easier to stay consistent with.
The Real Reasons Your Mulch Disappears Faster Than Expected
When clients tell me their mulch only lasted a few months, one of a handful of things has almost always gone wrong.
The Depth Was Too Shallow From the Start
This is the most common issue I see. A 1-inch layer of wood chips will essentially vanish within a season under moderate rainfall, foot traffic, and microbial activity.
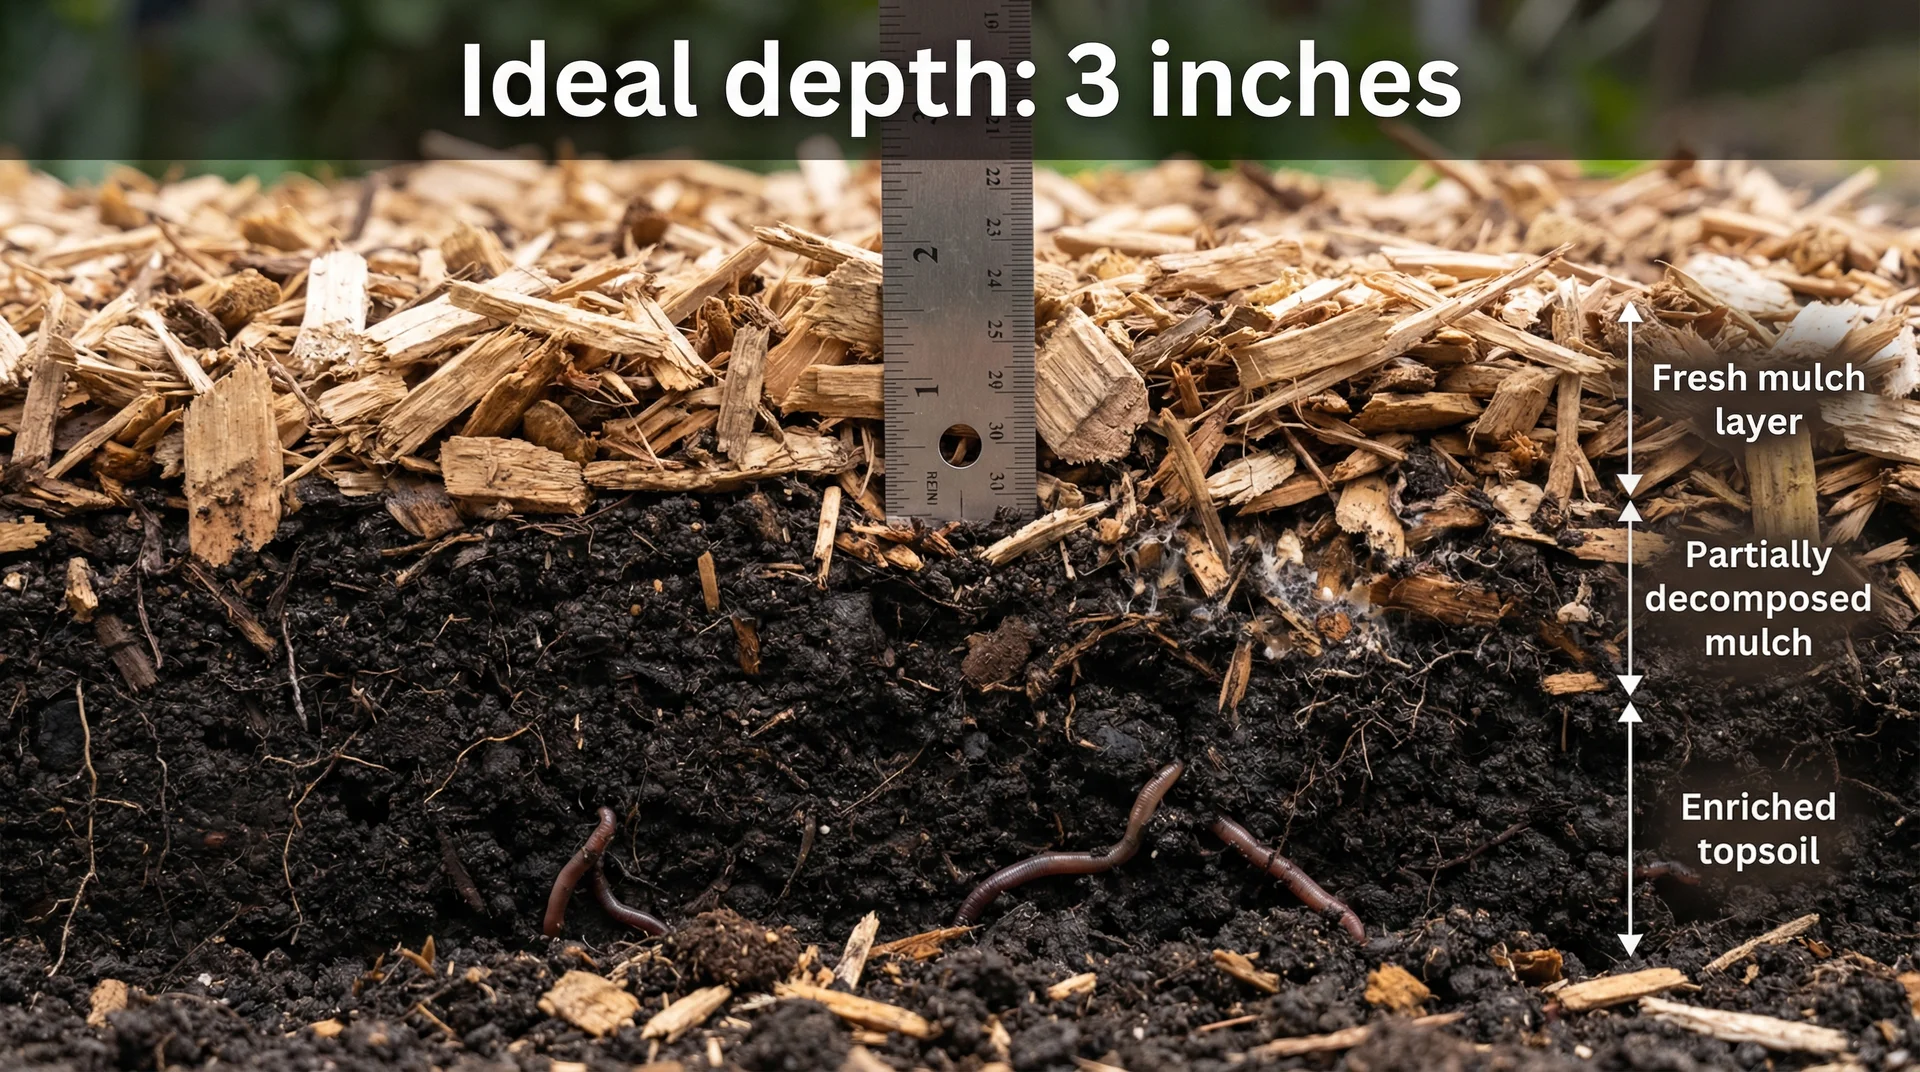
The functional minimum for most organic mulches is 2 inches, and 3 inches is where you genuinely start to see the benefits stack over time.
When I plan a new installation, I specify 3 inches in the initial application to give the mulch room to compress and still maintain effective coverage through the season.
Your Climate Is Accelerating Decomposition
Warm, humid climates break down organic mulch noticeably faster than cooler, drier ones. The microbial and fungal communities that drive decomposition thrive in heat and moisture.
Gardeners in the southeastern United States or coastal regions with mild, wet winters will see bark mulch disappear a full year faster than someone gardening in a drier northern climate.
If you live in a hot, humid region and your mulch seems to vanish quickly, you are gardening in conditions that are highly productive for soil biology, which is genuinely a positive sign.
Mulch Piled Against Plant Stems Creates Problems
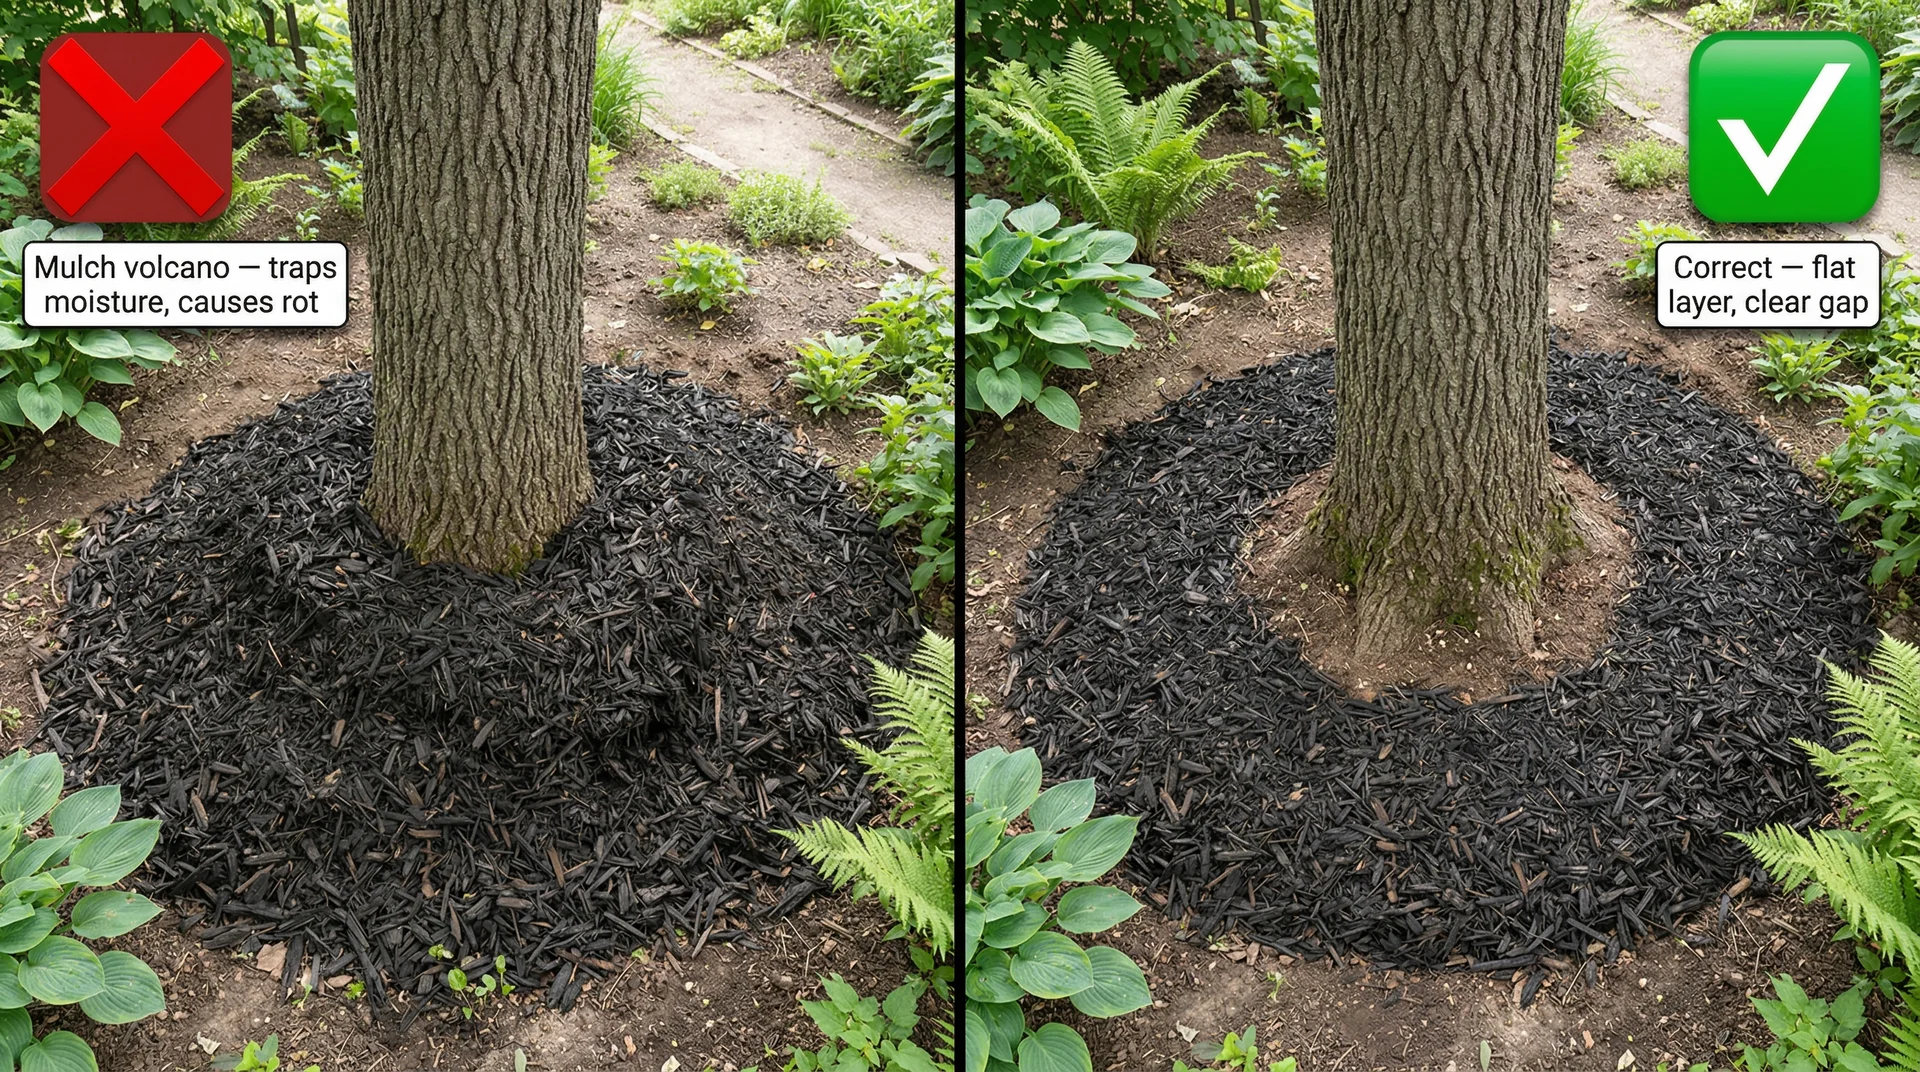
Mulch piled in a thick mound directly against tree trunks, sometimes called “mulch volcanism” by arborists, traps moisture against the bark and creates conditions for rot and fungal disease.
It also wastes material because the dense pile decomposes unevenly. Keep mulch pulled back at least 2 to 3 inches from trunks and stems, spread in a flat, even layer instead.
How Much Mulch Do You Actually Need?
To cover a garden bed at a 3-inch depth, use this simple guide:
| Coverage Area | Bags Needed (2 cubic feet per bag) | Bulk Cubic Yards Needed |
|---|---|---|
| 50 sq ft | 8 bags | 0.5 cu yd |
| 100 sq ft | 17 bags | 1 cu yd |
| 200 sq ft | 34 bags | 2 cu yd |
| 500 sq ft | 84 bags | 5 cu yd |
The formula, if you want to calculate your own:

For a top-up application over existing mulch that still has 1 inch remaining, calculate for a 2-inch depth rather than 3 inches. This keeps you from overapplying and wasting material.
One practical tip: ordering in bulk by the cubic yard rather than buying bagged mulch becomes cost-effective at around 3 cubic yards or more. The price per cubic yard from a local supplier typically runs 30 to 60 percent lower than the equivalent volume in bagged product.
Mulch Near Your House: What You Actually Need to Know
Clients ask me about this regularly, and it deserves a clear answer rather than a vague caution.
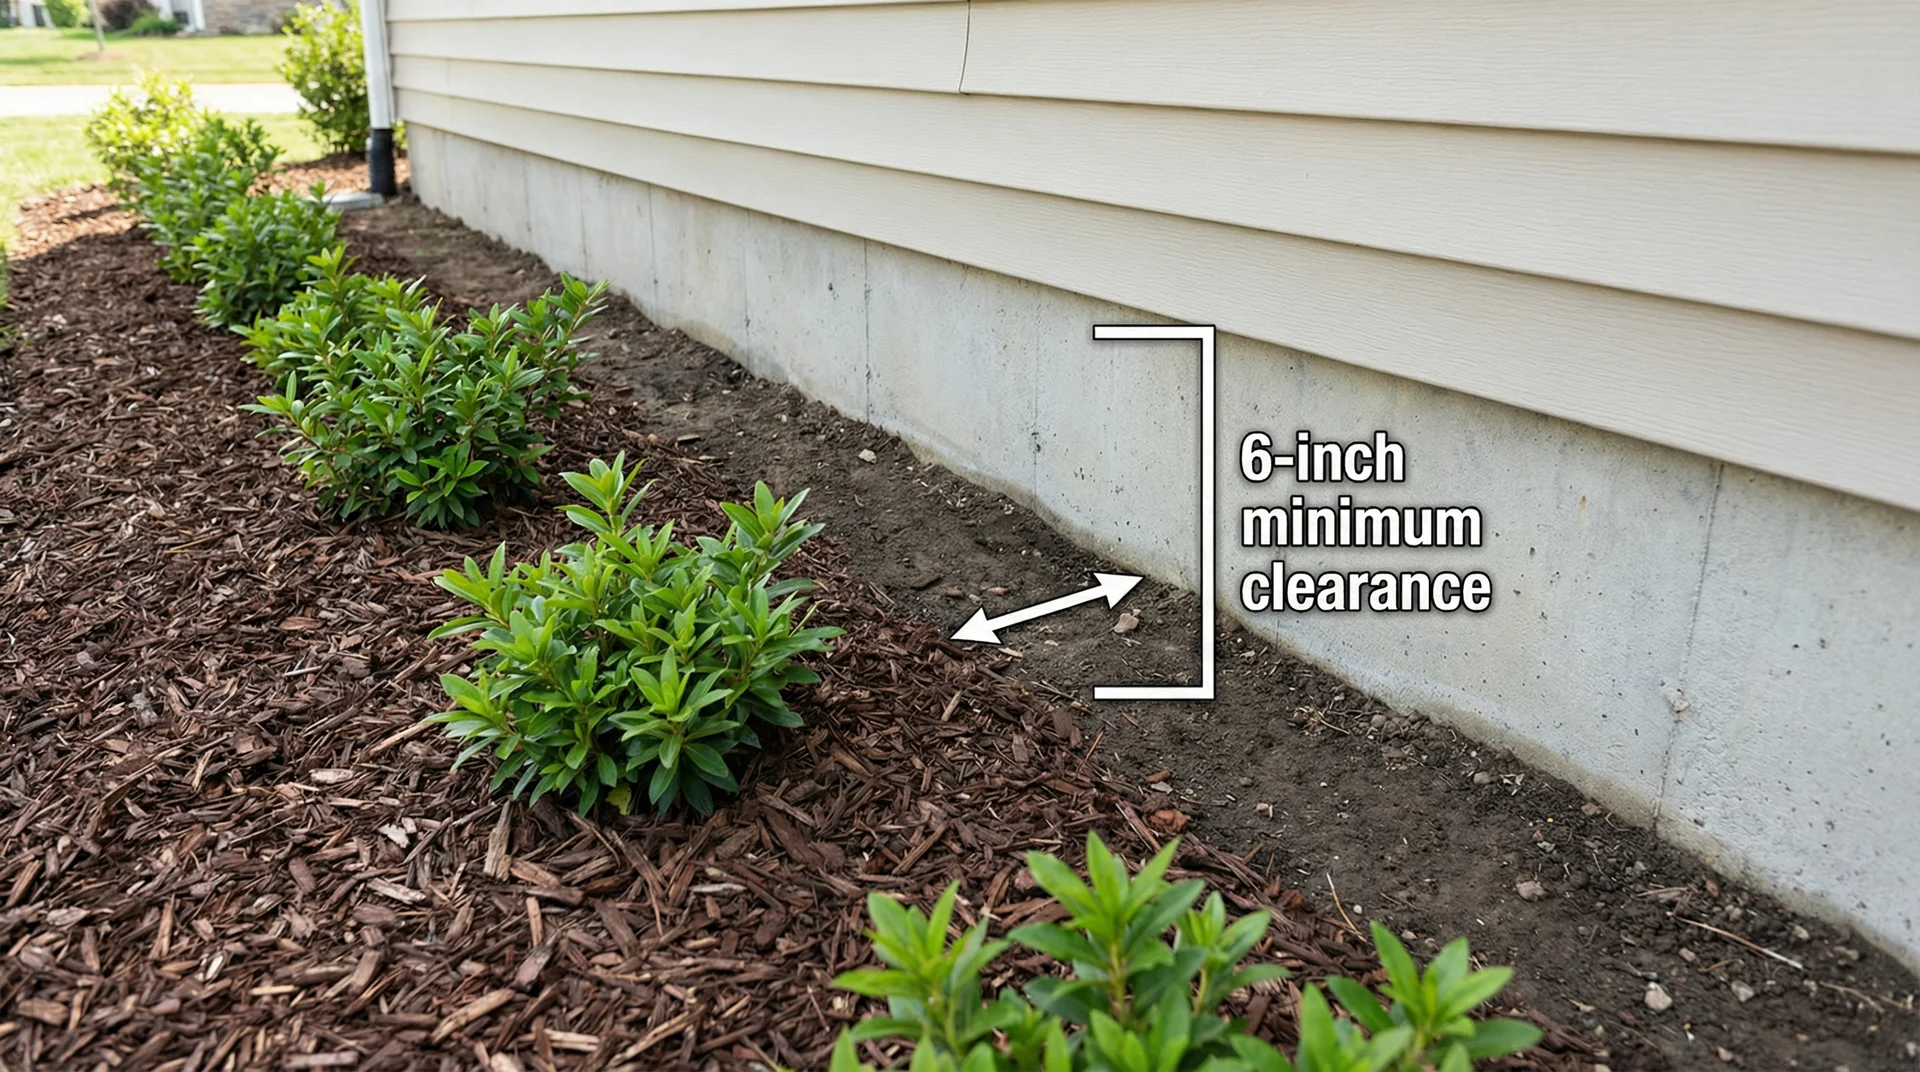
Mulch near your foundation is generally fine with one important condition. Keep organic mulch at least 6 inches away from your home’s foundation wall.
Mulch right against the foundation retains moisture against the structure, can degrade siding over time, and creates conditions that termites, carpenter ants, and other wood-boring insects can exploit if they are already present in the area.
This does not mean you should avoid mulching near your house. A well-maintained mulch bed along a foundation planting looks intentional, reduces water splash-back onto siding during rain, and keeps the soil conditions healthy for plants. Just maintain that gap between the mulch and the wall consistently.
If you are in a region with high termite pressure, I would lean toward using a gravel border in the immediate 6 to 12 inches adjacent to the foundation, then transitioning to organic mulch further out in the bed.
Does Mulch Attract Pests?
This concern comes up in almost every consultation I do for new homeowners, so let me address it straightforwardly.
Mulch does not create pests. It can, however, provide habitat for pests that are already present in your environment.
- Termites: Organic mulch near a foundation can give existing termite colonies easier access to your home. The gap rule I described above addresses most of this risk.
- Mosquitoes: Mulch that stays consistently wet can hold moisture long enough to become a breeding habitat. Well-applied mulch at 2 to 3 inches deep in a bed with good drainage does not typically create a standing-water problem. Overly thick or compacted mulch in a low-lying area can.
- Slugs and snails: These do use mulch as daytime shelter. If slugs are already a problem in your garden, straw mulch creates less ideal hiding conditions than dense bark.
- Beneficial insects and earthworms: These thrive under organic mulch. This is a feature, not a concern. The worm activity alone is worth the presence of the mulch layer.
A healthy, appropriately applied mulch layer supports far more beneficial garden life than it attracts harmful pests.
How to Make Your Mulch Last Longer
Layer Cardboard Underneath Before You Mulch
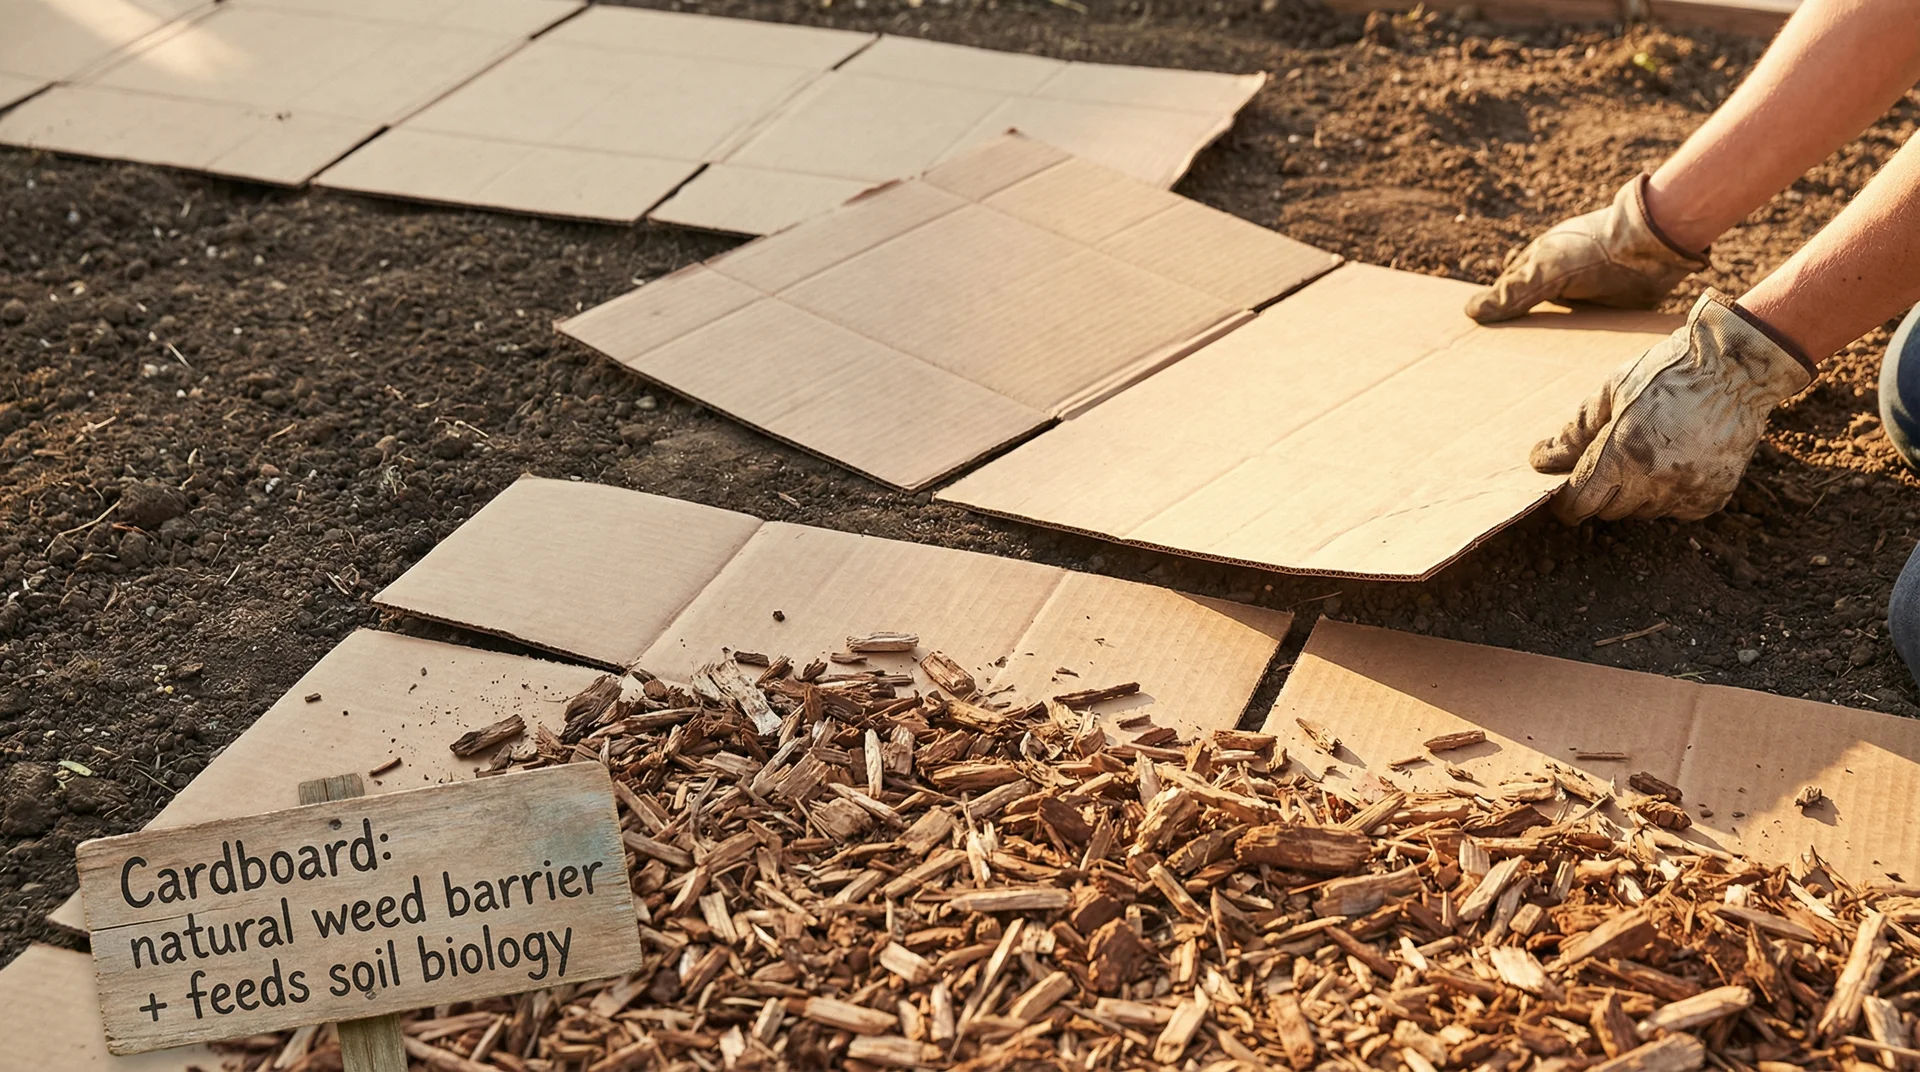
Before applying fresh mulch to a bed, lay down overlapping sheets of plain cardboard directly on the soil. Cardboard acts as a physical weed barrier, slows moisture evaporation, and feeds soil biology as it breaks down over 6 to 12 months.
When refreshing an existing bed, pull back the old mulch, lay the cardboard, and spread the existing material back over it, along with any fresh additions. This extends the functional life of everything in the layer.
Fluff the Surface Before Adding More
Organic mulch compacts over time, and the surface can crust over, especially in high-rainfall areas.
That crust repels water rather than absorbing it, which defeats the purpose. Use a rake to loosen and aerate the existing material before adding fresh mulch each season.
You often find the bottom inch or two is still solid and intact, and simply aerating the top adds months of performance to what is already there.
Use Edging to Contain the Material
Mulch migrates through rain, foot traffic, and wind. Installing a clean bed edge, whether a metal strip, a stone border, or a cut soil edge, keeps your mulch working where you placed it.
On sloped beds, especially, this makes a substantial difference to how long a single application lasts.
Time Your Applications Strategically
The two best application windows are early spring, before weed seeds germinate and the soil heats up, and late autumn, after perennials have died back and before the ground freezes.
Spring application locks in early soil moisture and suppresses the first wave of weeds. Autumn application insulates root systems through winter and gives the mulch a full season to begin its decomposition cycle before summer heat accelerates it.
When to Replenish Your Mulch: The Signs I Look For
Rather than a rigid calendar schedule, here are the physical cues I assess when evaluating whether a garden needs fresh mulch.
Top up your mulch when you notice:
- The layer has thinned to less than 1 inch across most of the bed
- Bare soil is visible between plants in multiple areas
- Weed germination has increased significantly in a previously clean bed
- The soil surface feels hot and dry to the touch, even a day after rain
- The existing mulch has compacted into a hard layer that water runs off rather than soaks through
You do not need to replace the whole layer when:
- The existing mulch still covers the soil consistently at 1.5 inches or more
- It breaks apart easily when pressed into
- Weed pressure remains manageable
Stripping out perfectly functional mulch every spring and replacing it from scratch is one of the most common and unnecessary expenses I see homeowners make. Topping up is almost always the right call.
It saves money, reduces labour, and continues building the organic matter layer that makes soil progressively healthier year over year.
Cost Comparison: Which Mulch Gives You the Best Value Over Time
A question I get asked regularly, especially when clients are deciding between organic and inorganic options, is what the actual long-term cost looks like.
| Mulch Type | Approximate Cost | Lifespan | Estimated Cost Per Year |
|---|---|---|---|
| Bagged Shredded Bark (per 100 sq ft) | $25 to $40 | 1 to 2 years | $15 to $25 |
| Bulk Wood Chips (per 100 sq ft) | $10 to $20 | 2 to 3 years | $5 to $10 |
| Straw (per 100 sq ft) | $10 to $15 | 6 to 12 months | $10 to $20 |
| Rubber Mulch (per 100 sq ft) | $80 to $120 | 10 or more years | $8 to $12 |
| Pea Gravel (per 100 sq ft) | $50 to $90 | Permanent | $5 to $9 amortised |
| Arborist Chips (often free) | $0 to $20 delivery | 2 to 3 years | Less than $5 |
Arborist chips remain the best value available for most planted beds. Many tree services will drop off a load for free or a small delivery fee because it saves them disposal costs. The material is fresh, coarse, and excellent for soil biology.
I have directed dozens of clients toward this option, and the consistent feedback is that it performs as well as any premium bagged product.
Choosing the Right Mulch for Your Specific Garden
Planted Perennial Beds
Medium-grade shredded bark or wood chips work best here. They last long enough to justify the application effort, contribute organic matter as they break down, and stay in place well. This is the mulch I specify most often in residential garden installations.
Vegetable Gardens
Straw is my consistent recommendation. It is light, easy to move at replanting time, breaks down completely by season’s end, and keeps the garden bed clean and workable. Some gardeners use compost as a mulch layer for vegetables, which delivers a simultaneous nutrient boost alongside moisture retention.
Around Trees and Large Shrubs
Coarse wood chips are ideal. The large particle size breaks down slowly, suppresses grass competition around root zones, and mimics the natural leaf litter layer that trees evolved alongside. I have seen arborist chip applications around established oaks remain effective for close to three full years.
Low-Maintenance Zones and Pathways
Crushed gravel or river stone with quality landscape fabric underneath offers the most durability for the least ongoing effort. The upfront investment is higher, but over a 10-year horizon, the cost-per-year is competitive with organic options, and the maintenance demand is essentially zero.
Hot & Dry Climates
Light-coloured gravel or decomposed granite reflects heat rather than absorbing it, helping stabilise soil temperature through peak summer. Organic mulches in arid climates can dry out and disperse before delivering much benefit, making inorganic materials the more practical choice in these environments.
A Seasonal Mulch Maintenance Reference
| Season | Action |
|---|---|
| Early Spring | Rake and fluff existing mulch. Top up areas below 2 inches before weed germination begins. |
| Late Spring | Check for mulch piled against stems. Correct and pull back from any trunks or plant bases. |
| Midsummer | Spot-check moisture retention. Thicken exposed areas temporarily in extreme heat if needed. |
| Early Autumn | Assess depth after the growing season. Apply a fresh layer over perennial beds before the first frost. |
| Winter | Leave mulch in place over perennial beds for root insulation. Note areas that thinned significantly. |
Frequently Asked Questions
Does old mulch need to be removed before adding new mulch?
In most cases, no. If the existing layer is still loose and less than 2 inches thick, simply add fresh material over the top. Remove old mulch only when it has become severely compacted, developed problematic mould, or when you are managing a disease issue that requires clearing the bed.
Can mulch be too thick?
Yes, and this is more common than most people realise. A layer exceeding 4 inches can prevent water from reaching the soil, create pest habitat, and promote fungal issues at plant bases. Aim for 2 to 3 inches as your consistent target depth.
Does mulch colour affect how long it lasts?
The colour fades before the material degrades. Dyed black, red, and brown mulches typically lose their colour within 1 to 2 months of sun exposure, but the wood material beneath continues to function for 1 to 2 years. If appearance matters, a thin cosmetic top-up is all you need rather than a full replacement.
Should you mulch in winter?
Yes, particularly over perennial beds and around trees and shrubs. A mulch layer through winter insulates roots from freeze-thaw cycles that cause significant root damage over time.
Does old mulch turn into soil?
Effectively, yes. Decomposed organic mulch integrates into the top layer of the soil as dark, fine organic matter. This feeds soil biology, adds organic carbon, and improves soil structure over time. It is one of the most valuable outcomes of using organic mulch consistently.
Does mulch attract mosquitoes or termites?
Mulch creates habitat conditions rather than attracting pests from elsewhere. Maintain the 6-inch gap from your foundation for termite risk mitigation, keep mulch from staying waterlogged for mosquito prevention, and appropriate application depth handles most pest concerns effectively.
The Final Word
A well-mulched garden asks less of you over time while delivering more in return. The soil improves steadily beneath the surface, weeds have less opportunity to establish, moisture stays where the roots need it, and the whole garden holds together through the season with far less intervention.
The key is choosing the right material for your actual situation, applying it at the correct depth, and refreshing it before it drops below its functional threshold rather than waiting for problems to appear.
Once that rhythm becomes part of your seasonal routine, mulching becomes one of the lowest-effort, highest-return practices in your entire garden.
If you are not sure where to start, put down a 3-inch layer of shredded bark or arborist chips in your main planted beds this spring. Watch how the soil responds through the season.
I am confident you will approach every subsequent mulch application with a clearer sense of what you are actually building toward.