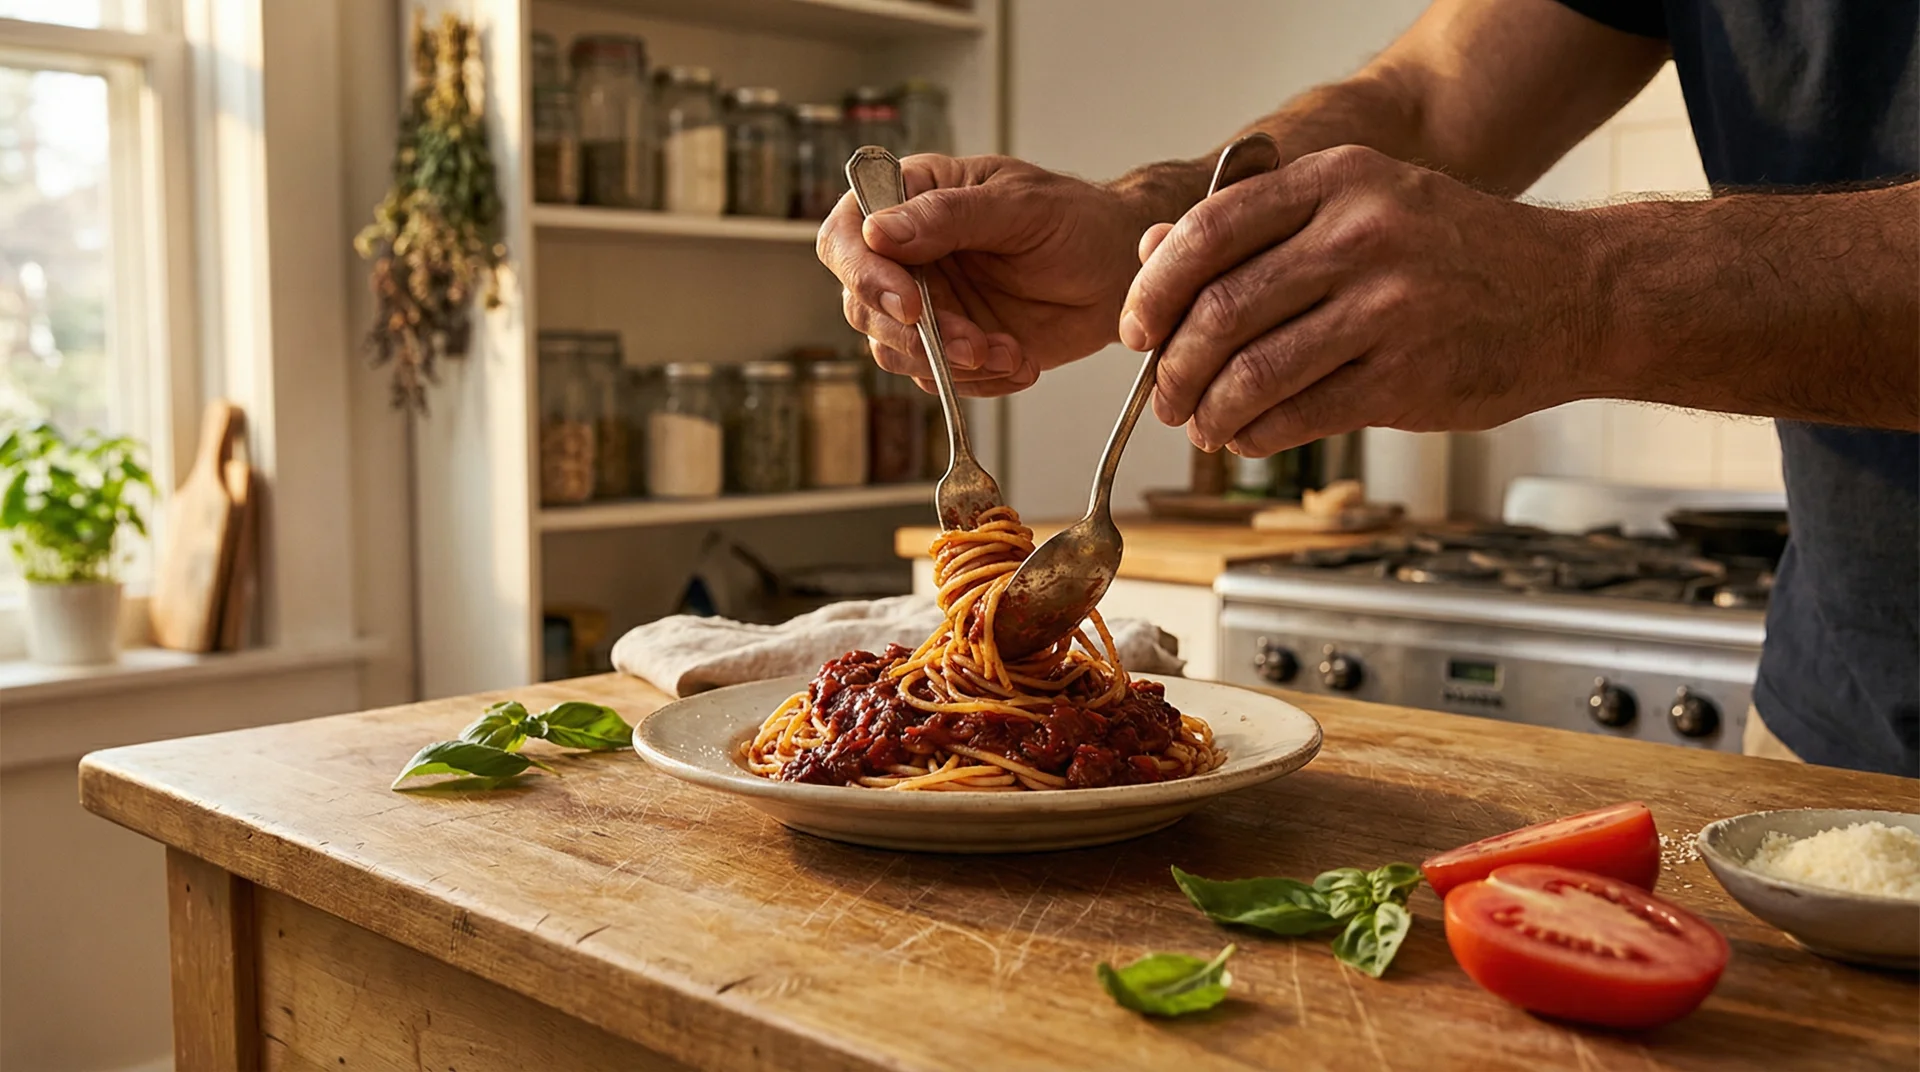
I still remember the first time I cooked a chuck eye steak in a home kitchen after years in professional kitchens. I expected an average result from an inexpensive cut, yet the steak surprised everyone at the table with deep beef flavor and a tender bite. Since then, I cook chuck eye often when I want steakhouse flavor without paying ribeye prices.
If you came here looking for a quick answer, here it is:
Cook chuck eye steak fast over high heat, season simply, avoid overcooking, and let it rest before slicing.
These four steps decide whether your steak turns juicy or tough, and they apply across most steak cooking methods.
Many home cooks struggle because chuck eye sits right on the edge between tender steak and tougher shoulder meat. Small mistakes show immediately. I’ve helped many readers and students fix the same issues: steak cooked cold, heat too low, or sliced too early.
So before we go deeper, here’s the practical roadmap I follow every time.
Quick Success Guide
| Step | What I Do | Why It Matters |
|---|---|---|
| Bring the steak to room temperature | 20–30 minutes outside the fridge | Helps with even cooking |
| Season generously | Salt, pepper, and optional garlic | Builds crust and flavor |
| Cook on high heat | Cast iron or grill | Creates sear quickly |
| Rest steak | 5–10 minutes after cooking | Keeps juices inside |
| Slice correctly | Against the grain | Improves tenderness |
Chuck eye steak rewards simple cooking done well. In the next sections, I’ll walk you through choosing, preparing, and cooking it with the same approach I learned and refined over years of professional cooking and recipe testing.
Let’s start with understanding what makes this cut special and how to choose the right steak before it even hits the pan.
How to Cook Chuck Eye Steak Perfectly (Quick Answer First)
When readers write to me about chuck eye steak, they usually say the same thing: “I followed a steak recipe and still ended up with chewy meat.” I’ve seen this happen many times in home kitchens, and the fix usually comes down to understanding how this cut behaves in heat.
Chuck eye steak cooks beautifully when you treat it like a ribeye that needs a little more care. The goal stays simple every time I cook it: build a strong crust quickly while keeping the inside juicy.
Here’s how I guide anyone cooking a chuck eye steak for the first time.
Why Chuck Eye Steak Often Turns Out Tough
Chuck eye comes from the shoulder area, close to ribeye. This location gives it good beef flavor and some marbling, though it also carries slightly more connective tissue. That structure demands correct cooking.
Tough results usually happen because of three habits:
- Cooking steak straight from the refrigerator
- Cooking too long over moderate heat
- Cutting the steak immediately after cooking
Cold steak cooks unevenly. Low heat dries meat before a crust forms. Early slicing releases juices before they settle.
In restaurant kitchens, cooks control these variables automatically. At home, small adjustments make the same difference.
The Fastest Way to Cook It Tender and Juicy
After years of testing steaks at home and teaching readers through recipes, this remains my most reliable method:
My go-to method
- Bring the steak to room temperature for 20–30 minutes.
- Season generously with salt and pepper.
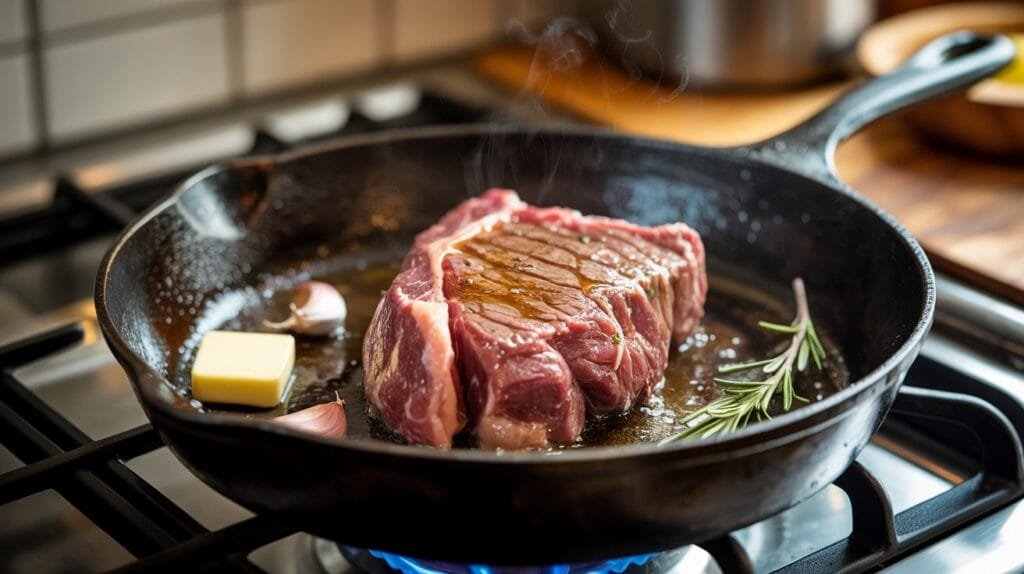
- Heat a cast-iron pan until very hot.
- Add oil, then steak.
- Sear 3–4 minutes per side.
- Add butter, garlic, herbs, and baste briefly.
- Rest the steak 5–10 minutes before slicing.
High heat creates flavor quickly, which prevents moisture loss. Resting finishes the job by redistributing juices through the meat.
The entire cooking time often stays under ten minutes.
Common Cooking Mistakes to Avoid
I see these mistakes repeatedly when readers share cooking struggles:
| # | Mistake | What Happens | Better Approach |
|---|---|---|---|
| 1 | Using a pan that isn’t hot enough | Steak releases water and steams instead of searing | Preheat the pan until very hot before adding the steak |
| 2 | Moving the steak constantly | Crust can’t form properly | Let the steak cook undisturbed to build a crust |
| 3 | Overcooking out of caution | Meat becomes tougher and loses juiciness | Cook to medium-rare or medium for the best texture |
| 4 | Skipping the resting period | Juices spill out when cutting | Rest the steak 5–10 minutes before slicing |
| 5 | Cutting with the grain | Fibers stay long and chewy | Slice against the grain for tenderness |
A few mindful adjustments turn chuck eye into a steak people rarely expect at its price point.
What is Chuck Eye Steak?
When I introduce chuck eye steak to someone who usually buys ribeye, they often assume it’s an entirely different kind of meat. Then they taste it and start asking why they paid more all those years. The truth sits in where the cut comes from and how butchers break down the beef.
Understanding the cut helps you cook it correctly and buy it confidently. Once you know what to look for, chuck eye becomes one of the smartest steaks to bring home.
Where It Comes From on the Cow
Chuck eye steak comes from the upper shoulder area, right where the chuck section meets the rib primal. Butchers sometimes call it the transition zone between chuck roast and ribeye.
This location matters because muscle usage changes gradually in this area. Muscles closer to the rib remain tender, while muscles deeper in the shoulder work harder and grow firmer.
Only a few steaks per animal qualify as chuck eye, which explains why stores sometimes sell out quickly. When butchers continue cutting ribeye steaks toward the shoulder, the last few steaks become chuck eye before the meat turns into chuck roasts.
In practical terms, chuck eye gives you:
- Ribeye-like marbling
- Strong beef flavor
- Slightly firmer texture
- Lower price
Handled properly, the eating experience comes surprisingly close to more expensive steaks.
Why It’s Called the “Budget Ribeye”
Butchers often joke that chuck eye is ribeye’s frugal cousin. I’ve heard chefs call it the cook’s secret steak because professionals know how good it can taste when prepared correctly.
The resemblance comes from:
- Similar fat distribution
- Comparable muscle structure
- Rich beef flavor profile
The difference comes from slightly more connective tissue, which demands proper cooking technique.
In restaurant kitchens, we sometimes used chuck eye for staff meals because cooks appreciated flavor over price. Many guests never realize they can recreate similar results at home with the same cut.
When Chuck Eye Steak Is a Smart Buy
Chuck eye shines in specific situations, and I reach for it often when cooking at home, especially when comparing affordable steak cut options.
It works especially well when:
- You want steak flavor without premium cost
- You cook for family or a small gathering
- You cook steak indoors in a pan
- You want generous portions without overspending
I still buy ribeye for special occasions, though chuck eye earns a regular spot in my kitchen because everyday cooking deserves good steak too.
Once you understand the cut, the next important step happens at the store: choosing the right piece of meat. A good chunk of eye steak begins with smart selection, and small details make a big difference before cooking even starts.
Choosing the Best Chuck Eye Steak
I’ve learned over the years that most steak success begins at the meat counter, not in the kitchen. Many disappointing results trace back to poor selection rather than cooking mistakes.
When I shop for chuck eye steak, I slow down and look carefully at a few details. Those small decisions determine tenderness, flavor, and overall satisfaction later at the table.
Here’s how I choose steaks that cook beautifully at home.
What Marbling to Look For
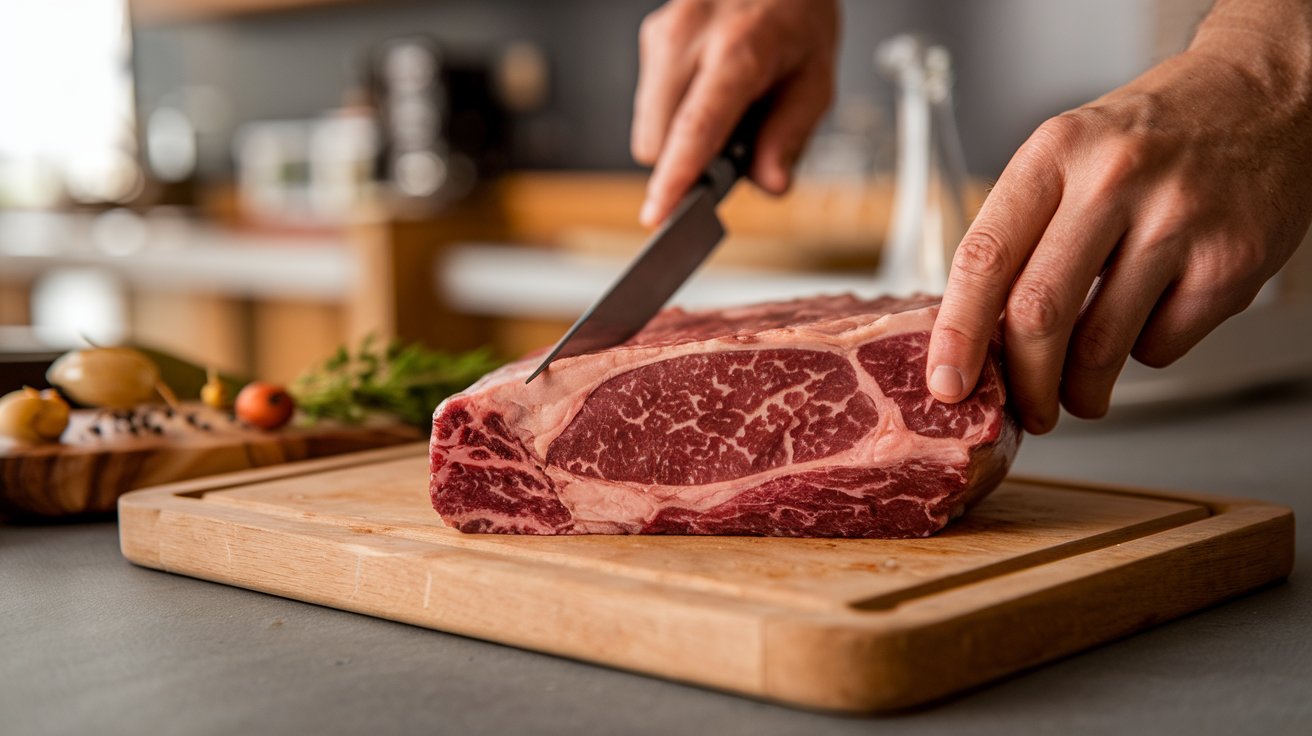
Marbling refers to the thin streaks of fat running through the meat. That fat melts during cooking and keeps the steak juicy while adding flavor.
When I pick chuck eye steaks, I look for:
- Thin white fat lines spread evenly across the steak
- Good fat distribution rather than large fat chunks
- Bright red meat color
Steaks with little marbling tend to cook drier and feel firmer. A well-marbled chuck eye usually delivers results closer to ribeye texture.
If two steaks cost the same, the one with better marbling almost always tastes better.
Ideal Thickness for Cooking
Thickness affects cooking control more than people realize. Thin steaks cook too quickly, which makes achieving a good crust without overcooking difficult.
For home cooking, I recommend:
| Thickness | Cooking Result |
|---|---|
| Under ¾ inch | Cooks too fast, easy to overcook |
| 1–1.25 inches | Best balance of crust and doneness |
| Over 1.5 inches | Needs oven finish or grill control |
I personally reach for steaks around one inch thick because they give enough time to build a crust while keeping the center juicy.
If the steaks look thin, ask the butcher if thicker cuts are available. Many stores cut steaks fresh on request.
Fresh vs Frozen Steak
Readers often ask whether frozen steak cooks differently. After many side-by-side tests, I can say freezing works well when handled properly.
| Fresh Steak | Frozen Steak |
|---|---|
| Slightly better texture | Freezes quickly for best quality |
| Immediate cooking convenience | Thaws slowly in the refrigerator |
| Easier crust formation | Stays sealed to prevent freezer burn |
I sometimes buy steaks on sale and freeze them individually. Slow overnight thawing usually preserves quality well enough for home cooking.
Once you bring home a good steak, preparation becomes the next crucial step. Proper seasoning and handling right before cooking often decide whether the chuck eye turns out average or impressive.
Preparing Chuck Eye Steak Before Cooking
I used to think seasoning steak was the main preparation step. Years of cooking taught me that preparation actually starts earlier, with how you handle the meat before heat ever touches it.
Chuck eye steak benefits from simple preparation, though timing and small details matter. When readers tell me their steak tasted good but felt slightly firm, preparation often holds the answer.
These steps create the foundation for a tender result.
Should You Marinate or Use Simple Seasoning?
Chuck eye steak already carries good beef flavor and decent marbling. Because of that, I usually keep seasoning simple.
On most nights, I use:
- Kosher salt
- Freshly ground black pepper
- Optional garlic powder or crushed garlic
- Neutral oil or light olive oil
This approach allows the steak flavor to stay front and center.
Marinades still have their place, especially if the steak looks leaner or slightly thinner. Acidic marinades with vinegar or citrus can soften fibers slightly, though long marinating sometimes masks the beef flavor.
At home, I marinate chuck eye only when I want a specific flavor profile, like garlic-herb or soy-based seasoning. For classic steak nights, salt and pepper work beautifully.
Why Room Temperature Steak Matters
One lesson professional kitchens drill into cooks early involves temperature control. Cold steak dropped into a hot pan cooks unevenly.
The outside heats quickly while the inside stays cold, leading people to cook longer than necessary. The result becomes an overcooked exterior and a tougher texture.
I usually:
- Remove steak from the fridge 20–30 minutes before cooking
- Pat the surface dry
- Season just before cooking
This small step improves cooking consistency noticeably.
How to Season the Chuck Eye Steak for Maximum Flavor
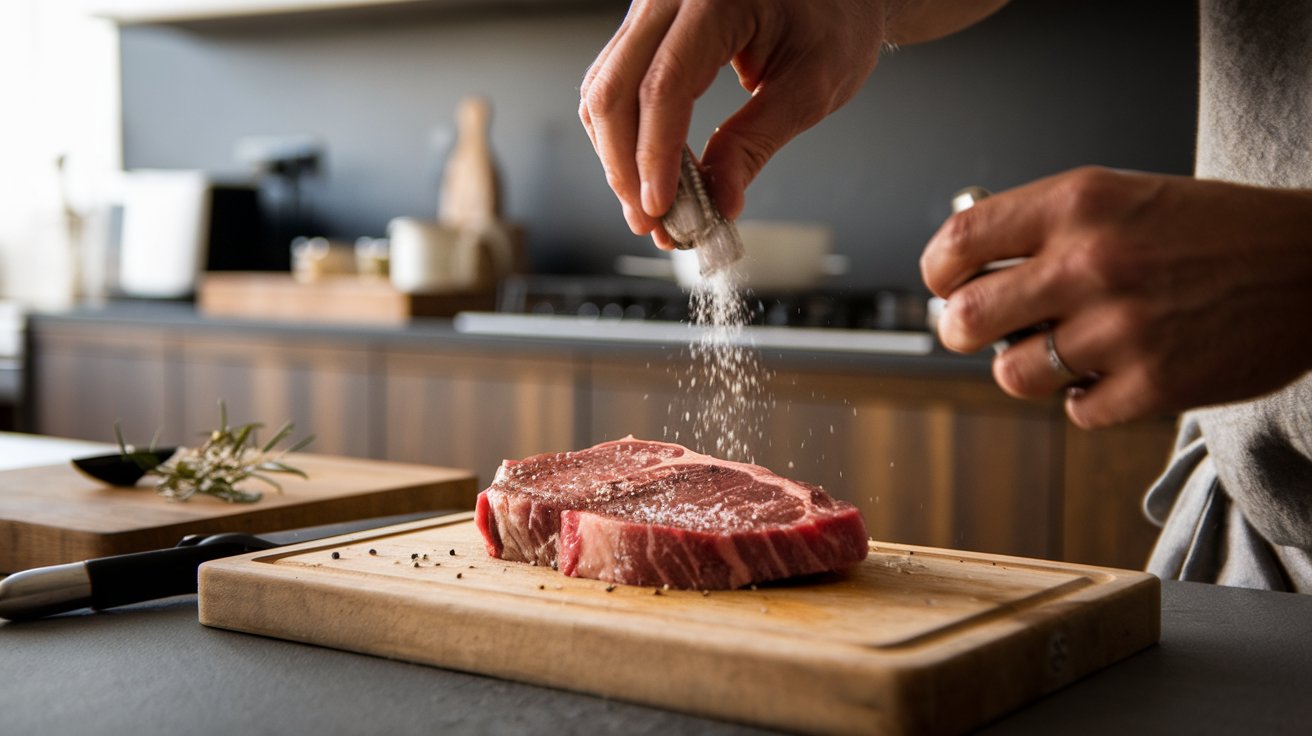
Good seasoning involves more than sprinkling salt at the last moment.
Here’s how I season chuck eye steak at home:
- Pat the steak dry with paper towels.
- Season generously with salt on both sides.
- Add black pepper and optional spices.
- Lightly oil the steak or pan.
- Let seasoning sit 5–10 minutes before cooking.
Salt draws moisture briefly, then reabsorbs into the meat, helping flavor penetrate slightly deeper.
Professional kitchens often salt steaks ahead of time for exactly this reason. Even a short rest improves results at home.
Tips for Holding Chuck Eye Steak Together
Sometimes, chuck eye steaks include natural muscle seams that loosen slightly while cooking. Readers occasionally mention steaks separating in the pan.
A simple fix solves this:
- Tie the steak loosely with kitchen twine around the middle
- Or press the edges together while searing the first side
This step helps steaks cook evenly and maintain shape, especially when grilling.
With preparation complete, the real transformation begins when the steak meets heat. Next, I’ll walk you through cooking chuck eye steak step by step, including the pan method I rely on most at home.
Steak Doneness & Cook Time Guide
One pattern I’ve noticed when helping readers improve steak cooking involves uncertainty about doneness. Many people cook longer than necessary because they worry about undercooking, especially when working with a new cut like chuck eye.
Professional kitchens rely on temperature and touch rather than guesswork. At home, using a thermometer simplifies everything and removes anxiety from the process.
Chuck eye steak tastes best when it stays juicy inside, which usually means cooking between medium-rare and medium. Past that point, muscle fibers tighten, and moisture escapes more quickly.
Let’s simplify doneness so you can cook confidently.
Internal Temperature Chart
A thermometer gives the most reliable results. Steak temperature continues rising slightly while resting, so removing it a little early helps achieve the final doneness.
Here’s the guide I follow:
| Doneness Level | Remove From Heat | Final Temperature After Rest |
|---|---|---|
| Rare | 120–125°F | 125–130°F |
| Medium Rare | 125–130°F | 130–135°F |
| Medium | 135–140°F | 140–145°F |
| Medium Well | 145–150°F | 150–155°F |
| Well Done | 155°F+ | 160°F+ |
Chuck eye performs best when removed around medium-rare or medium, just like most steaks across common home steak methods. That range preserves tenderness while still delivering satisfying beef flavor.
If you don’t own a thermometer, learning the feel test takes practice, though tools remove most uncertainty for home cooks.
Cook Times by Steak Thickness
Cooking time varies depending on thickness and heat level, though general timing helps guide expectations.
For pan-seared steak over medium-high heat:
| Steak Thickness | Approx. Cook Time Per Side |
|---|---|
| ¾ inch | 2–3 minutes |
| 1 inch | 3–4 minutes |
| 1.25 inches | 4–5 minutes |
| 1.5 inches+ | Sear then oven finish |
Grills and stovetops vary, so timing works best as a reference while temperature confirms doneness.
When cooking thicker steaks, I often sear first, then finish gently to avoid burning the outside.
Why Resting Steak Is Essential
Resting the steak feels like the hardest step because the aroma makes everyone want to eat immediately. Still, patience rewards you.
During cooking, heat pushes juices toward the center. Resting allows juices to redistribute through the meat again.
If you slice immediately:
Juices run onto the cutting board.
Steak loses moisture.
Texture feels drier.
Resting for five to ten minutes keeps juices inside, improving both texture and flavor.
In professional kitchens, resting happens automatically during plating preparation. At home, giving steak a short pause makes the difference between good and great results.
Once you master cooking time and resting, small professional tricks help push chuck eye steak even further.
Chef Tips for Tender Results Every Time
Over the years, I’ve learned that great steak cooking rarely depends on complicated recipes. Small professional habits make the biggest difference. These habits become automatic in restaurant kitchens, though home cooks rarely hear about them.
Chuck eye steak rewards careful handling because it sits between tender rib meat and hardworking shoulder muscle. A few smart techniques help you get the best from it every time.
Here are the tricks I still rely on at home.
How Restaurants Cook Budget Cuts Well
In professional kitchens, cooks treat every cut with respect because food cost matters. Expensive steaks don’t appear on staff meals every night, so cooks learn how to make affordable cuts shine.
Some habits I carried home include:
- Cooking steaks hot and fast to avoid moisture loss
- Letting meat rest properly before slicing
- Seasoning confidently rather than timidly
- Using butter basting to enhance flavor
- Slicing correctly for tenderness
Restaurants also serve steaks immediately after resting, while home cooks sometimes leave meat sitting too long. Steak continues cooking slightly while resting, so timing matters even after the heat stops.
I still plate steaks quickly once they finish resting because the texture feels best while warm and juicy.
When and How to Slice Against the Grain
This step alone improves tenderness dramatically. Muscle fibers run in visible lines across the steak, and the slicing direction changes how chewy the bite feels.
When slicing with the grain, fibers remain long, making chewing harder. Cutting across the grain shortens fibers and softens texture.
Here’s what I do:
- Look closely at the steak’s surface.
- Identify fiber direction.
- Slice perpendicular to those lines.
- Cut thin slices for maximum tenderness.
Chuck eye sometimes shows mixed grain patterns, so adjusting the slicing direction for each section helps.
Even a slightly overcooked steak improves when sliced correctly.
Fixing Steak That Turned Out Tough
Every cook ends up with a tougher steak sometimes. Even professionals miss timing occasionally. When that happens, a few adjustments help salvage dinner.
If the steak feels firm, try:
- Slicing thinner across the grain
- Adding butter or pan juices on top
- Serving with sauce to add moisture
- Using leftovers in sandwiches or tacos
I often slice tougher leftovers thinly for steak salads or wraps the next day, where texture matters less and flavor still shines.
Once the cooking technique feels comfortable, pairing the steak with the right sides and sauces completes the experience.
Serving Ideas for Chuck Eye Steak

A good steak rarely needs much to feel satisfying, though thoughtful sides and sauces can turn a simple dinner into something memorable. At home, I usually build meals around what fits the day. Some nights call for classic comfort, while busy evenings demand something quick and practical.
Chuck eye steak works in both situations because its strong beef flavor pairs easily with many dishes, similar to other budget steak options. Over time, I’ve developed a handful of reliable combinations that readers often return to once they try them.
Here are serving ideas I use regularly.
Classic Steakhouse Sides
When I want that restaurant-style experience at home, I lean toward traditional steakhouse accompaniments. These sides balance richness and give the meal familiar comfort.
Some favorites include:
- Creamy mashed potatoes with butter
- Roasted or baked potatoes
- Sautéed mushrooms and onions
- Creamed spinach
- Steamed asparagus with lemon
- Simple Caesar or wedge salad
Steakhouses often combine rich and fresh elements so meals never feel too heavy. I follow the same thinking at home by pairing something creamy with something crisp or green.
A warm plate also helps keep steak enjoyable through the meal, so I sometimes warm serving plates briefly before plating.
Quick Weeknight Pairings
On busy evenings, I want steak without extra cleanup or complicated prep. Chuck eye cooks quickly, so sides should match that simplicity.
Quick options I rely on include:
- Garlic butter green beans
- Simple rice or quinoa
- Air-fried potatoes
- Tomato and cucumber salad
- Warm tortillas for steak wraps
- Light pasta tossed with olive oil and herbs
Sometimes I slice steak thinly and serve it bowl-style with rice and vegetables. This stretches portions while keeping meals balanced for families.
Weeknight meals succeed when preparation stays manageable while flavor still feels rewarding.
Sauces That Improve Budget Steaks
Sauces can enhance chuck eye steak beautifully, especially if a steak cooks slightly beyond ideal doneness. Restaurants frequently use sauces to elevate affordable cuts.
Some sauces I enjoy pairing include:
- Garlic herb butter melting over a hot steak
- Peppercorn cream sauce
- Chimichurri with fresh herbs and garlic
- Simple pan sauce made from drippings
- Steakhouse mushroom sauce
Even a quick butter sauce from the cooking pan adds richness. After removing the steak, I often deglaze the pan with a splash of broth or wine, swirl in butter, and spoon the sauce over slices.
Once you master serving basics, experimenting with flavors becomes fun. Chuck eye steak adapts well to different seasoning styles, which we’ll explore next with variations you can try on future steak nights.
Chuck Eye Steak Variations to Try
Once chuck eye steak becomes comfortable to cook, experimenting with flavors makes steak night feel new again. I often rotate seasonings depending on mood or season, though the cooking technique stays mostly the same.
Chuck eye adapts well because its beef flavor remains strong enough to carry herbs, butter, and marinades without disappearing under seasoning.
Here are variations I come back to regularly when cooking at home.
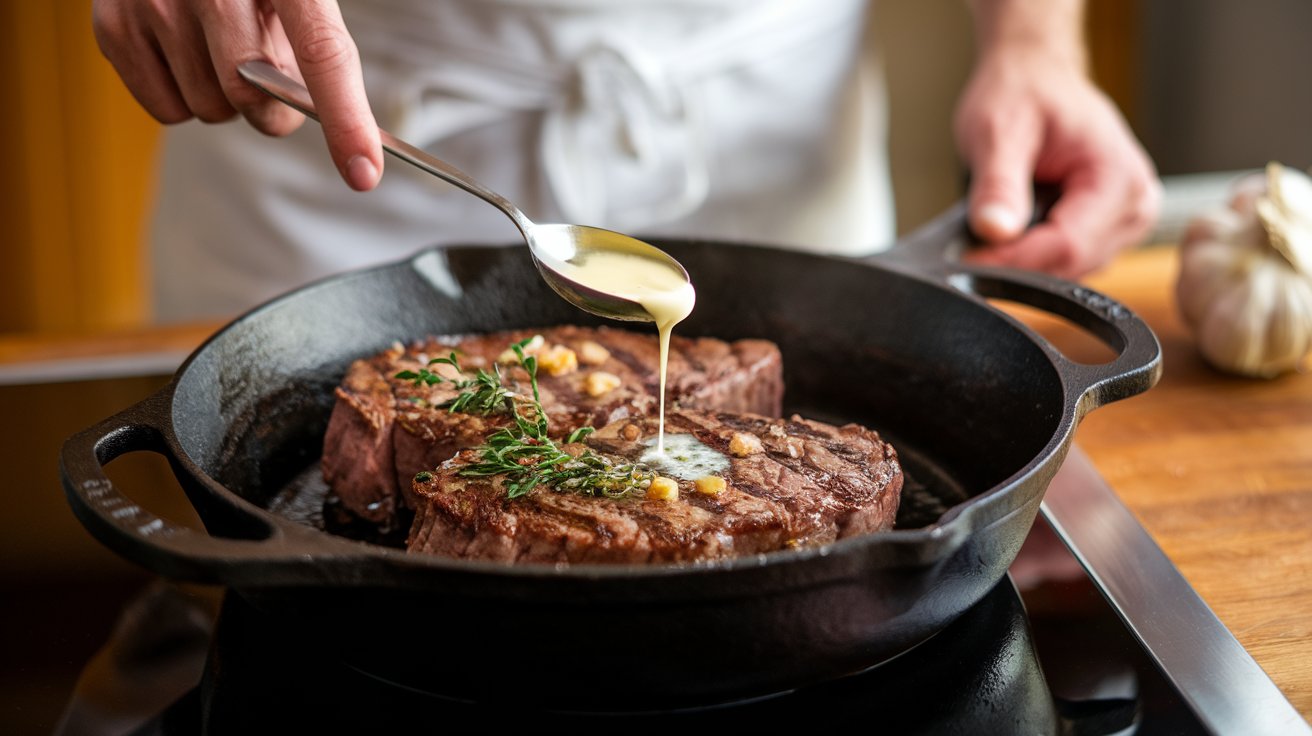
Garlic Butter Chuck Eye Steak
This version feels closest to what many people expect from steakhouse dining. Garlic butter enhances richness while keeping preparation simple.
Here’s how I prepare it:
- Season the steak with salt and pepper.
- Pan-sear normally.
- During the final minute, add butter, crushed garlic, and thyme or rosemary.
- Baste the steak repeatedly before resting.
- Spoon remaining butter over sliced steak when serving.
The aroma alone usually draws everyone into the kitchen before dinner hits the table.
This variation works especially well when serving guests because the flavor feels familiar and comforting.
Herb-Marinated Version
When I want a brighter flavor, especially in warmer months, I marinate chuck eye briefly with herbs and garlic. Marinades soften the texture slightly while adding freshness.
A simple marinade I use includes:
- Olive oil
- Garlic
- Lemon juice or vinegar
- Chopped parsley or rosemary
- Salt and pepper
I marinate steaks for one to four hours in the refrigerator, then pat them dry before cooking so the crust still forms well.
This version pairs nicely with grilled vegetables or lighter sides.
Cast Iron Steakhouse Style
This preparation recreates steakhouse flavor at home using high heat and butter basting.
My approach:
- Heat cast iron pan until very hot.
- Add oil and steak.
- Sear aggressively without moving the steak.
- Flip and add butter, garlic, and herbs.
- Baste until desired doneness.
- Rest before slicing.
The crust develops beautifully, and butter creates a glossy finish similar to restaurant steaks.
Many readers tell me this method becomes their standard approach once they try it because the results feel consistent and impressive.
Once you know your preferred variation, keeping a clear, printable recipe helps repeat success easily. Next, I’ll lay out the chuck eye steak recipe in a simple card format you can follow or save for future meals.
Chuck Eye Steak Recipe Card
Over time, many readers told me they like having a clean, repeatable recipe they can glance at while cooking. After learning techniques and variations, a simple recipe card helps lock in success on busy evenings.
This version reflects how I cook chuck eye steak most often at home when I want reliable, steakhouse-style results without overthinking the process.
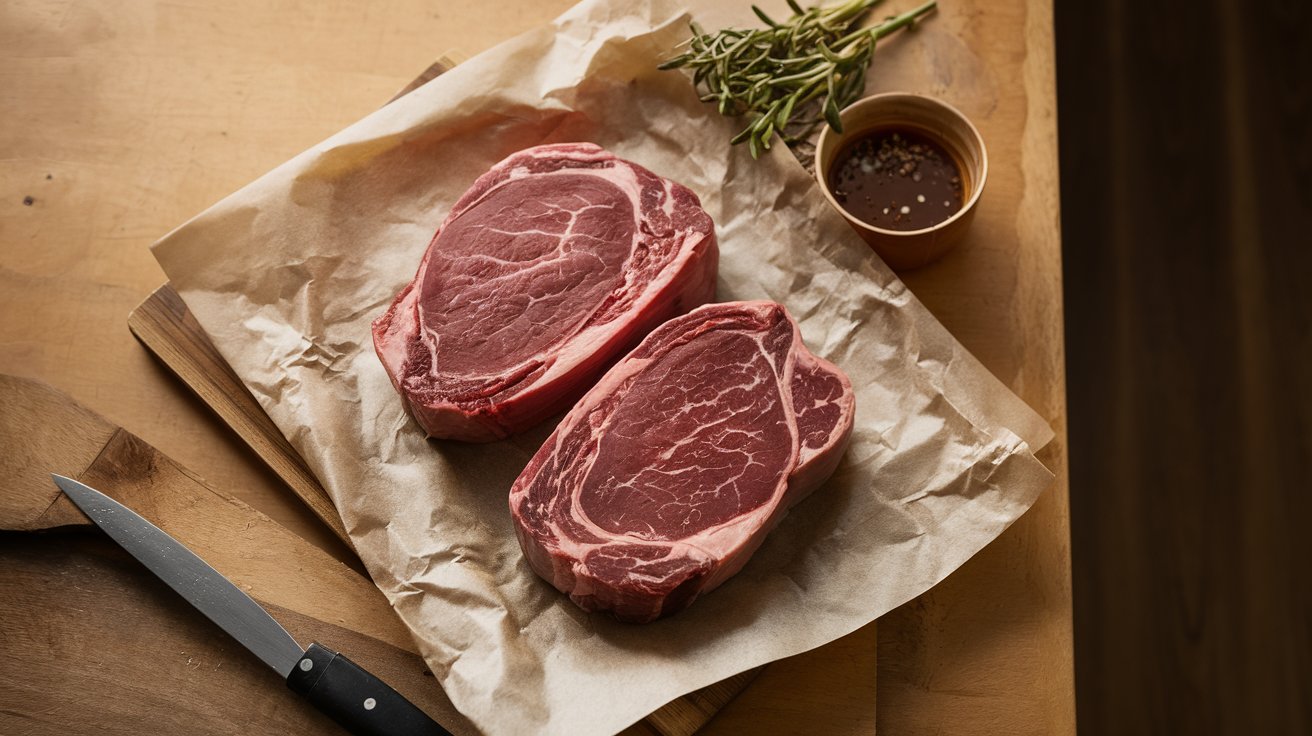
Ingredients
Serves 2
- 2 chuck eye steaks (about 1 inch thick)
- 1 tablespoon neutral oil or light olive oil
- Salt, to taste
- Freshly ground black pepper
- 2 tablespoons butter
- 2 garlic cloves, crushed
- Fresh thyme or rosemary (optional)
Optional additions:
- Garlic powder or onion powder
- Red pepper flakes
- Lemon wedges for serving
Instructions
- Remove steaks from the refrigerator 20–30 minutes before cooking.
- Pat steaks dry with paper towels.
- Season generously with salt and pepper on both sides.
- Heat a heavy skillet or cast-iron pan over medium-high heat.
- Add oil to the pan.
- Place steaks in the pan and cook without moving for 3–4 minutes.
- Flip steaks and cook another 3–4 minutes.
- Add butter, garlic, and herbs during the final minute.
- Tilt the pan and spoon butter over the steaks repeatedly.
- Remove steaks from the heat and rest 5–10 minutes.
- Slice against the grain and serve immediately.
Internal temperature guide:
- Medium rare: remove at 125–130°F
- Medium: remove at 135–140°F
Recipe Notes & Substitutions
• If steaks are thicker than 1.5 inches, finish cooking in a 400°F oven after searing.
• Grilling works well using the same timing principles.
• Marinate leaner steaks briefly for added tenderness.
• Leftover steak works well sliced thin for sandwiches, salads, or wraps.
• Allow steaks to rest uncovered so crust stays intact.
Frequently Asked Questions
Here are the questions I hear most often, along with the answers I give based on years of cooking and testing this cut at home.
Is Chuck Eye Steak Tender?
Chuck eye steak sits right next to ribeye, though it comes slightly closer to the shoulder, where muscles work more. That means tenderness depends heavily on cooking technique.
When cooked quickly over high heat and sliced against the grain, chuck eye can be pleasantly tender with strong beef flavor. Overcooking, however, tightens muscle fibers and makes them chewy.
I usually cook chuck eye to medium-rare or medium for the best texture. Proper resting and slicing make just as much difference as cooking time.
Can You Cook It Like Ribeye?
Yes, and that’s exactly how I recommend treating it.
Chuck eye responds well to the same methods used for ribeye:
- Pan searing
- Grilling
- Butter basting
- Oven finishing for thicker cuts
The main adjustment involves being slightly more careful about overcooking, since chuck eye carries a bit more connective tissue. When cooked thoughtfully, many people struggle to tell the difference in everyday meals.
Can It Be Cooked From Frozen?
Cooking steak directly from frozen works, though results improve when you thaw it first.
For the best texture, thaw the steak overnight in the refrigerator. Slow thawing helps preserve moisture and even cooking.
If cooking from frozen, use a two-step approach:
- Sear the steak briefly on both sides.
- Finish cooking gently in the oven.
Cooking time increases, though crust formation still works surprisingly well when the heat stays high during searing.
Is It Good for Meal Prep?
Chuck eye works well for meal prep when handled correctly.
I usually cook steaks to medium-rare, then slice portions for:
- Steak salads
- Rice bowls
- Wraps or sandwiches
- Quick reheated dinners
When reheating, gentle heat prevents drying. A quick warm-up in a skillet with a splash of broth or butter helps maintain moisture.
For busy households, chuck eye offers good value and flexibility without sacrificing flavor.
Final Thoughts: Making the Most of an Underrated Steak Cut
Chuck eye steak earned a permanent place in my kitchen because it proves great meals don’t always need premium ingredients. Once I learned how to handle this cut properly, it became one of the easiest ways to enjoy steak at home without turning dinner into an expensive event.
I’ve watched many home cooks gain confidence once they understand how small adjustments change results. Proper heat, good seasoning, and patient resting transform chuck eye into a steak that satisfies both everyday dinners and weekend gatherings.
If you remember a few essentials, success follows naturally:
- Choose steaks with good marbling.
- Cook quickly over high heat.
- Avoid overcooking.
- Rest before slicing.
- Cut against the grain.
Cooking steak well feels rewarding because the process stays simple while the payoff feels special, especially once you explore more affordable steak choices at home.
With a little practice, chuck eye steak becomes one of those meals you cook confidently whenever the craving hits.
And if your next steak night ends with empty plates and someone asking when you’ll cook it again, you’ll know you’ve mastered this underrated cut.