
Seal the right spot with the right metal roof sealant, and you stop most nuisance leaks fast. Start by finding the leak source, then match the sealant to the roof system and the joint you need to seal.
I reach for butyl tape around laps and trim, I use polyurethane for flexible exterior sealing, I choose acrylic when I need a paintable budget repair, and I reserve silicone for specific areas where long-term UV and water resistance matter.
You will save money when you fix fasteners, closures, and flashing details before you smear sealant across panels.
I learned that lesson after I watched a “quick coat” trap water and push rust forward on a client’s barn roof.
Why Your Metal Roof Is Leaking (And Why Sealant Alone Won’t Fix It)
I approach metal roof leaks like I approach any remodeling mystery: I follow the water path, and I assume the obvious spot lies to me. Water enters high, travels along ribs or purlins, and shows up far from the real opening.
The Real Reason Homeowners Choose Sealant
You choose sealant because you want control. You want a repair you can do on a Saturday, and you want to avoid an expensive tear-off. I respect that instinct because I work with it every season, and I also know where it goes wrong. Most homeowners face one of these situations:
- A drip appears around a screw head after a wind-driven rain.
- A seam opens at a lap joint on a shed or porch roof.
- A skylight, vent boot, or chimney flashing shows hairline gaps.
- Old caulk turns chalky, peels, and leaves a thin channel for water.
Sealant can solve these, and sealant can also hide bigger issues like missing closures, wrong fasteners, or failed underlayment. You will win when you identify which problem you have.
What Sealant Actually Does (And Doesn’t Do)
Sealant fills gaps, bonds surfaces, and blocks capillary water movement. Sealant also flexes with expansion and contraction when the chemistry matches the job. Sealant does not replace:
- a missing foam closure at an eave or ridge,
- a flashing that sits flat without a proper hem or kick,
- a fastener that backs out because the substrate rots,
- a panel that oil-cans and shifts because the system lacks support.
I keep this rule in my own job notes: “Sealant supports good detailing, and sealant punishes bad detailing.”
The 3-Question Framework: Do You Even Need Sealant?
I use three questions on every inspection because they stop impulse purchases and wasted tubes. You can use the same framework as a ladder with a notebook.
Question 1: What Type of Metal Roof Do You Have?
You will usually have one of these:
- Exposed-fastener panels (screws with rubber washers you can see)
- Standing seam / concealed fastener (smooth panels, clips underneath)
- Metal shingles or tiles (individual pieces with interlocks)
Exposed-fastener roofs invite small sealant repairs because you can access the fasteners and laps. Standing seam roofs demand more restraint because you can trap water at seams or interfere with thermal movement when you seal the wrong place. Metal shingles vary by system, and I treat them like a manufacturer-guided roof first and a caulk project second.
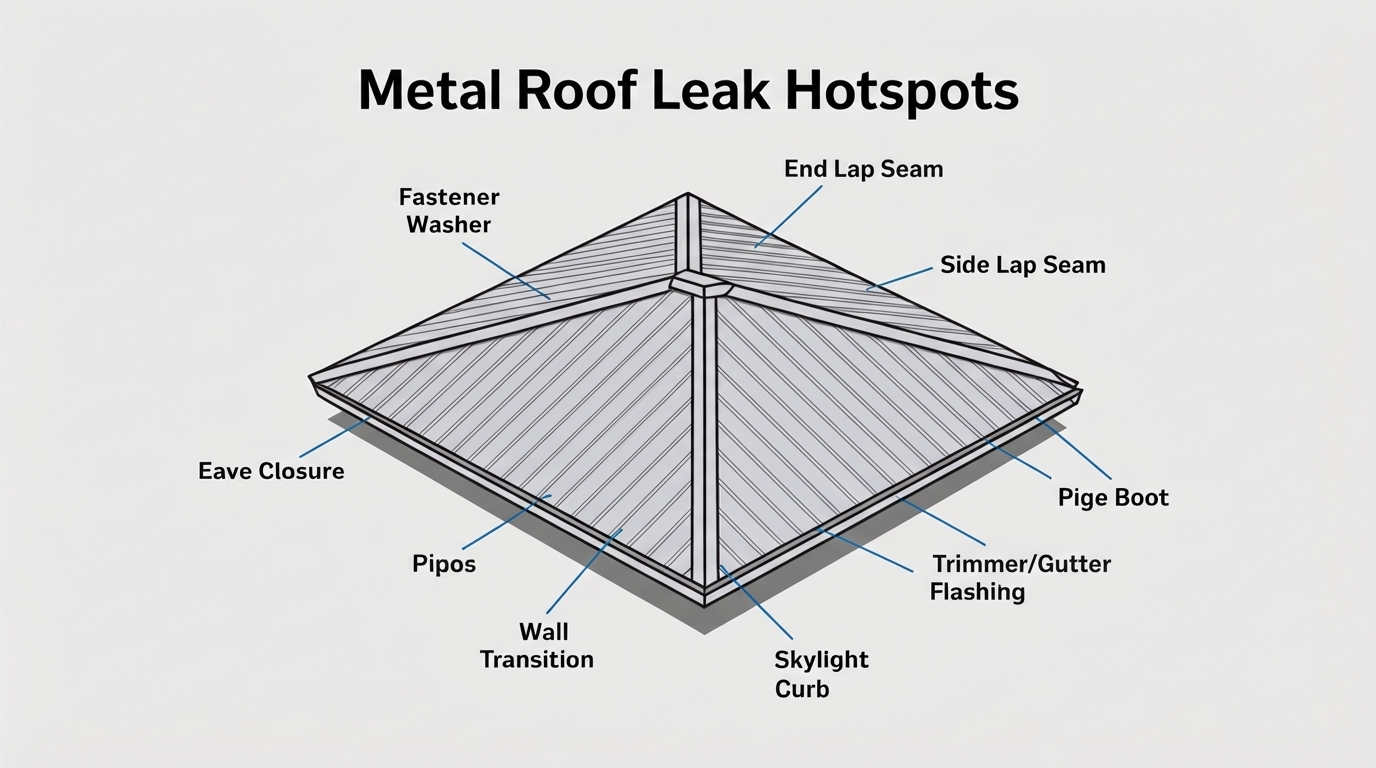
Question 2: Where Exactly Is the Problem?
You will get better results when you name the location precisely:
- Fasteners: backed-out screws, cracked washers, missing screws
- Seams/laps: horizontal end laps, side laps, transitions
- Penetrations: vents, pipes, skylights, solar mounts
- Edges: rake trim, eave, ridge, wall transitions
I often mark suspected points with painter’s tape during dry weather. You can run a controlled hose test with a helper and a phone call inside, and you can move water slowly from low to high. You build confidence when you recreate the leak on your terms.
Question 3: How Much Time & Money Can You Invest?
You can seal a few fasteners in an hour. You can also spend a weekend preparing a roof and still fail if you skip surface prep. I price DIY time like a contractor because my diploma in Construction Management trained me to see labor as a real cost, even when you pay yourself in sweat.
I keep the decision simple:
- You choose spot sealing when the roof shows isolated failures.
- You choose component replacement when washers, boots, or closures fail.
- You call a pro when the leak repeats after two careful repairs or when the roof system hides the attachment method.
The 4 Sealant Types Explained
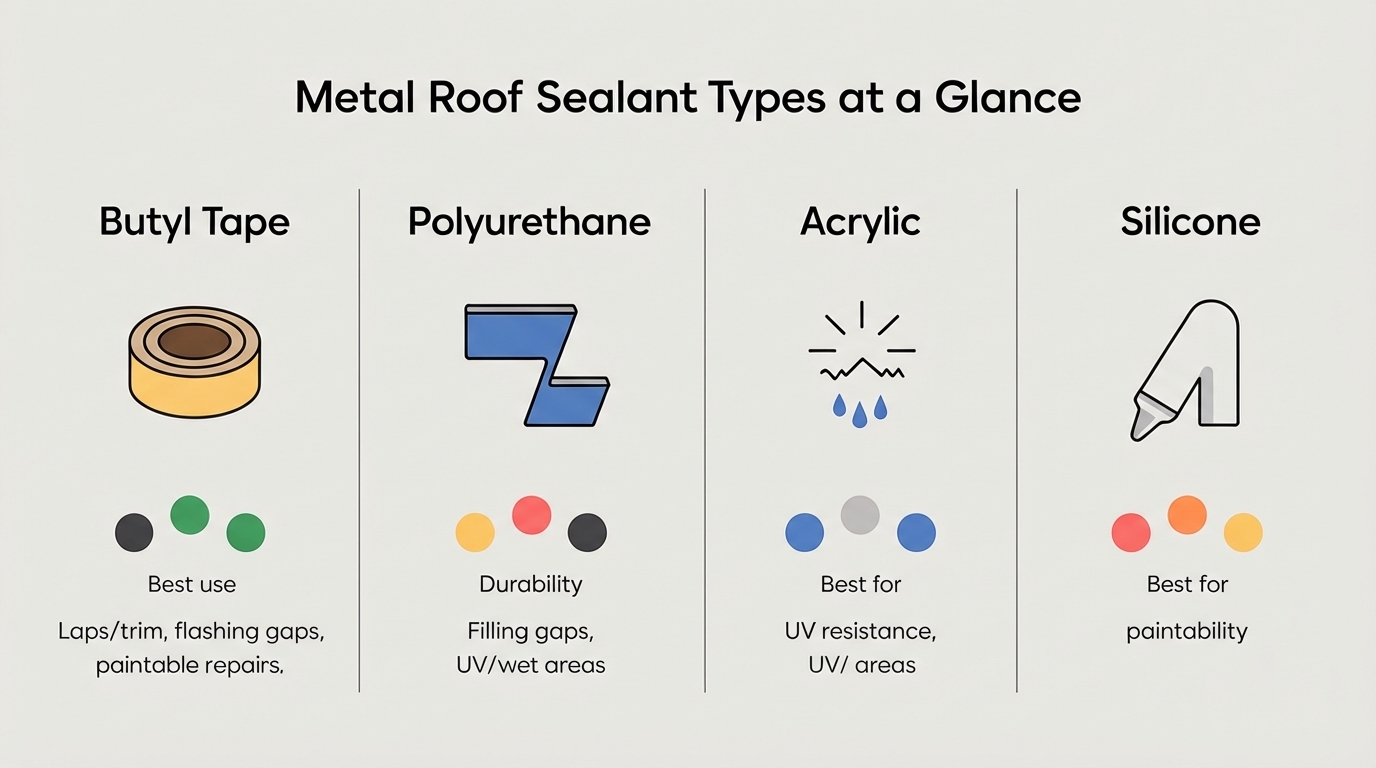
I keep sealant selection practical. I match the chemistry to the movement, UV exposure, and the joint geometry, and I respect the roof coating and paint system.
Butyl Tape: The Easiest DIY Option
Butyl tape behaves like a sticky gasket. You squeeze it between two parts, and you let the fasteners compress it into a water block. I use butyl tape on laps, trim, and transitions because it seals well under compression.
You will like butyl tape when you need:
- end-lap sealing under a lap
- trim-to-panel sealing under rake or eave trim
- flashing-to-panel sealing, where screws provide compression
I keep butyl tape clean and warm. Dirt kills adhesion, and cold tape stays stiff.
For Butyl Tape Sealing
Gibraltar 50 ft. Butyl Sealant Tape (Home Depot): Best for compressed lap joints and trim sealing. Easy DIY application, budget-friendly.
Polyurethane: The Flexible Workhorse
Polyurethane sealant grips well, stays flexible, and handles exterior weather with solid durability. I use polyurethane around flashing details and small gaps where I need a bead that moves with the roof. You will like polyurethane when you need:
- a strong bond to painted metal and flashing metal
- a flexible bead that resists vibration
- a durable exterior repair that you can tool smoothly
Polyurethane dislikes oily surfaces and loose rust. You will get a long life when you prep well.
For Polyurethane Repairs
Loctite PL S30 Polyurethane Roof and Flashing Sealant (Home Depot): Professional-grade adhesion and flexibility. Ideal when you need a strong, durable exterior bead.
Acrylic: The Budget-Friendly Trade-Off
Acrylic sealant earns its spot when you want a paintable, easy-to-use product, and the joint stays relatively stable. I use acrylic in low-movement areas or as part of a compatible roof coating system where the manufacturer allows it. You will like acrylic when you need:
- paintability and easy cleanup
- a quick repair in mild conditions
- a sealant that pairs with certain coatings
Acrylic tends to shrink and weather faster in harsh sun and big temperature swings. I plan shorter maintenance cycles when I choose them.
For Acrylic Spot Repairs
Titebond WeatherMaster Metal Roof Sealant (Amazon): Paintable, UV-resistant, and widely available. Great when you want easy application and color options.
Silicone: The Long-Term Investment
Silicone resists UV and water exceptionally well, and it stays flexible for a long time. I use silicone in select applications where the substrate and the surrounding products accept it.
Silicone can create future headaches because many coatings and sealants hate to bond to cured silicone. You will like silicone when you need:
- strong UV resistance on an exposed bead
- long-term flexibility in wet-prone areas
- a seal around glass or certain non-porous surfaces
I treat silicone like a commitment. Once you use it, you often keep using it in that area because adhesion compatibility becomes a constraint.
For Silicone Long-Term Sealing
Rust-Oleum Silicone Roof Sealant (The Paint Store): Maximum UV and water resistance. Choose this when you’re sealing for the long haul and compatibility allows.
In my 12+ years of residential remodeling, I’ve tested dozens of sealant products. These four consistently deliver results when matched to the right joint and applied with proper prep. I recommend them because I’ve used them myself on client roofs.
Comparison Table: Metal Roof Sealant Types Side-by-Side
| Sealant type | Best use on metal roofs | Strengths you will notice | Watch-outs you should plan for | DIY friendliness |
|---|---|---|---|---|
| Butyl tape | Laps, trim, under flashing with compression | Seals well under pressure, clean finish when hidden | Needs compression, hates dust, stiff in cold | High |
| Polyurethane | Flashing gaps, penetrations, exterior beads | Strong adhesion, flexible, durable | Needs good prep, can skin fast | Medium-High |
| Acrylic | Paintable detail sealing, mild-movement joints | Easy application, paintable, low odor | Shorter lifespan, shrinkage in extremes | High |
| Silicone | UV-exposed beads, wet-prone areas | Excellent UV/water resistance, long flexibility | Hard to recoat, adhesion issues for future work | Medium |
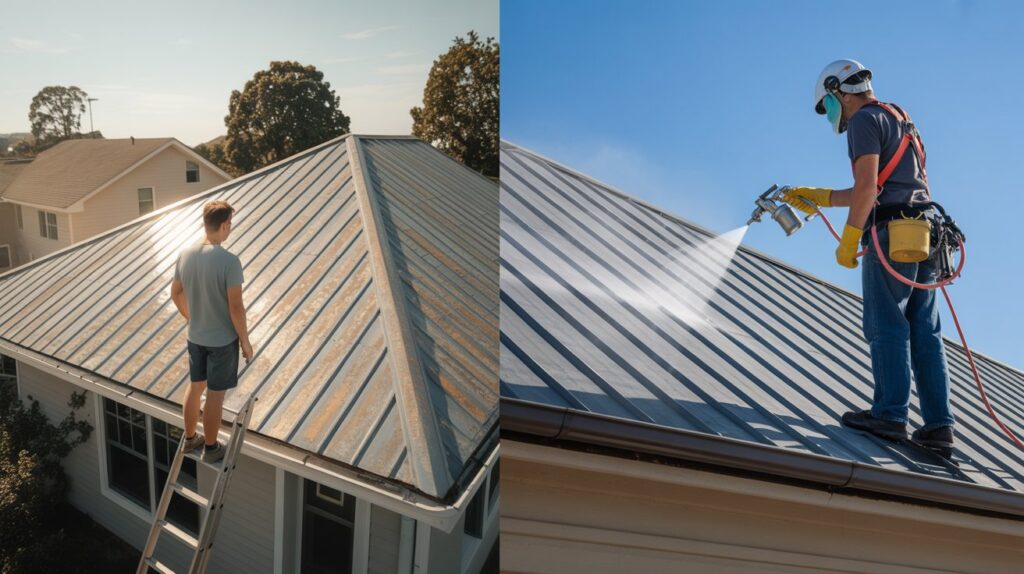
Application: What the Pros Know (That DIYers Often Miss)
I learned the hard way that application controls outcome more than brand. I have opened “sealed” joints where the bead floated over dust like a bridge. You can avoid that mistake with a simple routine.
Pre-Application Preparation (The Step Everyone Skips)
You will get better adhesion when you prep like you mean it.
- Choose safe access. Use a stable ladder, wear soft shoes, and avoid wet metal.
- Clean the area. Remove loose paint, chalking, dirt, and old failing sealant.
- Degrease if needed. Use a cleaner that leaves no residue and rinse well.
- Dry the surface. Let it dry fully because moisture blocks adhesion.
- Handle rust honestly. Wire-brush to sound metal, then prime or treat per product guidance.
I tell homeowners this line because it keeps them focused: Underline this: Sealant sticks to what you leave behind.
The Right Tools Make All the Difference
I keep tools simple because consistency beats complexity.
- Caulk gun with steady pressure
- Utility knife and scraper
- Wire brush and rags
- Nitrile gloves
- Painter’s tape for clean edges
- A small tool or wet finger method (per product) to shape the bead
You will create a stronger seal when you tool the bead. Tooling pushes sealant into the joint and removes air pockets.
Common Application Mistakes & How to Avoid Them
I see the same mistakes across DIY jobs and rushed contractor repairs.
- You apply a bead to chalky paint. You can scrub and rinse first, then dry.
- You seal a moving seam rigidly. You can choose a flexible sealant and keep the bead sized for movement.
- You smear sealant across a wide area. You can keep repairs targeted to joints and penetrations.
- You ignore fasteners and washers. You can replace suspect screws and washers before you seal.
- You work in bad weather. You can follow the temperature and cure window on the label.
I remember one porch roof where the owner “painted” sealant along every rib. Water still entered at a wall transition because the flashing lacked closure foam. The sealant created a maintenance mess and still missed the real problem.
“I trust sealant when I trust the detail under it.”
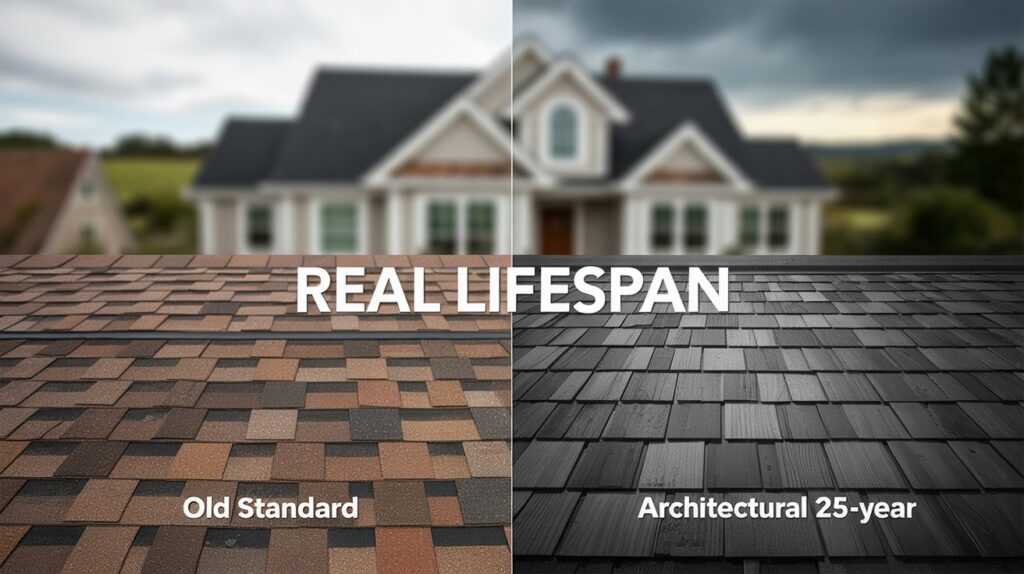
How Long Will It Actually Last? (Honest Timeline)
As a general expectation for quality products with good prep, many spot repairs last several years, and some last longer. I plan inspections yearly because metal roofs reward early maintenance.
Factors That Affect Sealant Lifespan
You will influence lifespan with these variables:
- Sun exposure: South-facing roofs punish weak UV resistance.
- Temperature swings: Expansion and contraction of shear rigid beads.
- Joint movement: Seams move more than trim overlaps.
- Surface prep: Clean, dry surfaces extend life dramatically.
- Water load: Ponding, snow, and wind-driven rain accelerate failure.
Warning Signs Your Sealant Is Failing
You can catch failure early when you look for:
- cracking or crazing on the bead surface
- peeling edges where the bead lifts
- chalking, shrinking, or gaps forming
- rust bleeding from beneath a joint
- recurring moisture in the same interior area after storms
You will save money when you treat these as early alerts and reseal small sections before water damages insulation or framing.
Questions Homeowners Ask Often
Can I apply metal roof sealant in winter?
You can apply some products in cold weather, and you will struggle with adhesion and cure when the surface stays cold, damp, or frosty. You should read the label for the minimum application temperature and cure time. I schedule sealing on a dry day when the roof warms above the minimum and stays dry long enough to cure.
Do I need to remove the old sealant first?
You should remove loose, failing sealant because new sealant bonds to stable material. I usually scrape peeling sections, clean thoroughly, and feather the edges. You can leave well-adhered sealant in place when the product supports reapplication, and the surface stays sound.
How much will a professional application cost?
Pros usually price by repair complexity, access, and how many details need attention. You will pay more when the roof pitch increases, when penetrations multiply, and when the crew needs lift access. I advise you to request a scope that lists fastener replacement, flashing adjustments, and sealant type so you can compare bids accurately.
Can sealant fix rust on my metal roof?
Sealant can block water at a joint that feeds rust, and sealant cannot reverse active corrosion. You should remove loose rust, treat or prime as recommended, and seal the joint only after the surface stabilizes. You will need panel replacement when rust creates holes or structural thinning.
Your Action Plan for Metal Roof Sealant (Next 30 Days)
I like a short plan because it turns worry into steps you can finish.
Week 1: Inspect & Diagnose
You walk the interior first and mark stains. You inspect the roof on a dry day and trace up-slope from the stain area. You take photos of seams, fasteners, and penetrations so you track changes.
Week 2: Choose Your Sealant
You match sealant type to the joint:
- You choose butyl tape for compressed laps and trim.
- You choose polyurethane for flexible exterior beads at flashing gaps.
- You choose acrylic for paintable, lower-movement areas where allowed.
- You choose silicone for select UV/wet areas when compatibility fits.
You buy enough product for one complete repair cycle because half-finished sealing invites leaks.
Week 3: Prepare & Apply
You clean, dry, and de-rust the repair area. You replace bad fasteners and cracked washers. You apply sealant in a controlled bead, tool it, and keep the joint neat. I use a simple finishing habit: I remove tape before the sealant skins so the edge stays clean.
Week 4: Monitor & Maintain
You check after the next heavy rain. You look for new water tracks, and you confirm the interior stays dry. You schedule a yearly inspection because metal roofs reward small maintenance and punish neglect.
Closing Note from the Jobsite
You can solve most metal roof leak headaches when you slow down, diagnose the entry point, and choose sealant like you choose any building material: for the job conditions and the details that carry water.
I have spent 12+ years in residential remodeling, and I still treat every leak as a lesson in how water thinks.
You will get the best outcome when you seal with intention, keep repairs targeted, and respect the roof system under your feet.