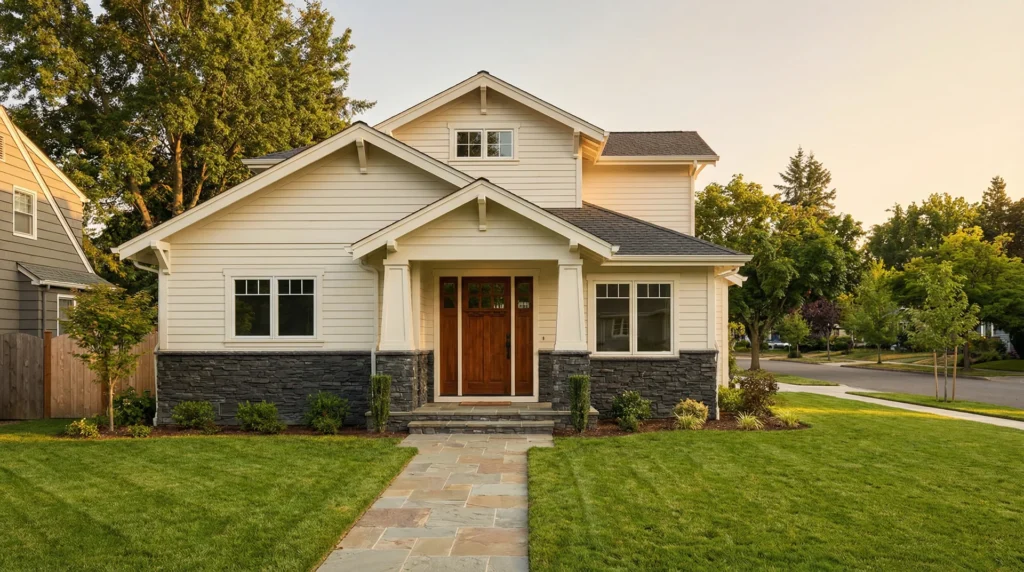
Stone veneer is the material I see done wrong more often than anything else in residential exterior construction. Not because it is inherently flawed. When it is done right, it is extraordinary. A stone veneer entry facade or foundation band changes a home’s street presence in a way no other cladding material matches.
But the gap between a well-executed installation and a poorly executed one is wider than with any other material I work with. And unlike most siding failures that announce themselves through visible cracks or warping, stone veneer failures hide completely behind an intact, beautiful-looking surface while water destroys framing, sheathing, and insulation for months before anyone notices.
I have been called in on remediation projects where a wall that looked immaculate from outside contained sheathing so saturated it crumbled under light pressure. The veneer itself was fine. The installation behind it was not.
This guide covers which type of stone veneer is right for your home, where it performs best, what correct installation actually requires, how it compares to alternatives like vinyl siding, and how to vet a contractor before you write any deposit check.
| Quick answer: Manufactured stone veneer costs $11 to $22 per square foot installed, lasts 25 to 75 years with proper installation, and delivers a 208% return on investment nationally per the 2025 Zonda Cost vs. Value Report. It is the highest-returning exterior remodeling project in the country when used as an accent application. Natural stone veneer costs $23 to $46 per square foot installed and lasts 50 to 100 years. Both types fail in predictable, expensive ways when the water management system behind them is installed incorrectly. |
The 4 Types of Stone Veneer Siding
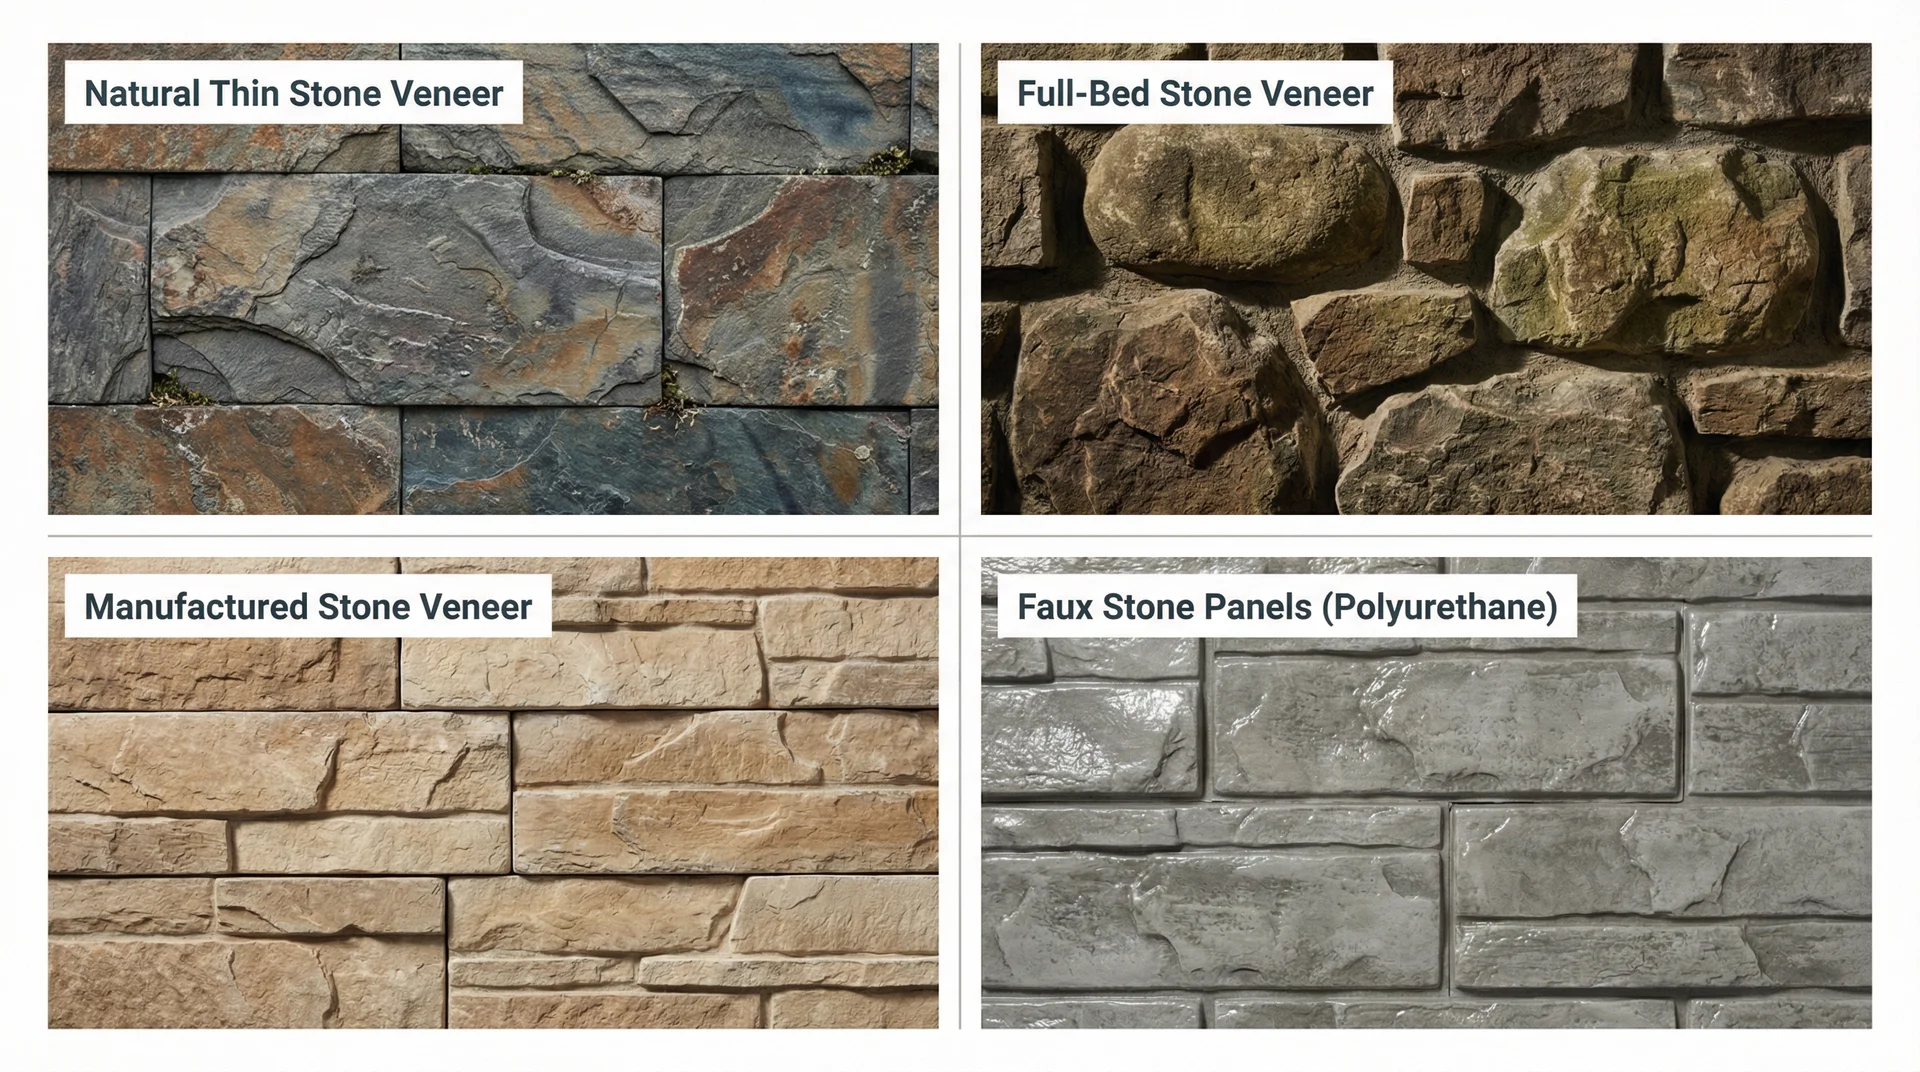
Most homeowners search for “stone veneer siding” and assume there is one product being described. There are actually four distinct product categories, each made differently, installed differently, and priced differently.
Natural Thin Stone Veneer
Quarried from the earth, granite, limestone, slate, sandstone, and fieldstone are mechanically sliced to approximately 1 to 1.5 inches thick. The back face is cut flat to allow mortar-setting against a prepared wall substrate. It is real stone, with the full color depth, texture variation, and visual permanence that no manufactured product fully replicates.
The weight of natural stone, even in thin veneer form, requires structural consideration. Standard wood-frame residential walls are not always engineered to carry the load of full natural stone cladding without supplemental foundation support adjacent to the home’s existing foundation. Before specifying natural thin stone for a full exterior application, a structural assessment is required.
- Material cost: $4 to $21 per square foot
- Installed cost: $15 to $46 per square foot, depending on stone species, complexity, and regional labor
- Lifespan: 50 to 100+ years with appropriate installation and periodic repointing of mortar joints
Full-Bed Stone Veneer
Full-bed uses natural stone at its full quarried thickness, typically 3.5 to 6 inches, set in mortar. This is the closest residential option to the construction methodology of historic stone buildings.
Weight requirements are significant. Most residential wood-frame homes cannot accommodate full-bed stone veneer without substantial structural modification. Full-bed installations are most appropriate for masonry-substrate homes or projects where a structural stone base is part of the original building design.
Installed cost: $30 to $48 per square foot
Manufactured Stone Veneer (Cultured Stone)
Made from lightweight Portland cement mixed with aggregates, iron oxide pigments, and lightweight materials, poured into molds taken from actual natural stones. Approximately four times lighter than full natural stone. Brands like Cultured Stone (Owens Corning), Eldorado Stone, Dutch Quality Stone, and Versetta Stone define this market.
Modern manufactured stone veneer is convincing. At street-level viewing distance, and in many cases at close range, it is not visually distinguishable from natural stone to untrained eyes. The difference becomes apparent only on very close inspection of cut edges and back faces.
- Material cost: $4 to $20 per square foot
- Installed cost: $11 to $35 per square foot
- Lifespan: 25 to 75 years, depending on installation quality and maintenance
Faux Stone Panels (Polyurethane)
Made from high-density polyurethane foam cast in stone-profile molds and coated with a textured paint system. Lightest, least expensive, and easiest to install of all stone veneer categories.
Also, the most visually limited: close inspection typically reveals the synthetic nature. Appropriate for accent applications, interior feature walls, and areas where weight is a structural constraint. For serious exterior applications where long-term performance and visual credibility both matter, polyurethane panels are not the correct specification.
Installed cost: $13 to $24 per square foot
Stone Veneer Cost: Full Breakdown by Project Type
The installed cost ranges in most comparison articles obscure meaningful distinctions. Here is a more useful breakdown by project scope.
| Project Type | Typical Cost |
|---|---|
| Window or garage door accent | $400 to $2,000 |
| Entry facade or archway | $1,500 to $5,000 |
| Front of house, lower third | $2,000 to $9,000 |
| Foundation band, full perimeter | $3,000 to $13,500 |
| Chimney surround | $1,000 to $6,000 |
| Full exterior coverage | $15,000 to $90,000 |
| Product Type | Material Cost | Installed Cost |
|---|---|---|
| Polyurethane faux panels | $4 to $8/sq ft | $13 to $24/sq ft |
| Manufactured stone veneer (standard) | $4 to $12/sq ft | $11 to $22/sq ft |
| Manufactured stone veneer (premium) | $10 to $20/sq ft | $18 to $35/sq ft |
| Natural thin stone veneer | $4 to $21/sq ft | $15 to $46/sq ft |
| Limestone veneer | $4 to $19/sq ft | $14 to $43/sq ft |
| Granite veneer | $8 to $22/sq ft | $18 to $46/sq ft |
What pushes costs higher within each category?
Project complexity is the biggest driver. Multi-story applications, architectural features with curves or arched openings, and projects with many window and door transitions all increase labor time significantly. Stone veneer around an arched entry with a keystone requires pattern cutting, fitting, and individual adjustment that adds hours of mason time compared to a simple rectangular band on a flat wall.
Premium products cost more for good reason. Within manufactured stone veneer, entry-level products run $4 to $8 per square foot for materials. Premium products from Eldorado Stone and Cultured Stone, with deeper color integration, more sophisticated surface textures, and better warranty coverage, run $12 to $20 per square foot. The visual difference between entry-level and premium manufactured stone is noticeable.
Drainage system specification is the cost line item most tempting to cut, and the most expensive to have skipped. A code-minimum installation costs less than a full rainscreen assembly with a drainage mat, correctly lapped weather-resistive barrier, and complete flashing at all transitions. The installation that costs $14 per square foot without a drainage mat and the installation that costs $16 per square foot with a proper drainage mat are not equivalent value propositions. Only one of them is likely to perform correctly over its full claimed lifespan.
Regional labor rates vary substantially by geography. In high-construction-activity markets with competitive mason demand, stone veneer installation labor runs $10 to $24 per square foot. In markets with less specialized mason demand, the same installation labor runs $6 to $12 per square foot.
The ROI Reality of Stone Veneer
According to the 2025 Zonda Cost vs. Value Report, manufactured stone veneer delivers a 208% return on investment nationally, ranking as the third-highest returning remodeling project available, behind only garage door replacement at 268% and steel entry door replacement at 216%. In the West South Central region, the ROI reaches 242.5%, and in the Pacific region, it hits 231.7%.
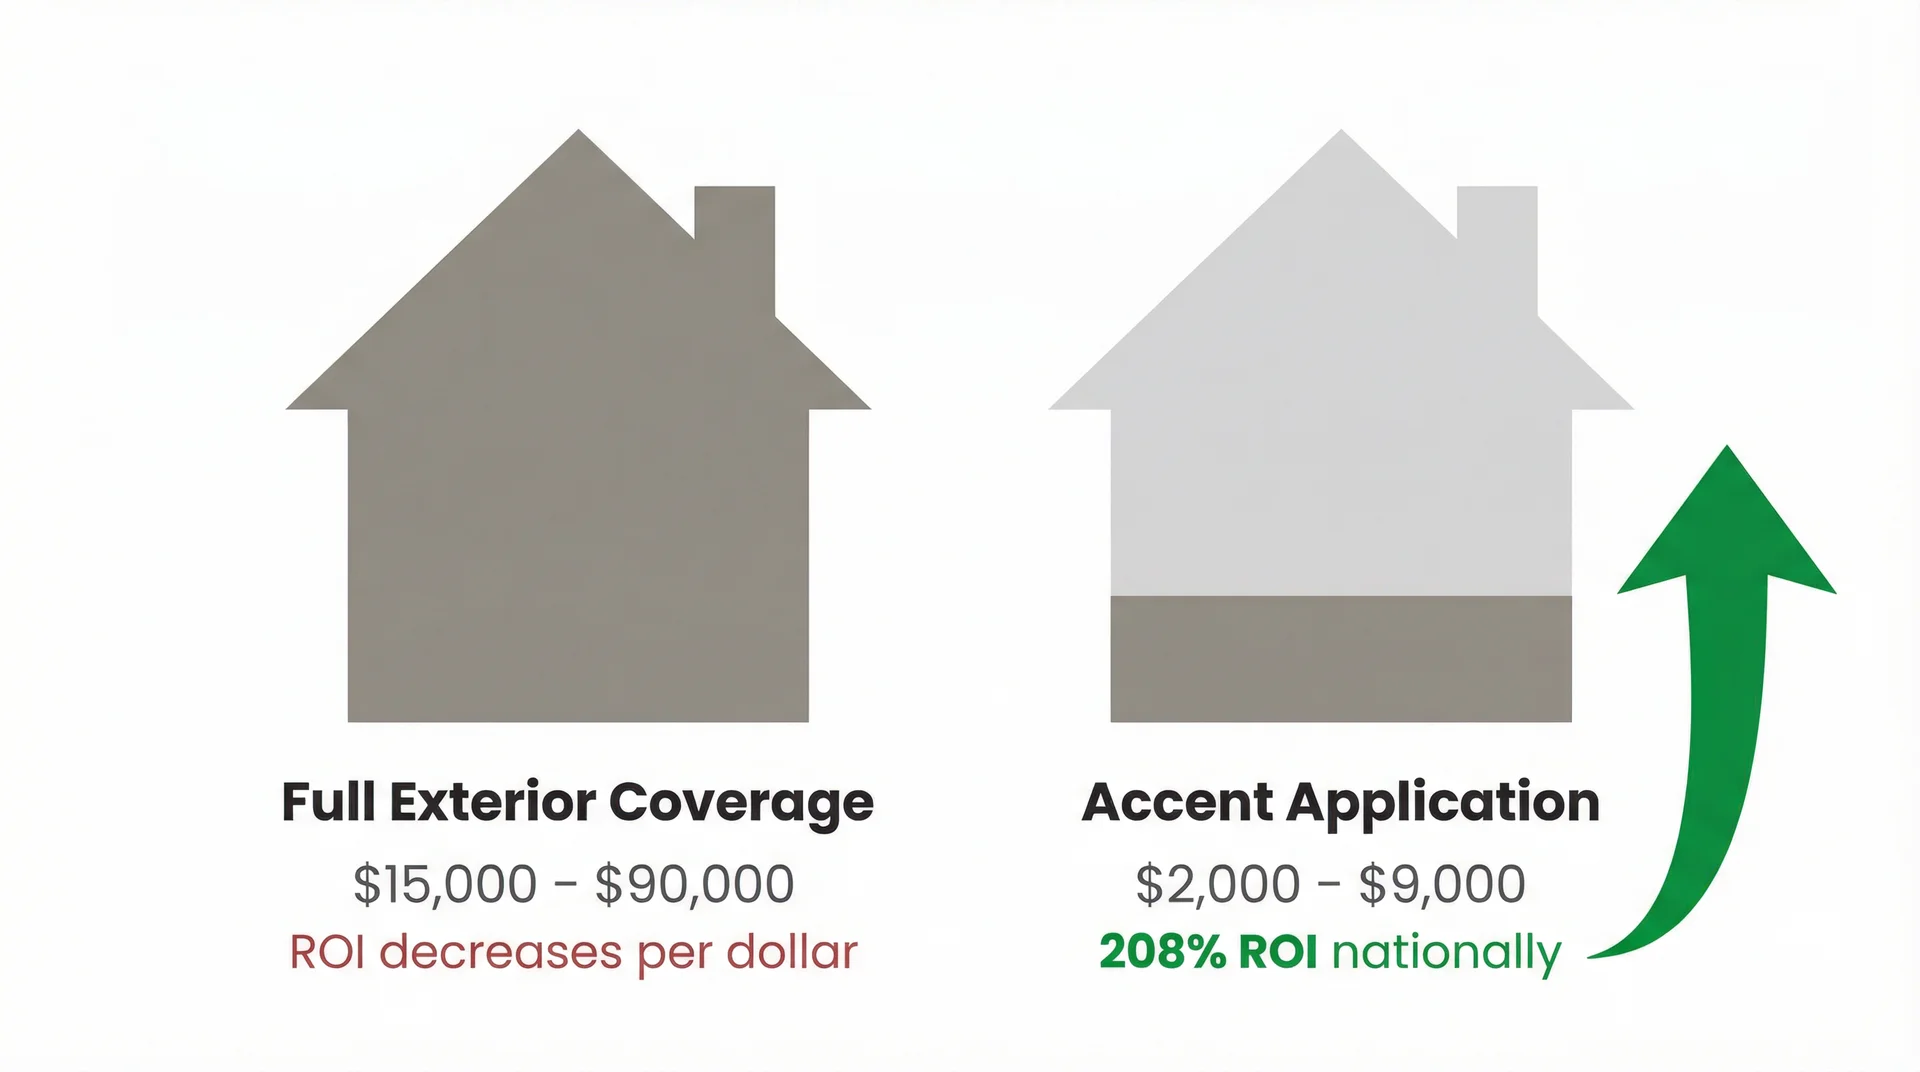
This figure reflects a specific project scope: replacing a 300-square-foot continuous band of vinyl siding from the bottom third of a home’s street-facing facade with manufactured stone veneer, including sills, corners, an address block, and an outlined entry archway. It is not a whole-home installation. It is a targeted accent application.
This is exactly how I recommend stone veneer to almost every client who asks about it. A focused accent on the most visible section of the front facade delivers the full visual impact at a fraction of the cost of full-exterior coverage, and it returns more than its cost at resale in most US markets.
Full-exterior stone veneer coverage costs $15,000 to $90,000, depending on home size and stone selection. At that scale, the per-project ROI curve flattens. The curb appeal premium is real, but the return per dollar invested decreases as the total project cost scales up.
For most homeowners, the strategic approach is targeted accent application, entry facade, foundation band, chimney surround, gable accent, rather than full-exterior coverage.
Stone Veneer vs. Vinyl Siding: The Honest Comparison
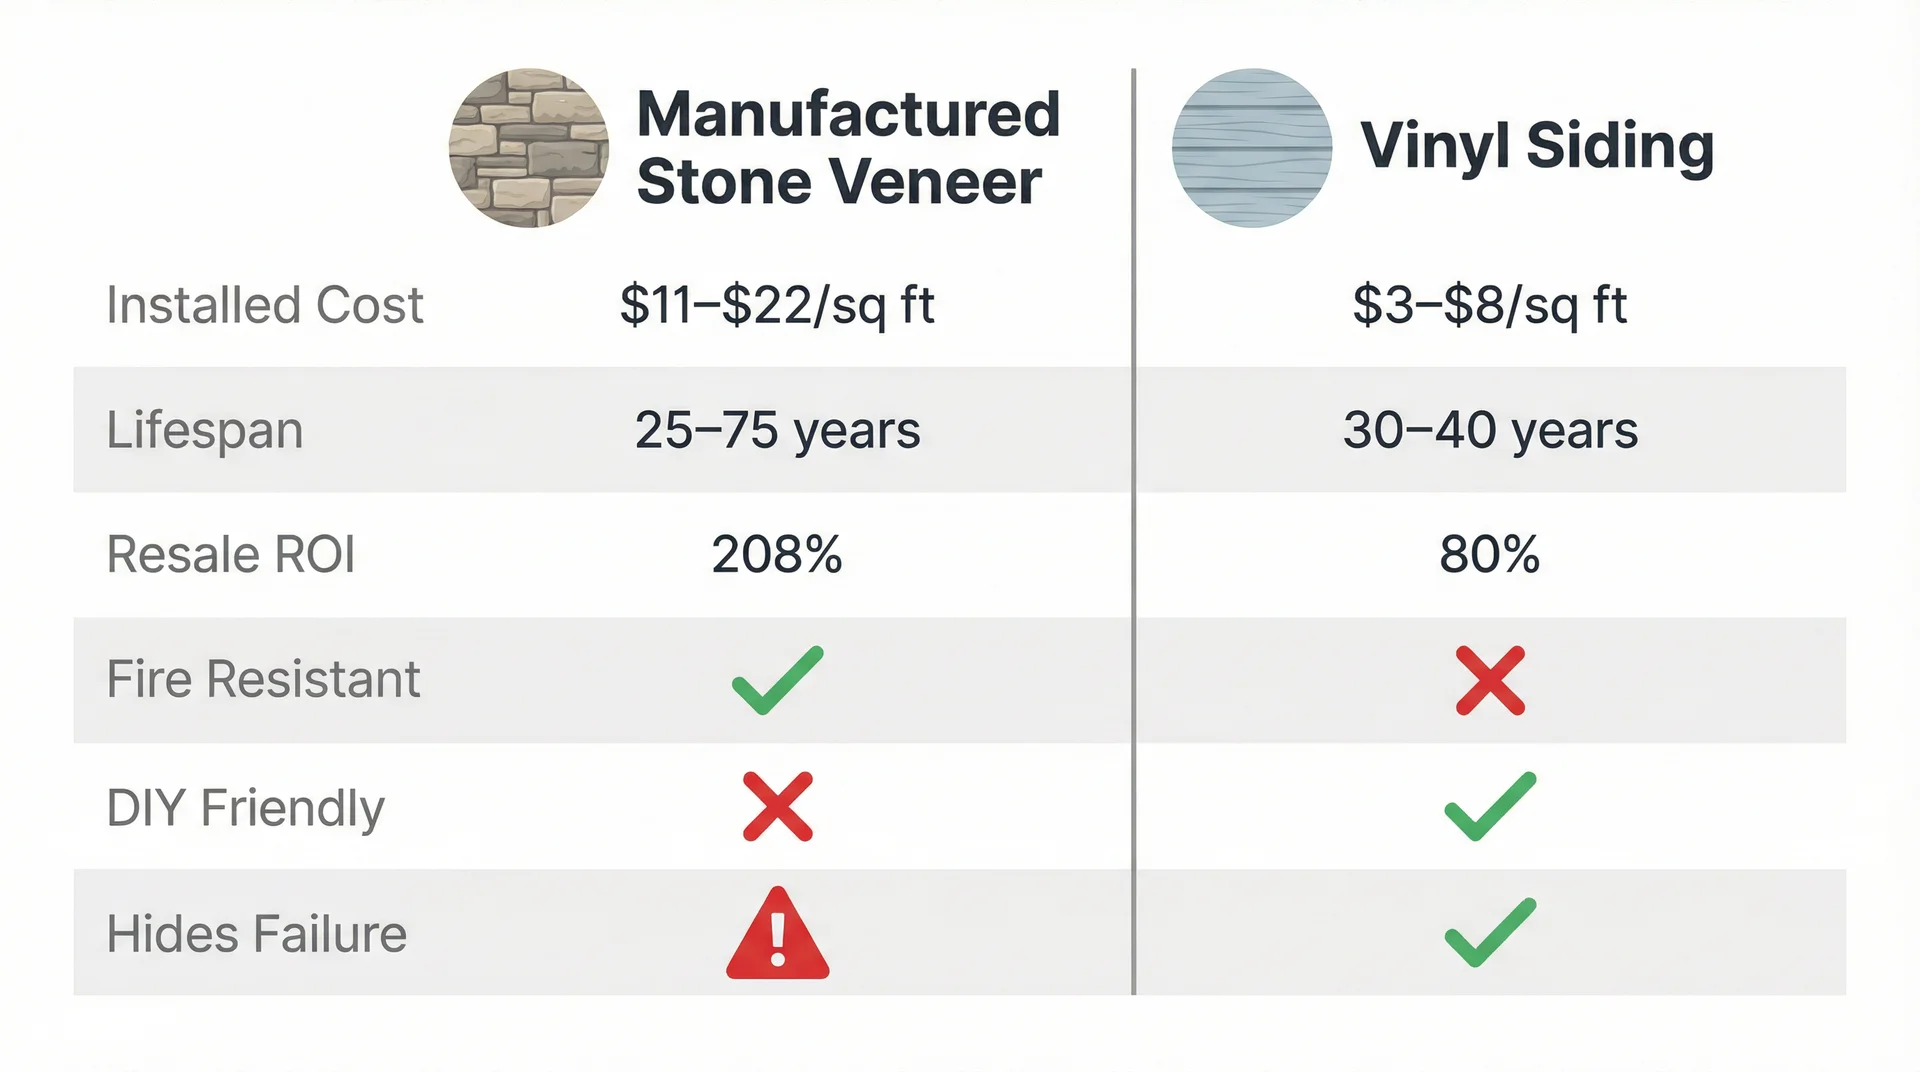
This is a question I get regularly, and the answer depends entirely on what you are optimizing for.
Vinyl siding wins on upfront cost ($3 to $8 per square foot installed versus $11 to $22 for manufactured stone), installation speed, and ease of DIY. Vinyl is lightweight, panel-based, and can be installed without specialized masonry skills or tools. It also requires almost zero maintenance, just an occasional rinse.
Stone veneer wins on visual impact, resale value, durability, and fire resistance. Manufactured stone veneer lasts 25 to 75 years versus 30 to 40 years for vinyl. Stone does not warp in heat, go brittle in cold, or fade the way vinyl does over time. And no vinyl siding product comes close to a 208% ROI at resale.
The tradeoff worth understanding: vinyl failure is visible and simple to fix. Stone veneer failure hides, which is what makes installation quality so much more consequential. A slightly careless vinyl installer creates an installation that looks imperfect. A slightly careless stone veneer installer creates an installation that can fail structurally while looking perfect from the outside for two or three years.
My recommendation for most homeowners on a realistic budget: manufactured stone veneer as a lower-third accent on the front elevation, with vinyl or fiber cement siding on the upper portion and remaining elevations. You get most of the visual impact at a fraction of the cost of full-exterior stone coverage, and the transition detail between the two materials, a horizontal Z-flashing profile, is clean and code-compliant.
The Water Management Problem: Why Installation Quality Is Everything
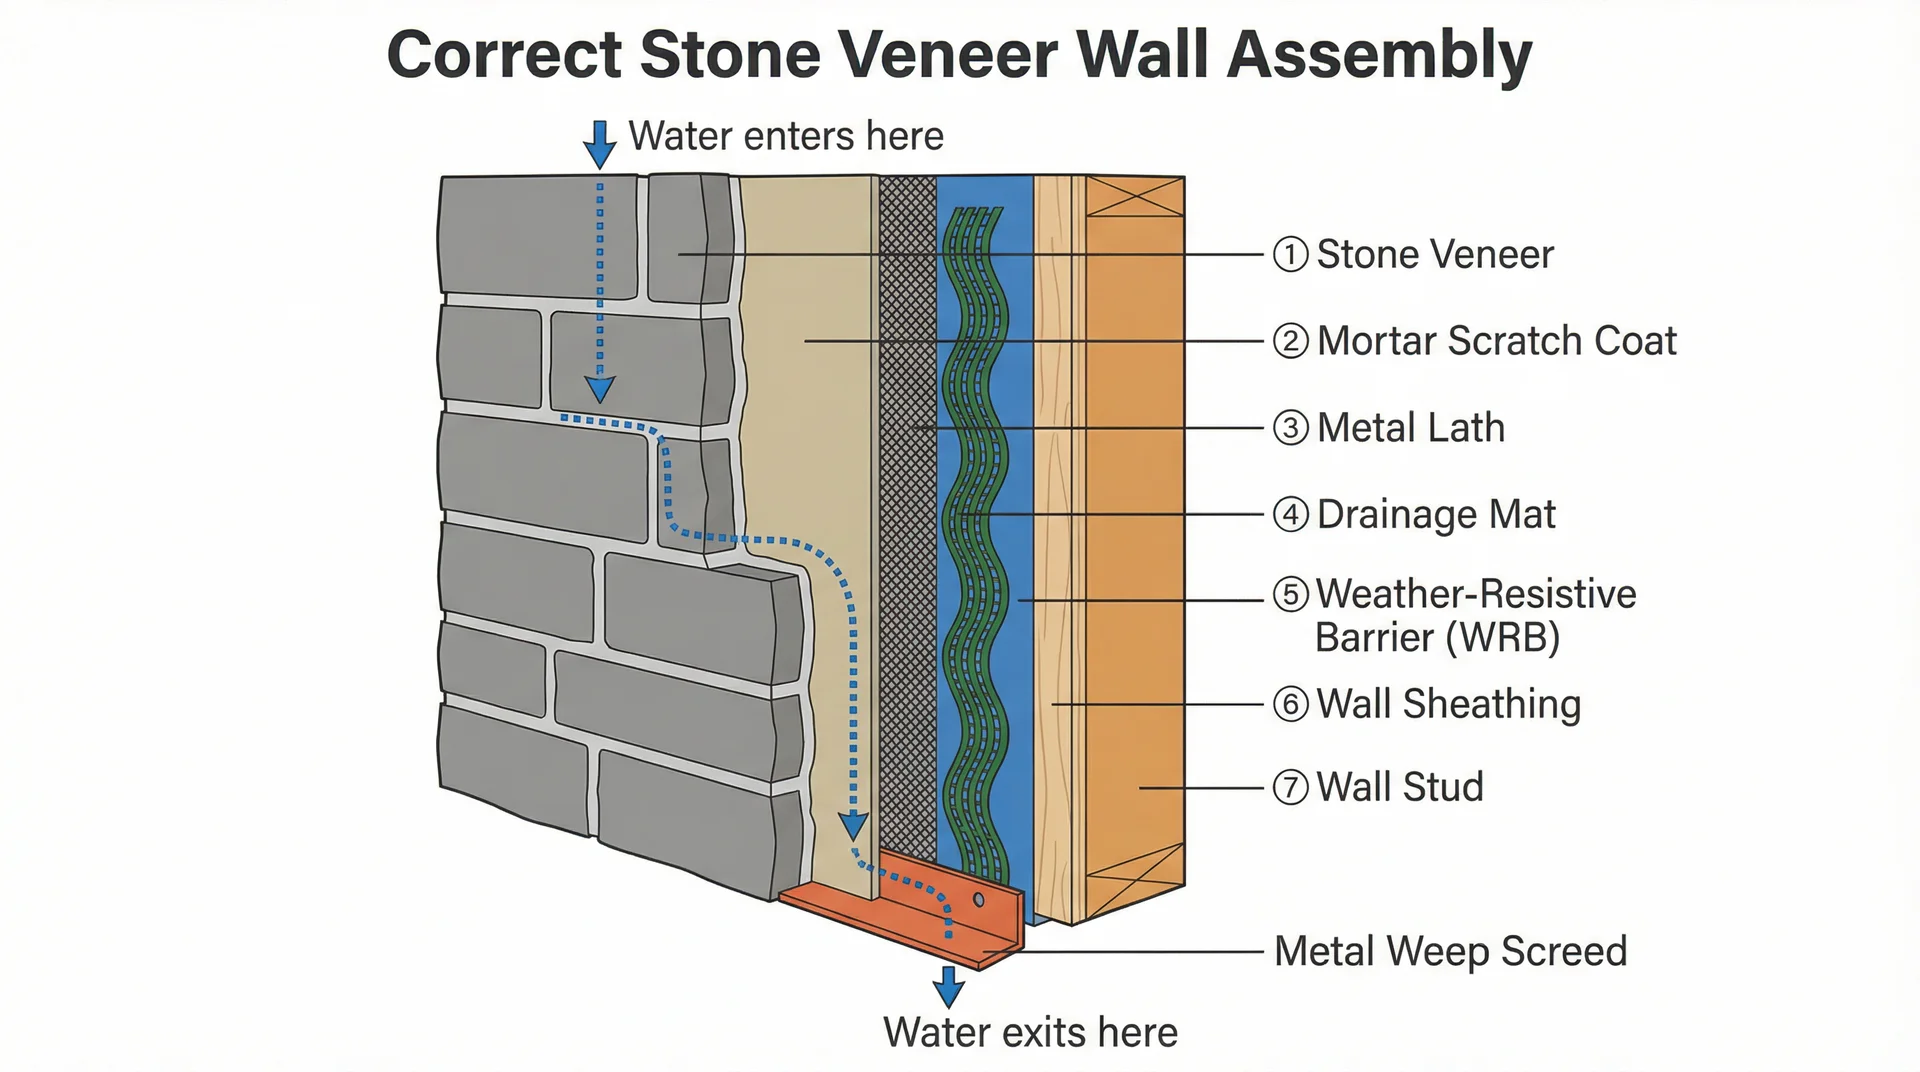
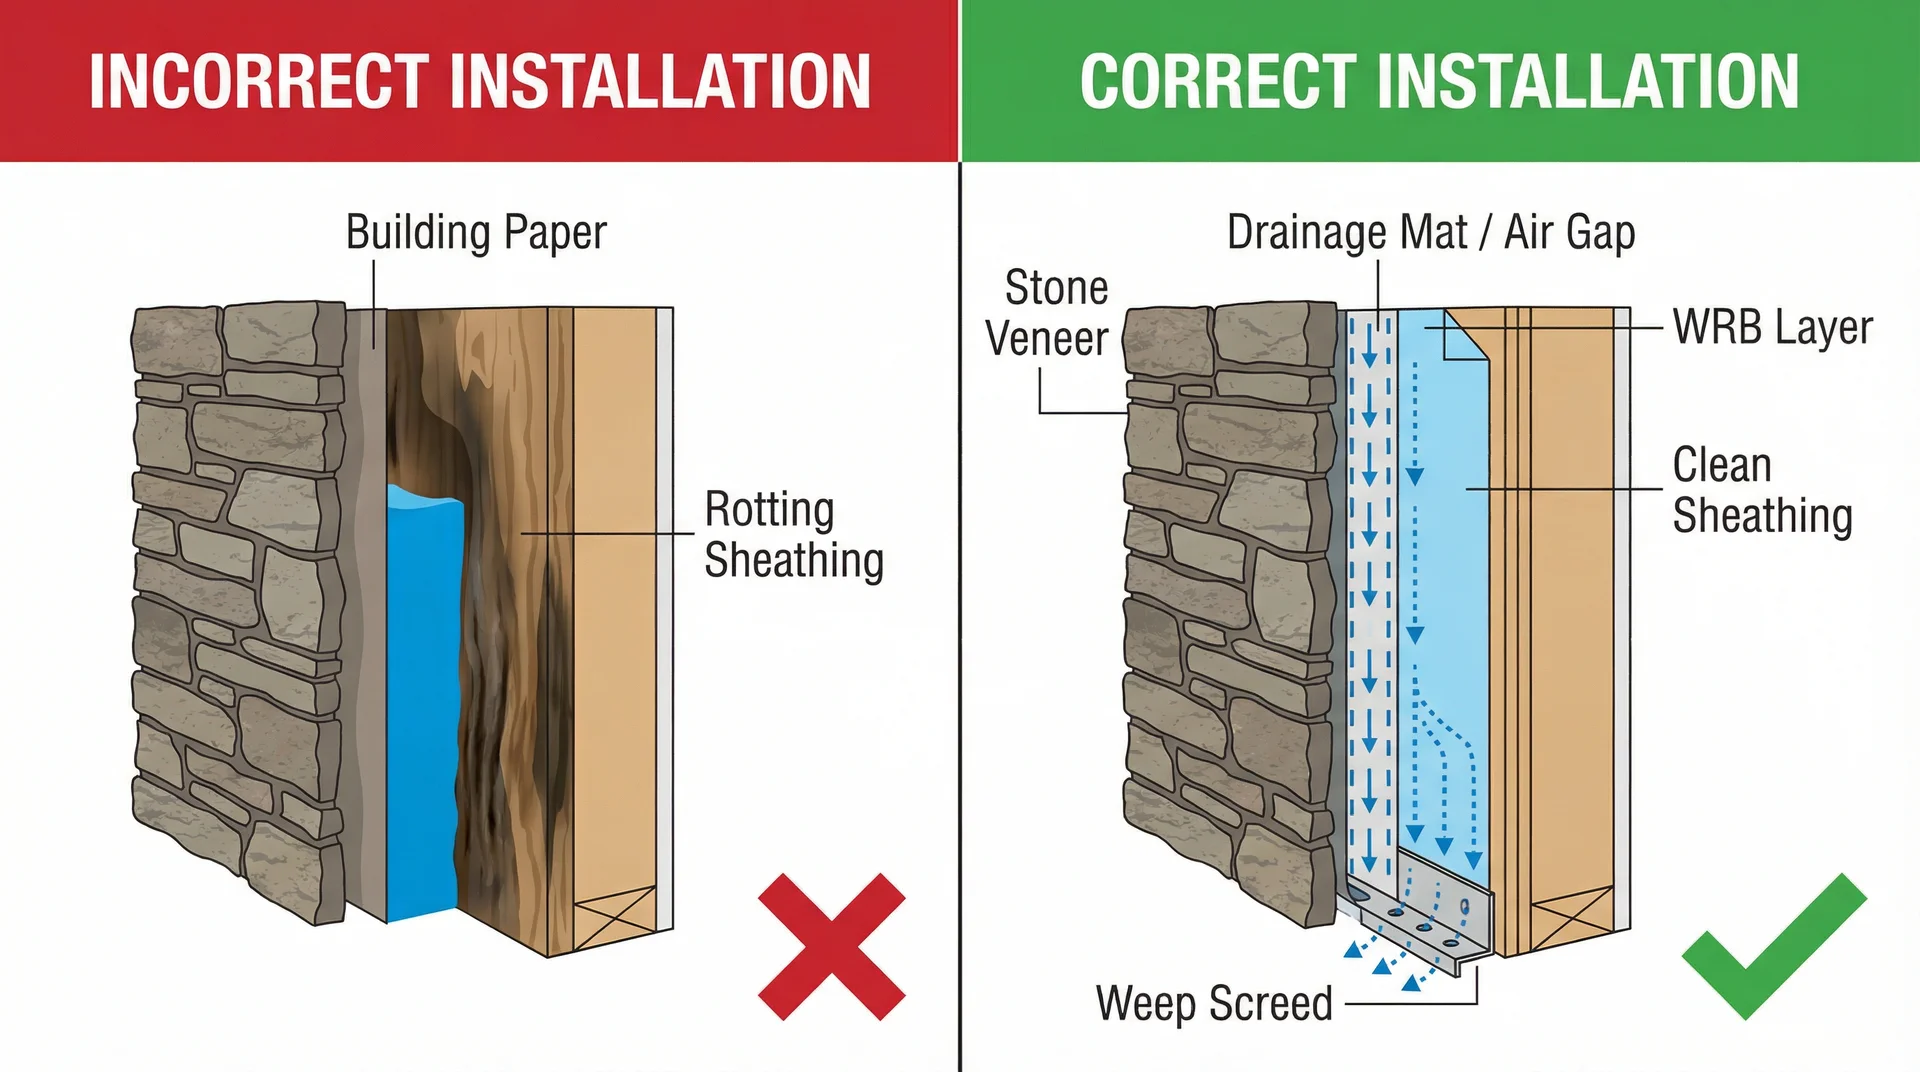
Stone veneer is not a waterproof material. Neither natural stone nor the Portland cement matrix of manufactured stone is impermeable. Water penetrates through the face of the material, through mortar joints, and through any imperfection in caulk and flashing at transitions. This is normal and expected. The system is not designed to keep water out of the veneer layer. It is designed to manage where that water goes once it enters.
When the water management system is correctly installed, water that enters the veneer drains down and out through weep screeds at the base of the wall, never reaching the structural sheathing. When it is incorrectly installed, missing components, improperly sequenced, or poorly detailed at transitions, that water has nowhere to go. It accumulates against the wood sheathing, where it creates rot, mold, and structural damage that progresses invisibly behind the stone surface.
Required Components of a Correct Stone Veneer Installation
Weather-resistive barrier (WRB). A continuous, properly lapped WRB must cover the entire wall sheathing area receiving stone veneer. This layer, typically a housewrap product like Tyvek or a self-adhering membrane, allows vapor to move outward while blocking liquid water from penetrating inward. Reverse-lapped or improperly sequenced WRB, where upper layers tuck under lower layers rather than over them, is among the most common and consequential installation defects I inspect on failed stone veneer systems.
Drainage mat. A drainage mat installed between the WRB and the metal lath creates a 3/8-inch to 1-inch air gap behind the stone. This gap gives water a physical pathway to drain by gravity to the weep screed at the wall base, and allows airflow that helps the wall assembly dry after rain events. Code minimum installation does not require a drainage mat in all jurisdictions, but building science research has established clearly that drainage mats dramatically outperform code-minimum two-layer paper installations in moisture management. A 2024 Buechel Stone lab test comparing code-minimum wall assemblies to rainscreen assemblies showed that code-minimum layers stayed wet for days at moisture levels that promote rot, while rainscreen assemblies stayed essentially dry under the same conditions. I specify drainage mats on every stone veneer project I supervise, in every climate.
Metal lath. Galvanized or stainless steel expanded metal lath, fastened through the drainage mat and WRB into wall studs with appropriate corrosion-resistant fasteners, provides the mechanical key for the mortar scratch coat. The lath must be completely embedded in the scratch coat.
Weep screed at the base. A metal weep screed at the base of each stone veneer section provides the exit point for water that drains down through the wall assembly. It also establishes the minimum clearance from finished grade, typically 4 to 6 inches, that keeps the bottom edge of the veneer from wicking soil moisture. Weep screeds that are sealed or clogged with mortar during installation eliminate the drainage pathway that the entire system depends on.
Flashing at all transitions. Every horizontal interruption in the wall plane, the top edge of the stone veneer band, all window and door heads, and roof-to-wall intersections, requires corrosion-resistant metal flashing integrated with the WRB. The flashing must be installed under the WRB at the top and over it at the bottom, creating a continuous water-shedding path. Missing kickout flashing at roof-to-wall intersections is one of the most reliably destructive omissions I see in field inspections. Without kickout flashing, water that runs off a roof slope channels directly into the wall assembly behind the stone rather than being diverted away from it.
Caulk all cladding transitions. Where manufactured stone veneer meets a different cladding material, vinyl siding above the stone band, fiber cement at gable ends, trim boards at window surrounds, the transition joint must be sealed with flexible, paintable exterior caulk. Without caulk at these joints, water runs directly into the gap and behind both materials simultaneously.
What Failed Installations Look Like, and When the Evidence Appears
The most dangerous aspect of stone veneer water management failure is its invisibility. Stone veneer looks exactly the same whether the wall assembly behind it is dry and sound or wet and actively deteriorating.
Evidence of failure typically becomes detectable only when the damage has progressed to the interior wall surface: interior paint peeling, a musty smell in rooms adjacent to stone-clad walls, visible mold at baseboard level, or soft spots in interior drywall. By that point, the remediation scope is substantial. Removing stone veneer to access and repair damaged sheathing destroys the veneer in most cases, requiring full reinstallation of the stone in addition to the structural repair work beneath it.
Water damage repair in stone veneer systems costs $30 to $50 per square foot for the repair work alone, not including stone removal and reinstallation. A moderate-scale remediation on a 300 to 400 square foot affected area easily reaches $15,000 to $25,000.
Early warning signs worth watching for:
- White powdery deposits (efflorescence) on the stone surface, mineral salts carried to the surface by migrating moisture
- Dark staining or discoloration of mortar joints that persists after rain has dried
- Soft or spongy feeling on adjacent interior walls
- Musty odor in rooms adjacent to stone-clad exterior walls
- Mortar joint cracking, particularly at window corners and horizontal transitions
Climate Considerations
Where you live shapes how stone veneer performs and what maintenance it requires. Most guides skip this entirely.
Freeze-thaw climates (Midwest, Northeast, Mountain West): This is where installation quality matters most. Water that enters the veneer and has nowhere to drain will freeze in winter. When it freezes, it expands, and that expansion behind the stone pieces will pop them off the wall. A proper drainage mat and correctly lapped WRB are non-negotiable here. Applying a breathable penetrating sealer before winter and reapplying every five to seven years significantly reduces water absorption and freeze-thaw damage.
Hot, humid climates (Southeast, Gulf Coast): The primary concern shifts from freeze-thaw to persistent moisture and mold. Drainage mats earn their cost several times over in these climates because the wall assembly must be able to dry quickly after frequent rain events. Stone that stays wet for extended periods in humid conditions develops efflorescence and mortar staining faster than in drier climates.
Dry climates (Southwest, Pacific Coast inland): Thermal expansion and UV exposure are the dominant concerns. Mortar joints on south-facing walls in high-UV environments may need inspection and repointing earlier than typical. Color fading is more pronounced on west- and south-facing elevations, which makes color-through manufactured stone products worth the premium over surface-colored products in these regions.
Stone Veneer: DIY vs. Professional Installation
For interior applications, a small fireplace surround, a kitchen backsplash, an interior feature wall, a competent DIYer with renovation experience can manage mortar-set stone veneer. The stakes around water damage are lower, and there is time to work carefully.
For exterior applications, professional installation is the right call in almost every case. The consequences of getting the WRB sequencing, flashing, and weep screed details wrong are too expensive to discover two or three years later. Mortarless panel systems, Versetta Stone being the most widely available, reduce the skill requirement significantly for exterior applications and are a reasonable DIY option on single-story walls with simple geometry.
If you hire the work out, the mason’s skill level matters more for stone veneer than for any other residential cladding. Mortar-set stone veneer requires individual piece fitting, pattern management, and mortar joint work that exposes inconsistency in technique clearly. Ask to see completed projects before you commit to a contractor, and prioritize projects that are at least three years old.
Stone Veneer Profiles and Styles
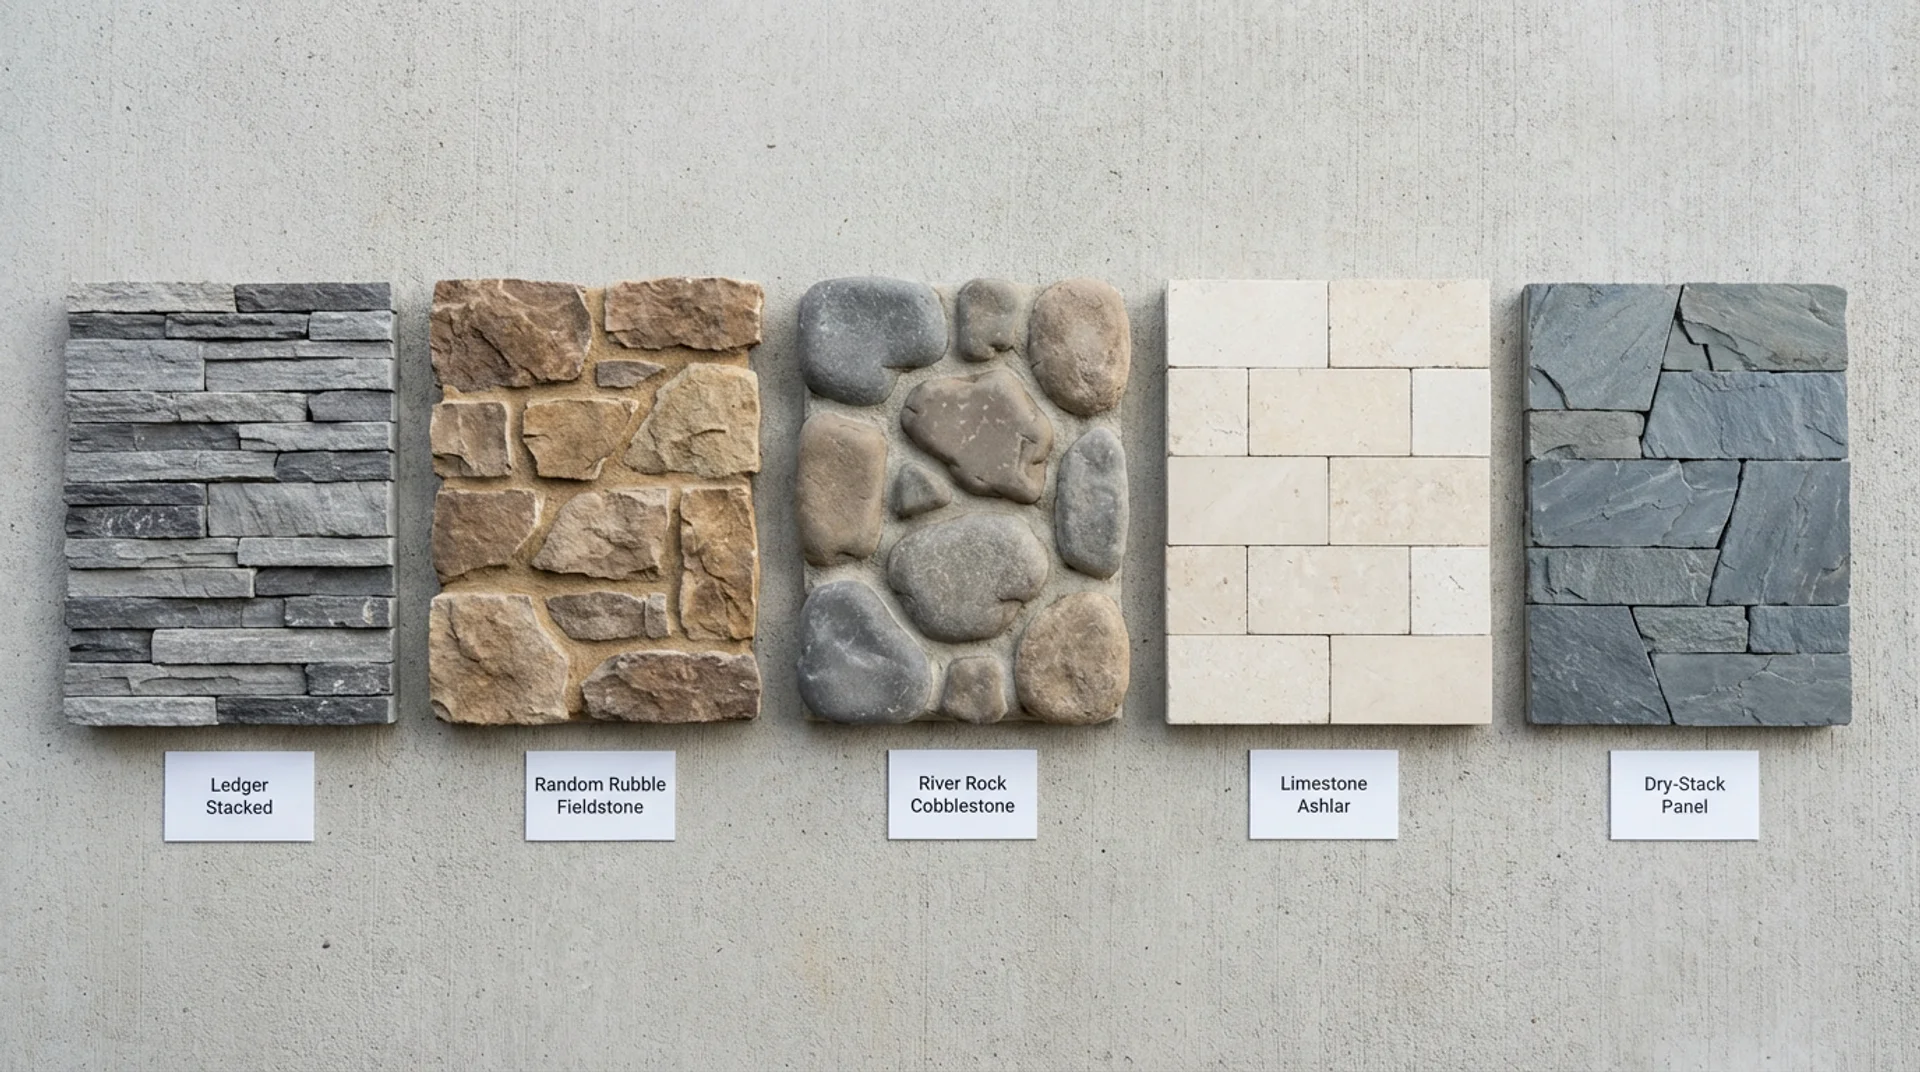
Ledger Stone / Stacked Stone: Horizontal bands of thin, elongated stone pieces in tight, consistent courses. Clean horizontal lines with minimal mortar joint visibility. The dominant contemporary residential profile and the most commonly specified style in new construction and high-end renovation over the past decade. Works well on full-facade applications and as a foundation band.
Random Rubble / Fieldstone: Irregular, naturally-shaped stone pieces set in varied patterns with visible mortar joints. Rustic and organic in character. Appropriate for craftsman, colonial, and farmhouse architectural styles, where the handcrafted quality of fieldstone is contextually correct. More labor-intensive than dimensional profiles because each piece requires individual fitting.
River Rock / Cobblestone: Rounded, smooth-faced stones in a casual pattern with substantial mortar joint visibility. Strongly associated with Arts and Crafts and Bungalow architecture, particularly on column bases, porch piers, and foundation bands. Regionally characteristic in the Pacific Northwest and Mountain West.
Limestone and Ashlar: Dimensionally consistent rectangular stones in regular or coursed patterns with tight mortar joints. Formal and refined in character. Appropriate for traditional, colonial, and neoclassical architectural styles. Common in the Midwest and Southeast.
Dry-Stack (Mortarless) Panels: Several manufacturers offer panels with interlocking edges designed to install without visible mortar joints, creating the appearance of dry-stacked stone construction. Versetta Stone is the best-known example. Faster to install and less dependent on mortar skill. The key limitation: panel systems require a specific manufacturer’s drainage mat and flashing accessories. Mixing components from different manufacturers voids warranty coverage and creates compatibility risks.
Full Exterior vs. Accent Application: Which Makes More Financial Sense
Full exterior stone veneer coverage creates a home that commands attention on the street. It also costs $15,000 to $90,000, depending on home size and stone selection, and it creates the maximum possible water management risk surface area for an installer to get right. On a 2,000 square foot home, every transition, every window perimeter, every corner detail, and every elevation termination becomes a potential failure point.
Targeted accent application delivers most of the visual impact at 20% to 30% of the full exterior cost. The 2025 Zonda Cost vs. Value data supports this quantitatively: a 300 square foot accent application returning 208% is a dramatically better financial proposition than a full-exterior application, where the ROI per dollar invested decreases as project cost scales up.
The combination that consistently photographs best and performs best at resale in my experience: manufactured stone veneer as a foundation band or lower third on the street-facing elevation, combined with fiber cement or engineered wood lap siding on the upper portion and remaining elevations. This mixed-material approach creates depth and premium character without the risk of concentration and cost of full exterior stone coverage, and the transition detail between the two systems is clean, code-compliant, and provides a clear drainage break.
Maintenance Schedule
Stone veneer is low maintenance, not zero maintenance. Here is what the actual schedule looks like.
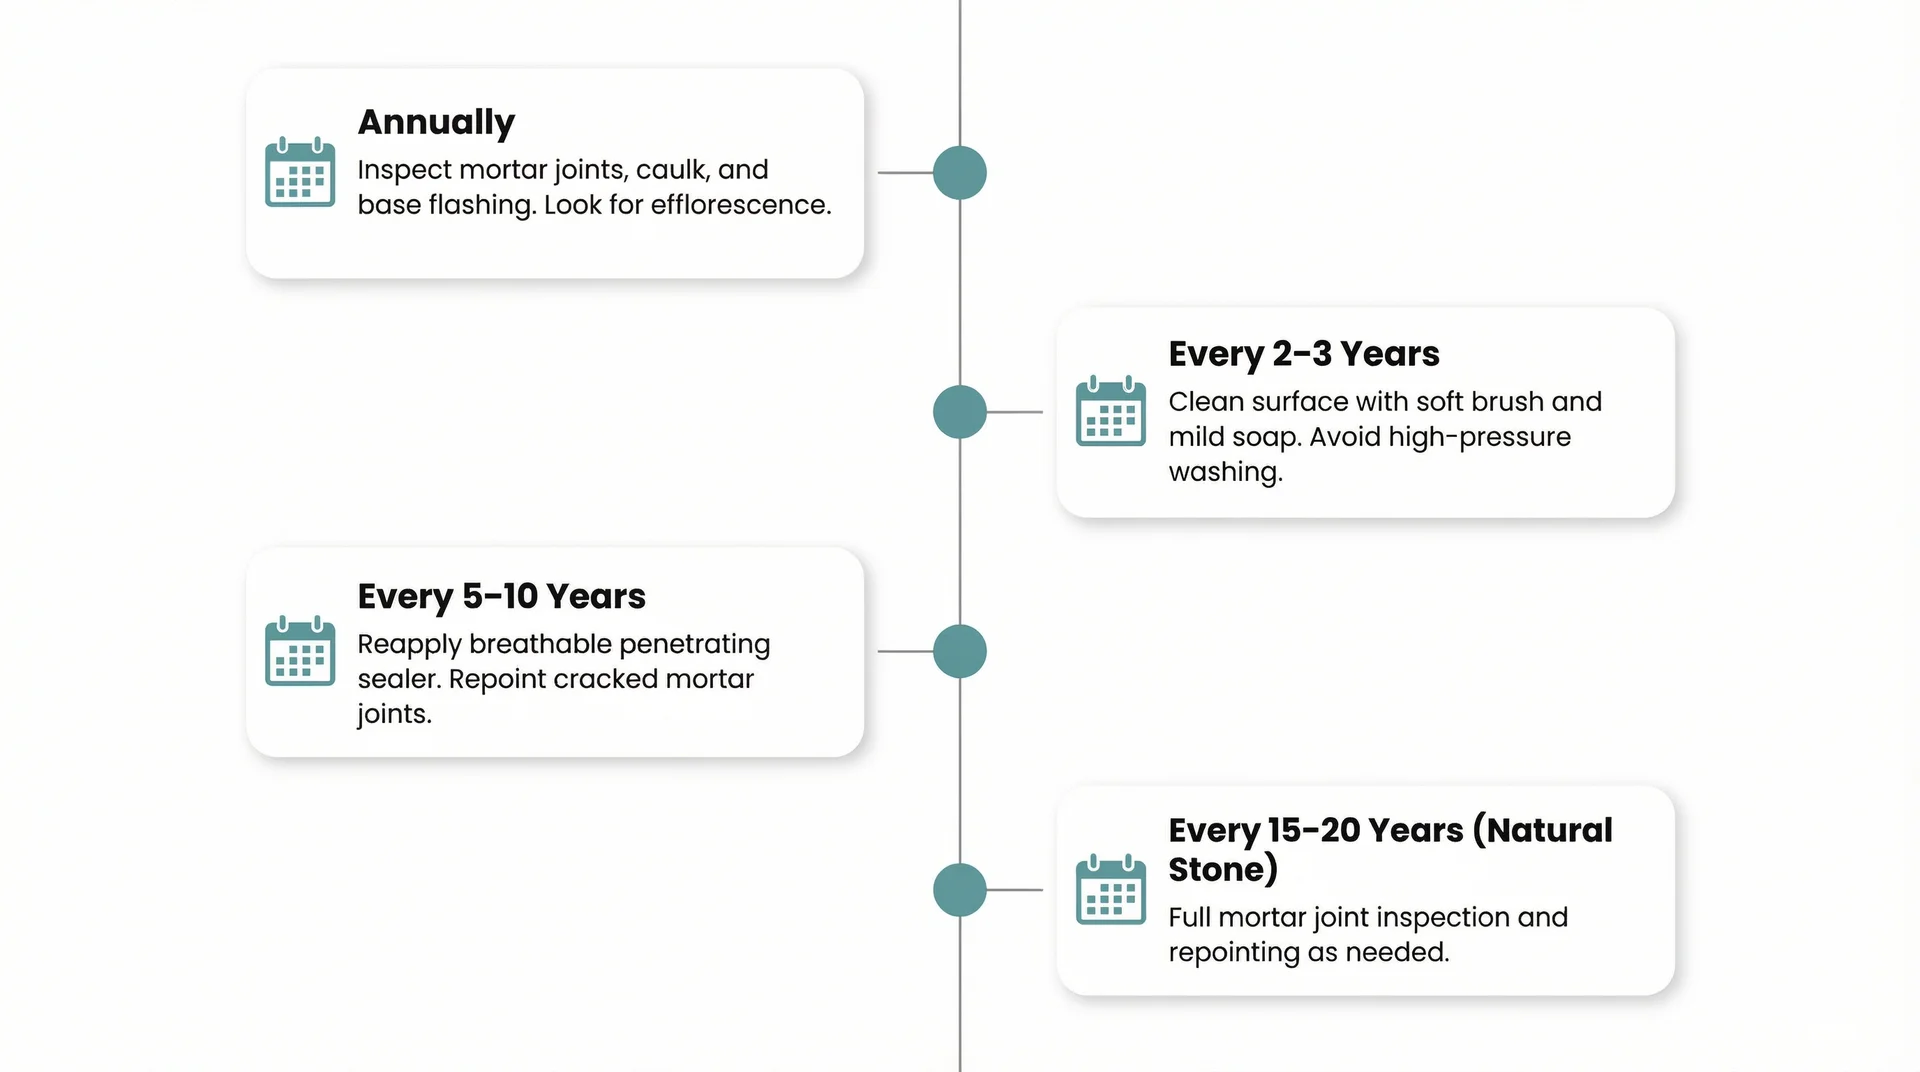
Annually: Visual inspection of mortar joints, caulk at transitions, and flashing at the base of the veneer. Check for efflorescence, which can signal a drainage issue worth investigating before it progresses into something expensive.
Every 2 to 3 years: Clean the veneer surface with water and a soft brush. Avoid high-pressure washing, which can damage mortar joints. Mild dish soap removes organic staining without harming the surface.
Every 5 to 10 years: Reapply penetrating breathable sealer on manufactured stone veneer, particularly in freeze-thaw or high-moisture climates. Inspect and repoint any mortar joints showing cracking or separation at window corners and horizontal transitions.
Every 15 to 20 years (natural stone): Full mortar joint inspection and repointing as needed.
One important note: do not use film-forming sealers on manufactured stone veneer. They trap vapor inside the material, which accelerates the same freeze-thaw damage they are meant to prevent. Only breathable penetrating sealers designed for Portland cement-based materials are appropriate.
How to Vet a Stone Veneer Installer Before You Sign Anything
Contractor selection matters more for stone veneer than for any other residential cladding material I work with. A vinyl or fiber cement installer who is slightly careless about expansion gaps creates an installation that looks imperfect. A stone veneer installer who skips the drainage mat, fails to flash window heads, or seals the weep screeds creates an installation that will fail structurally, invisibly, and expensively.
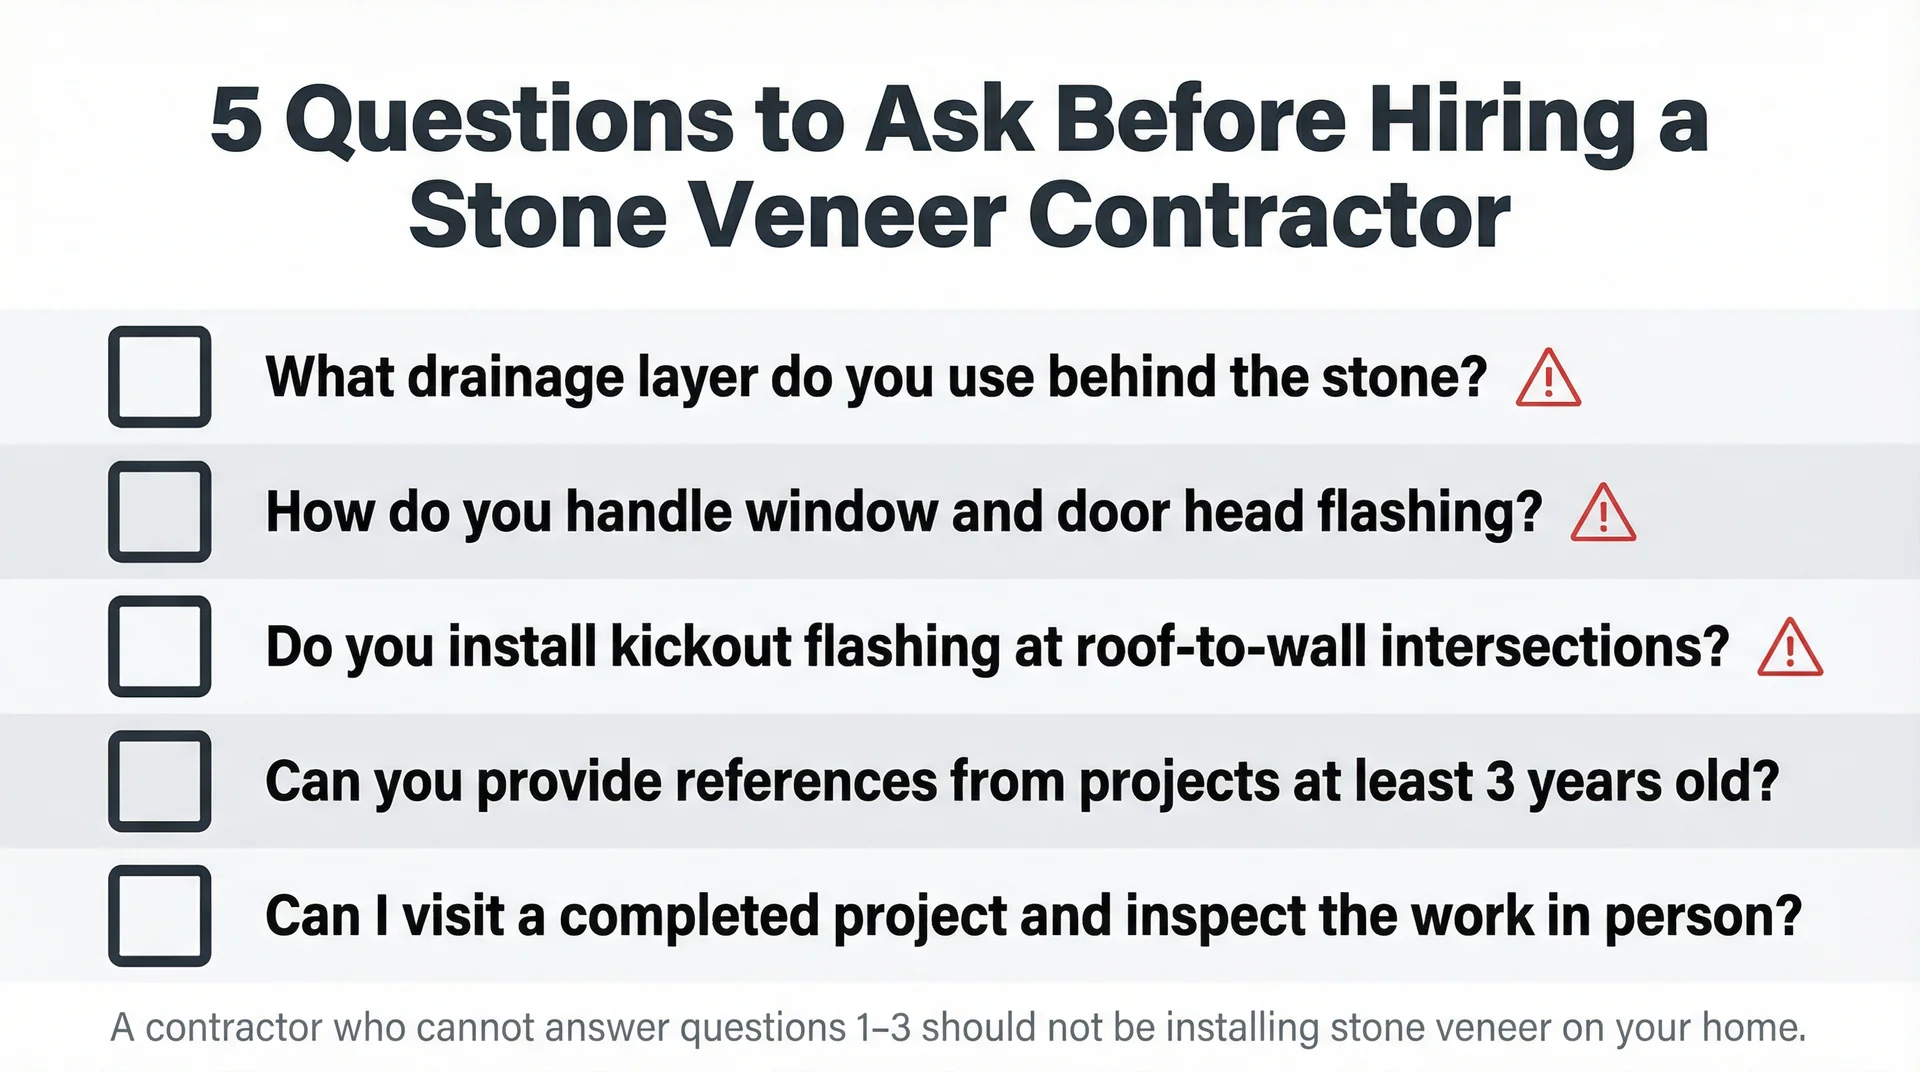
Ask about the drainage system. Specifically: “What drainage layer do you install behind the stone, and what product do you use?” A contractor who installs drainage mats as standard practice and can name the product has been doing this work correctly. A contractor who says “we use two layers of building paper per code” is installing to the minimum requirements that building science research has identified as inadequate. A contractor who looks confused by the question has not done enough of this work.
Ask how they handle window and door head flashing. The answer should describe metal flashing integrated with the WRB, installed before the lath goes up, with the flashing extending past the window and door frame and lapping correctly over the weather-resistive barrier below. If the answer is “we caulk around the windows,” that contractor does not understand the flashing requirements for this system.
Ask about kickout flashing at roof-to-wall intersections. Missing kickout flashing is absent in an enormous percentage of stone veneer installations I inspect, and its absence is directly responsible for some of the most severe water damage I have seen behind stone veneer. A contractor who can explain unprompted why kickout flashing matters has the experience to install this system correctly.
Ask for references from projects completed at least three years ago. Not two years ago. Not last year. Three years minimum. Stone veneer water management failures typically take two to four years to become detectable at the interior surface. A reference from a project installed eighteen months ago cannot confirm long-term performance.
Visit the references’ stone in person. Look at the caulk joints at the window and door perimeters: is the caulk intact and adhered, or cracking and separating? Look at the transition joint between the stone and any upper siding material: is the flashing visible and correctly positioned, or is the stone running directly into the siding with only caulk at the joint? Look at the base of the stone: is there a visible weep screed, or is the stone running to grade without a drainage exit?
Is Stone Veneer Right for Your Home?
Stone veneer earns its specification clearly if:
- You want the highest possible curb appeal return on investment from a targeted exterior accent project
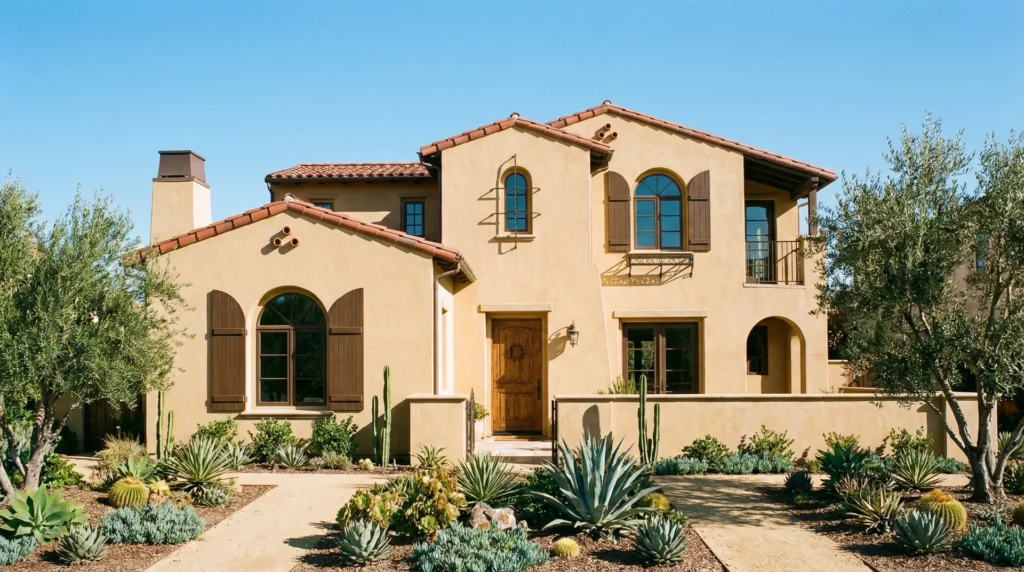
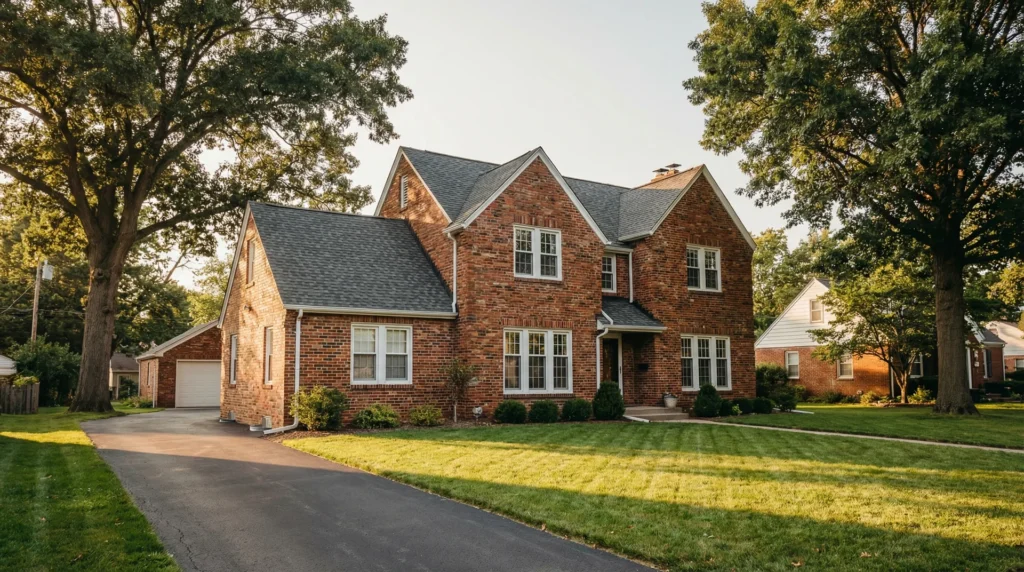
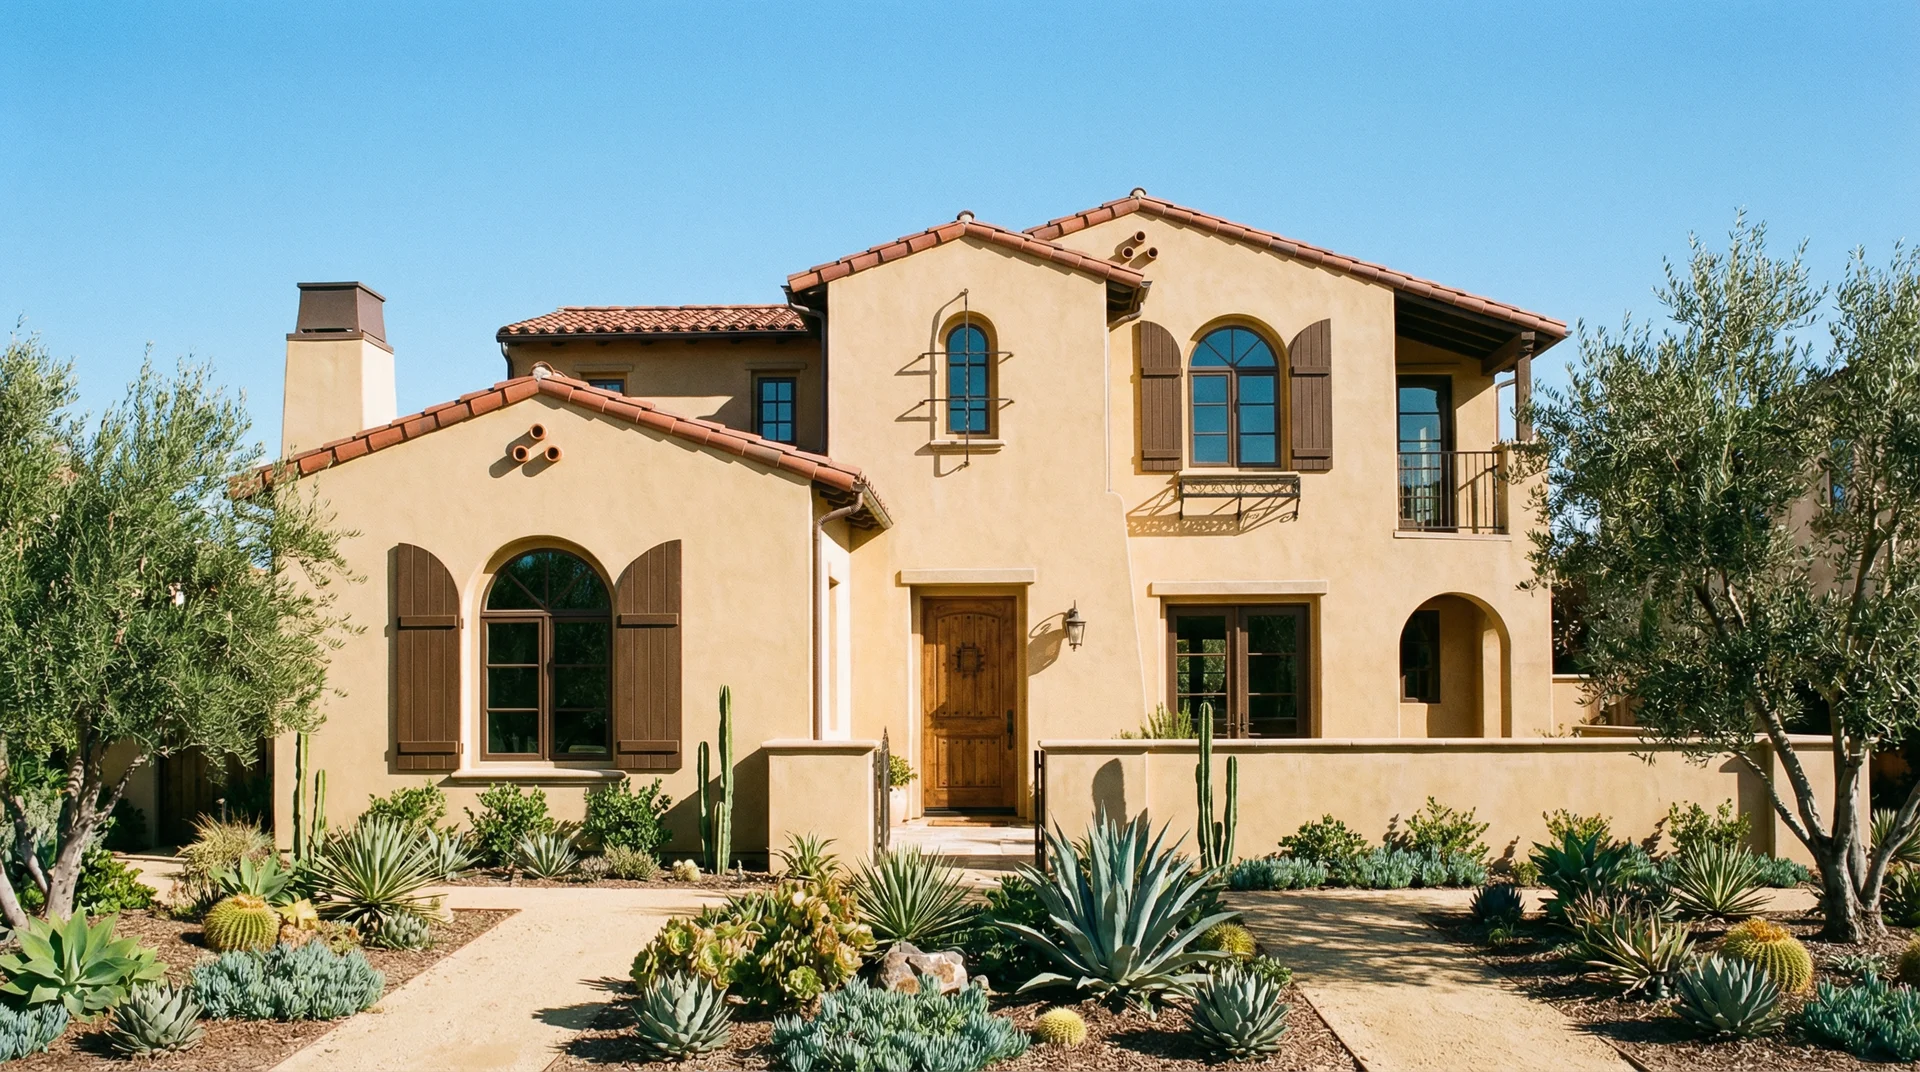
- Your home’s architecture has masonry-adjacent character, craftsman, colonial, traditional, and Mediterranean styles that accommodate stone veneer naturally
- You are selling within three to seven years, and your neighborhood market rewards premium exterior finishes
- You can find a contractor with documented stone veneer experience, including drainage mat specification and window flashing details
- You want a material that is fire-resistant, pest-immune, and permanent-looking in a way that other cladding materials cannot replicate
Consider more carefully if:
- You cannot confirm your contractor’s drainage system specification. This is the single non-negotiable technical requirement, and a contractor who cannot explain it should not be installing stone on your home
- You are considering full-exterior coverage at $30,000 to $90,000. The financial calculation changes significantly at that scale, and the risk management demands are substantially higher
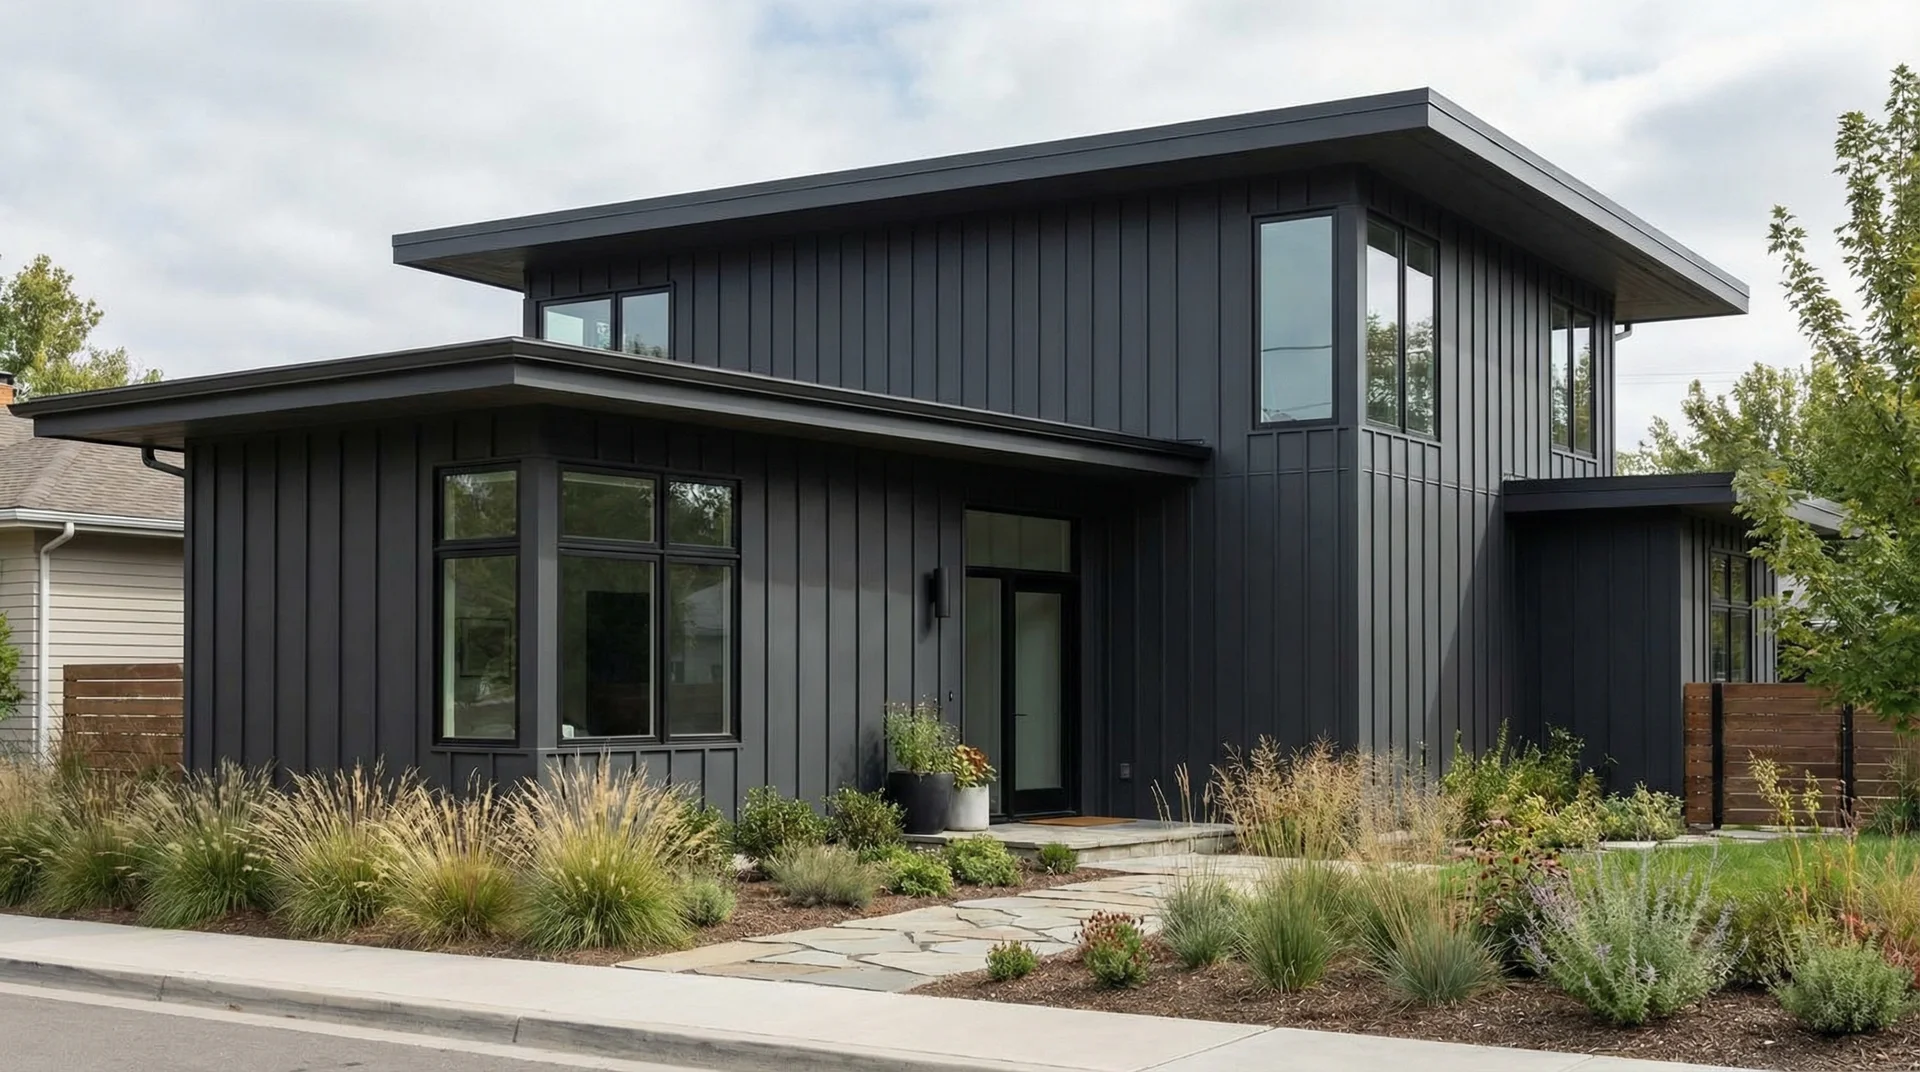
- Your home’s architecture is contemporary or modern. Stone veneer can feel contextually mismatched on flat-roofed or strongly contemporary facades, where its traditional material associations create visual tension
- You are primarily budget-constrained. Manufactured stone veneer at $11 to $22 per square foot is not the least expensive exterior accent option, and the ongoing maintenance requirements add to the total cost of ownership
Frequently Asked Questions
How long does manufactured stone veneer last?
With proper installation, including a drainage mat, a correctly lapped weather-resistive barrier, and complete flashing at all transitions, manufactured stone veneer lasts 25 to 75 years. Poor installation, particularly missing drainage systems, creates failures in as little as two to four years.
Does manufactured stone veneer need to be sealed?
Applying a high-quality breathable penetrating sealer designed for Portland cement-based manufactured stone reduces water absorption, minimizes staining, and protects against freeze-thaw damage in cold climates. Reapply every five to ten years in high-moisture or freeze-thaw environments. Never use film-forming sealers, which trap vapor and accelerate damage.
Can stone veneer be installed over existing siding?
In some cases, yes. Manufactured stone veneer can be installed over existing flat siding if the substrate is structurally sound, the existing material is flat enough to receive lath and mortar correctly, and the added weight is within the wall assembly’s load capacity. The existing siding must be assessed by a professional before this approach is specified. Installing over damaged or uneven existing siding creates a failed substrate for the stone system, regardless of how correctly the veneer itself is installed.
Is the ROI on manufactured stone veneer really 208%?
Yes, according to the 2025 Zonda Cost vs. Value Report. Manufactured stone veneer ranked third nationally among all remodeling projects for return on investment. This figure reflects a targeted accent application of approximately 300 square feet on the street-facing facade, not full exterior coverage. The ROI for full-exterior applications is lower per dollar invested.
What is the difference between natural stone veneer and manufactured stone veneer?
Natural stone veneer is quarried from the earth and sliced thin. It has geological variation in color and texture that manufactured products cannot fully replicate, and it carries the full permanence of natural stone. Manufactured stone veneer is made from Portland cement cast in molds taken from natural stone surfaces, producing a lighter, more consistent, and significantly less expensive product that is visually convincing at most viewing distances. Natural stone costs roughly two to three times as much as manufactured stone for material and installation.
How do I know if my existing stone veneer has a moisture problem?
Look for white powdery efflorescence on the stone surface, mortar joint cracking, particularly at window corners, dark persistent staining after rain dries, soft spots on adjacent interior walls, musty odor in rooms next to stone-clad walls, or peeling interior paint on those walls. If you observe two or more of these signs simultaneously, a professional moisture inspection using a probe moisture meter is warranted before any surface repairs are attempted.
What is kickout flashing, and why does it matter?
Kickout flashing is a bent piece of metal flashing installed at the point where a sloped roof meets a vertical wall. Without it, water running off the roof slope follows the wall face downward and enters the wall assembly behind the stone veneer at that transition. With it, water is directed away from the wall entirely. Missing kickout flashing is one of the most common causes of severe moisture damage in stone veneer installations at roof-to-wall intersections.
Can I install stone veneer myself?
For interior applications, a fireplace surround or feature wall, yes, if you have some renovation experience and patience with mortar work. For exterior applications, professional installation is the right call in most cases.
The water management details, WRB sequencing, flashing, and weep screeds, are too consequential to get wrong. Mortarless panel systems are a reasonable DIY option for single-story exterior walls with simple geometry, as they do not require mortar skills and install similarly to standard panel siding products.