
Most people searching for whitewash brick house before and after photos have already made up their minds.
They bought the house for the layout, the neighborhood, the bones. The brick, though, was too orange, too heavy, too obviously 1993. You’ve changed the front door, added landscaping, and the brick still bothers you every time you pull into the driveway.
So let me answer the three questions that are actually keeping you from starting.
1. Is it permanent? Limewash is semi-permanent and can be power-washed off within the first few days if you hate the result. Traditional whitewash, made from diluted paint, is more permanent. German schmear is a full commitment.
2. Will it damage the brick? Limewash won’t. It’s breathable, mineral-based, and leaves the brick structurally intact. Traditional whitewash is low-risk when applied correctly. German schmear is mortar, so once it sets, it stays.
3. Will it hurt resale value? A well-executed limewash has never hurt a sale in any of the markets I’ve worked in. Execution quality is what buyers actually notice.
With those off the table, here’s everything else you need to decide, plan, and get this right.
What Whitewashing Does to a Brick Exterior
Why the Texture Stays Visible (and Why That’s the Point)

Whitewash and limewash don’t hide the brick. They soften it. The texture, variation, and organic irregularity of real brick all stay visible through the wash, and that is the entire design point. The mortar joints still read. The light still plays across the brick face. You get depth and warmth in a way that solid paint completely flattens.
Limewash penetrates the brick’s pores and bonds with the surface. Traditional whitewash, which is diluted latex paint, sits on top, but because it’s heavily diluted, the brick surface still reads through. What you get looks like it belongs to the house rather than something applied over it.
Which Brick Colors Transform Most Dramatically
This matters more than most guides acknowledge.
| Brick Color | Expected Transformation | Best Technique |
|---|---|---|
| Dark orange/red (1990s) | Most dramatic — high contrast, striking before/after | Limewash at 50% opacity |
| Tan and buff | Bright, coastal or cottage character | Limewash at 25–30% opacity |
| Sandy or pale | Subtle shift; may feel underwhelming at light coverage | Test before committing |
| Dark brown/chocolate | Often responds better to texture than lightening | German schmear |
| New construction brick | Adds instant age and depth where there wasn’t any | Light limewash at 20–25% |
Is Whitewashed Brick Still in Style?
Yes, and I’d argue it’s more durable as a design choice than most exterior trends. Unlike shiplap or all-white kitchens, whitewashed and limewashed brick has a 200-year history in European and American architecture. It doesn’t read as “trendy” to most buyers. It reads as considered.
Limewash in particular has been growing across both farmhouse and coastal aesthetics, and the aged-European look that German schmear creates is gaining traction in higher-end residential markets. If anything, the risk isn’t that the whitewashed brick will date your home. The risk is a poor execution that will.
Whitewash Brick House Before and After by Home Style
These scenarios reflect the brick types homeowners deal with most often, along with the design decisions that made each transformation work.
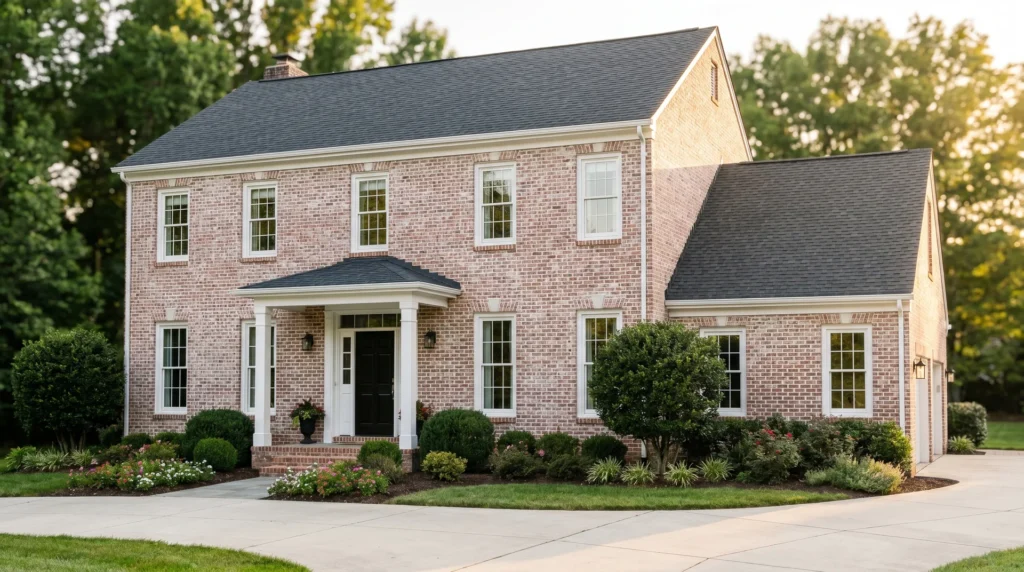
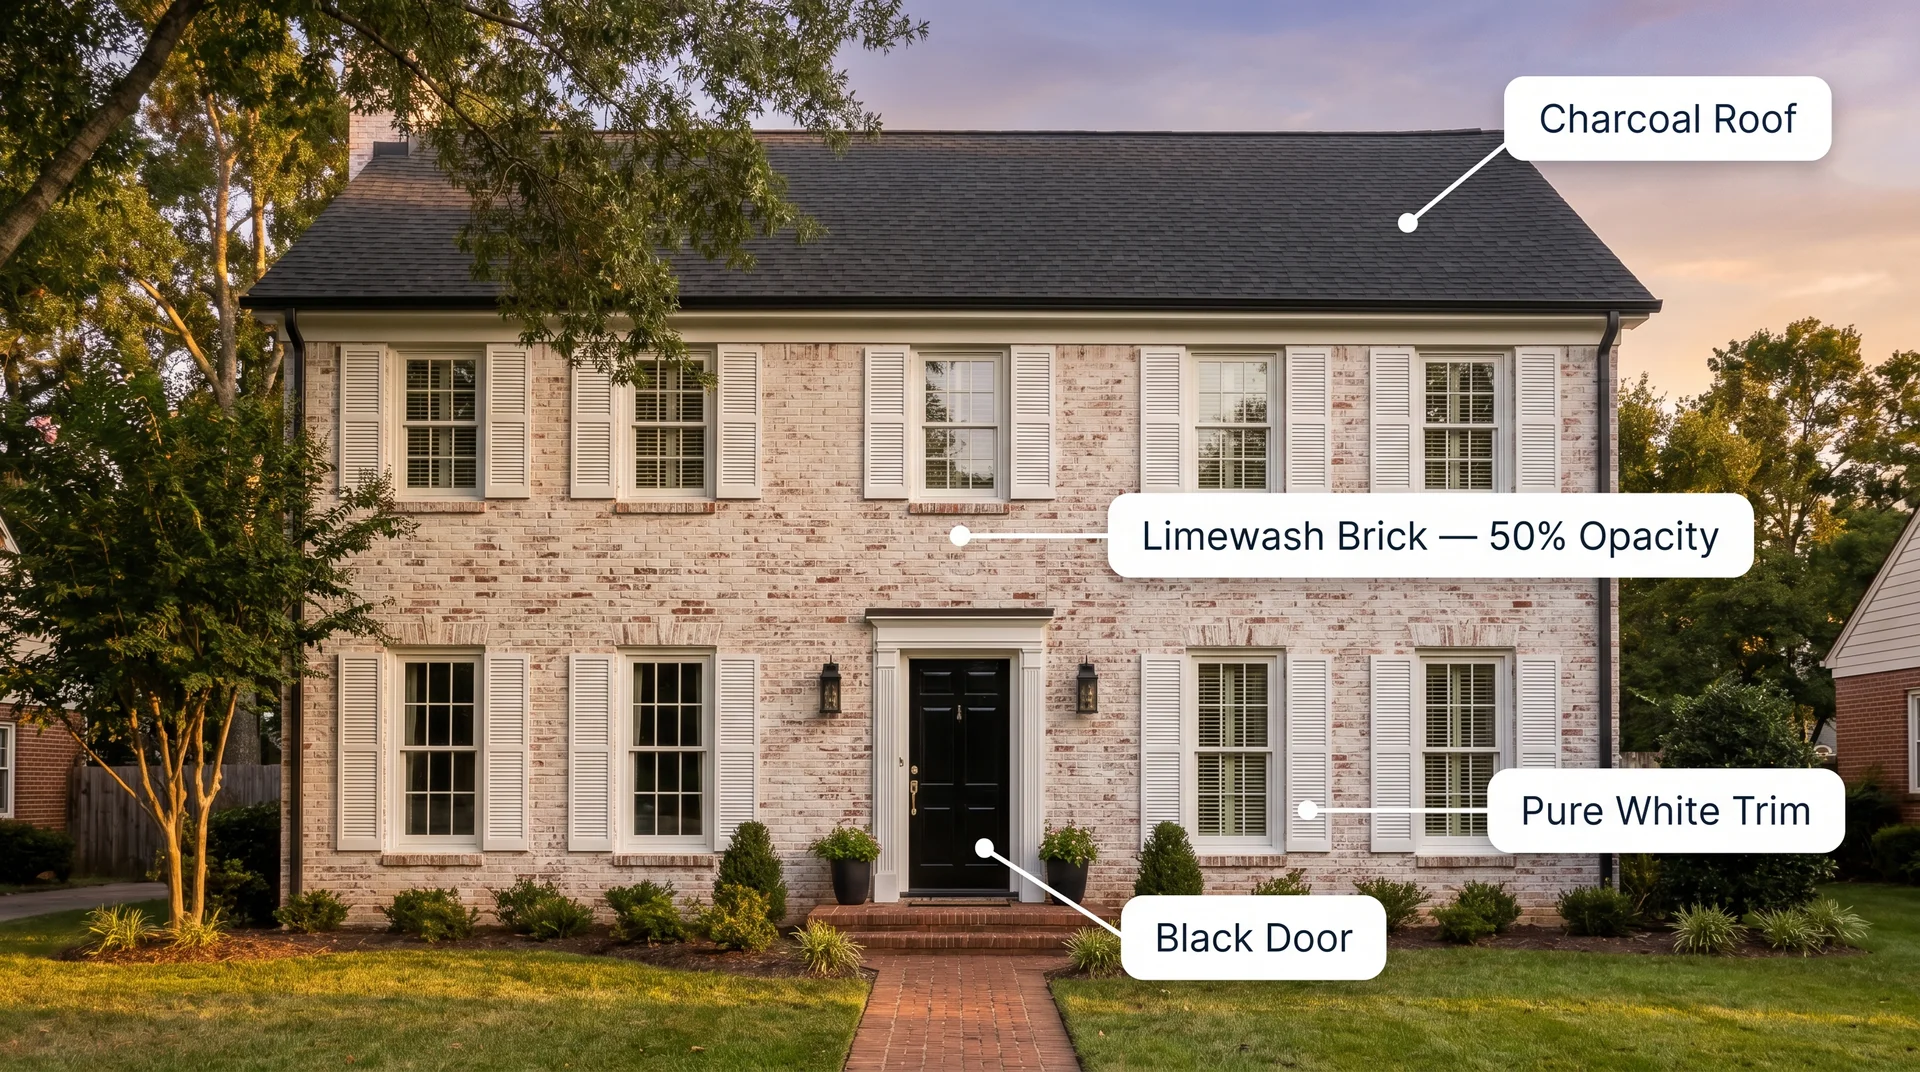
The 1990s Red Brick Colonial: From Builder-Grade to Timeless
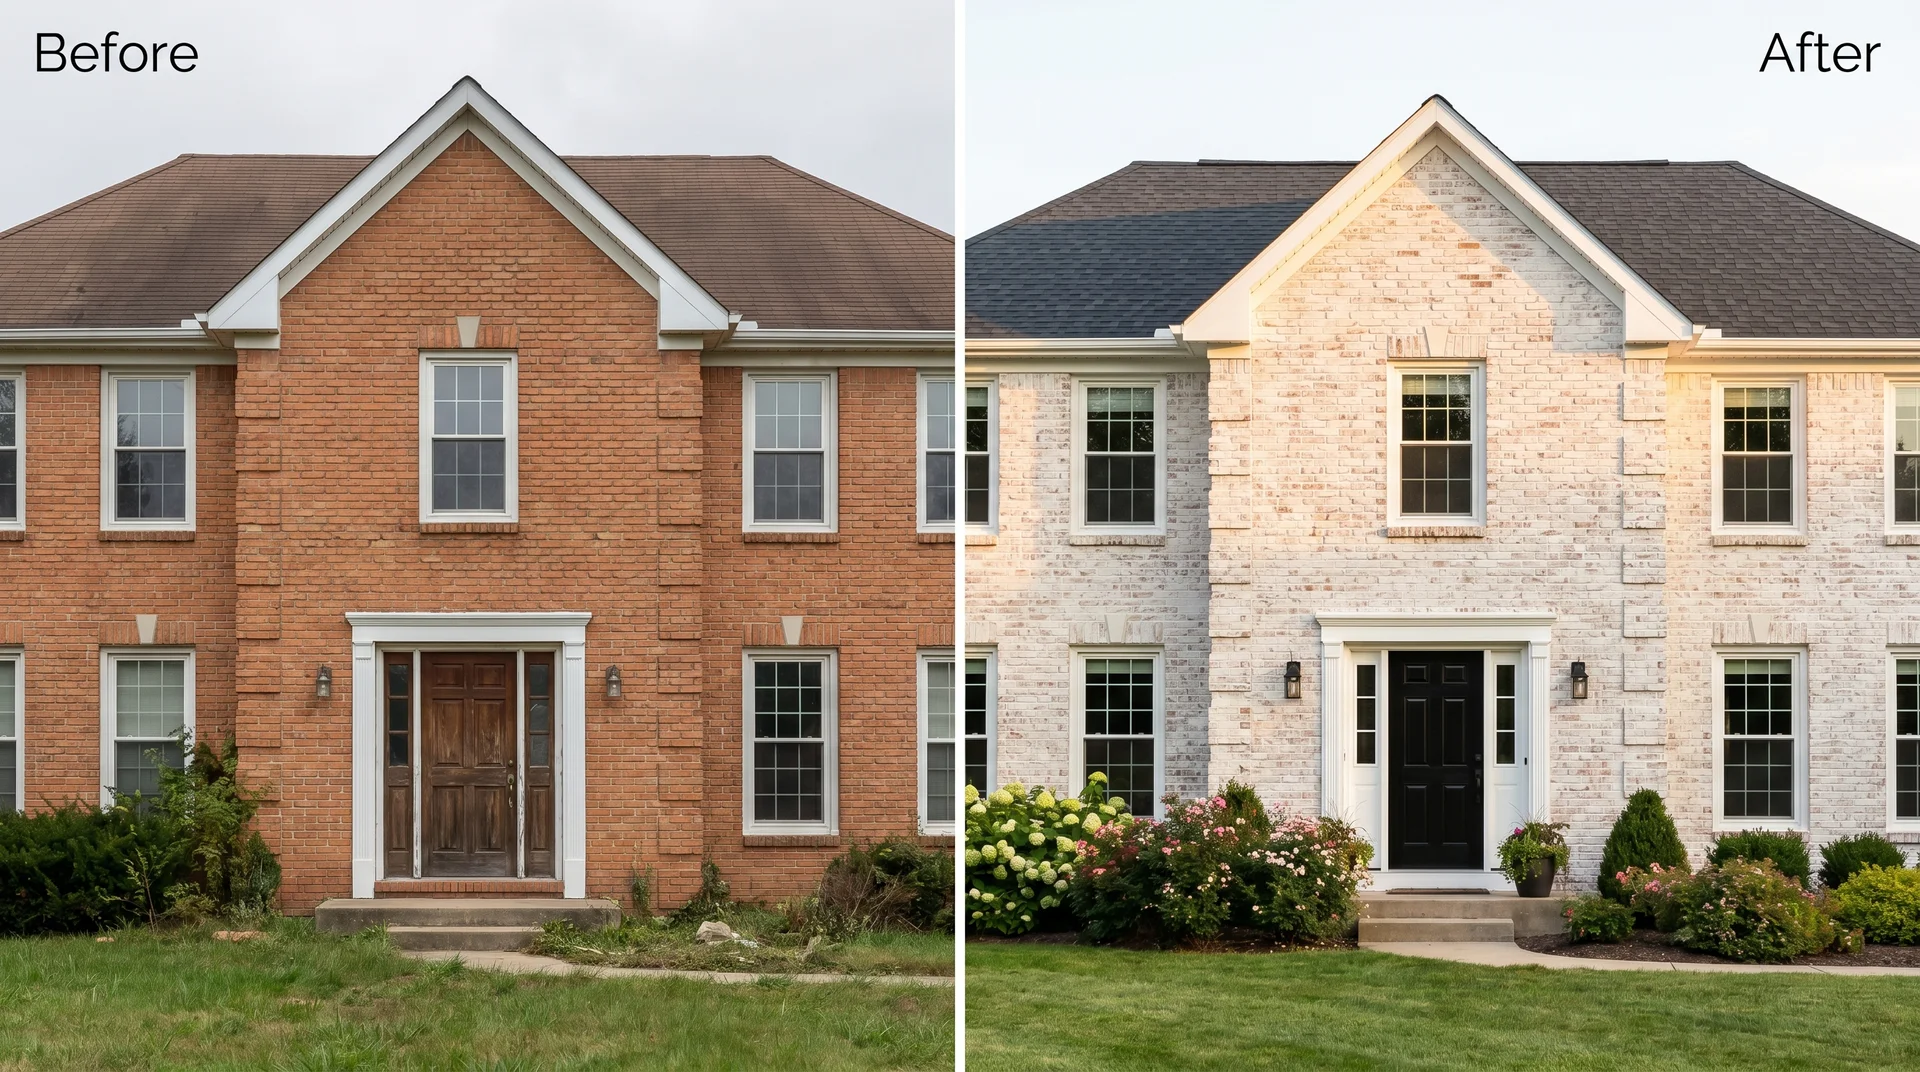
Before: Uniform orange-red brick, builder-grade front door, white vinyl trim that fights the warm brick instead of working with it. Solid and well-built, but unmistakably dated.
After:Romabio Classico Limewash in Bianco White at roughly 50% opacity, applied with a pump mist on the brick during application to slow drying and improve penetration. Charcoal gray roof. Black front door. Trim repainted in Pure White. The result is clean, current, and quietly elevated.
What made it work wasn’t just the limewash. The brick, trim, roof, and door were treated as a coordinated system.
I’ve seen homeowners whitewash their brick and leave the rest of the exterior untouched, and the result always feels incomplete. If you’re thinking about your trim color options, our guide on Sherwin-Williams Alabaster and what makes white paint colors read differently is a useful read before you commit.
The Orange Brick Ranch: Brightened Without Erasing Character

Before: Warm orange brick clashing with a cooler, more updated interior. The exterior felt disconnected from everything that had been changed inside.
After: Limewash at 25 to 30% opacity. This is the right call for orange brick. A full 50% wash can produce a flat, chalky result on orange. A lighter application lets the warmth show through in a way that actually complements the white wash. Soft charcoal shingles and warm white trim completed the picture.
Dark Brown Brick: When German Schmear Is the Right Call
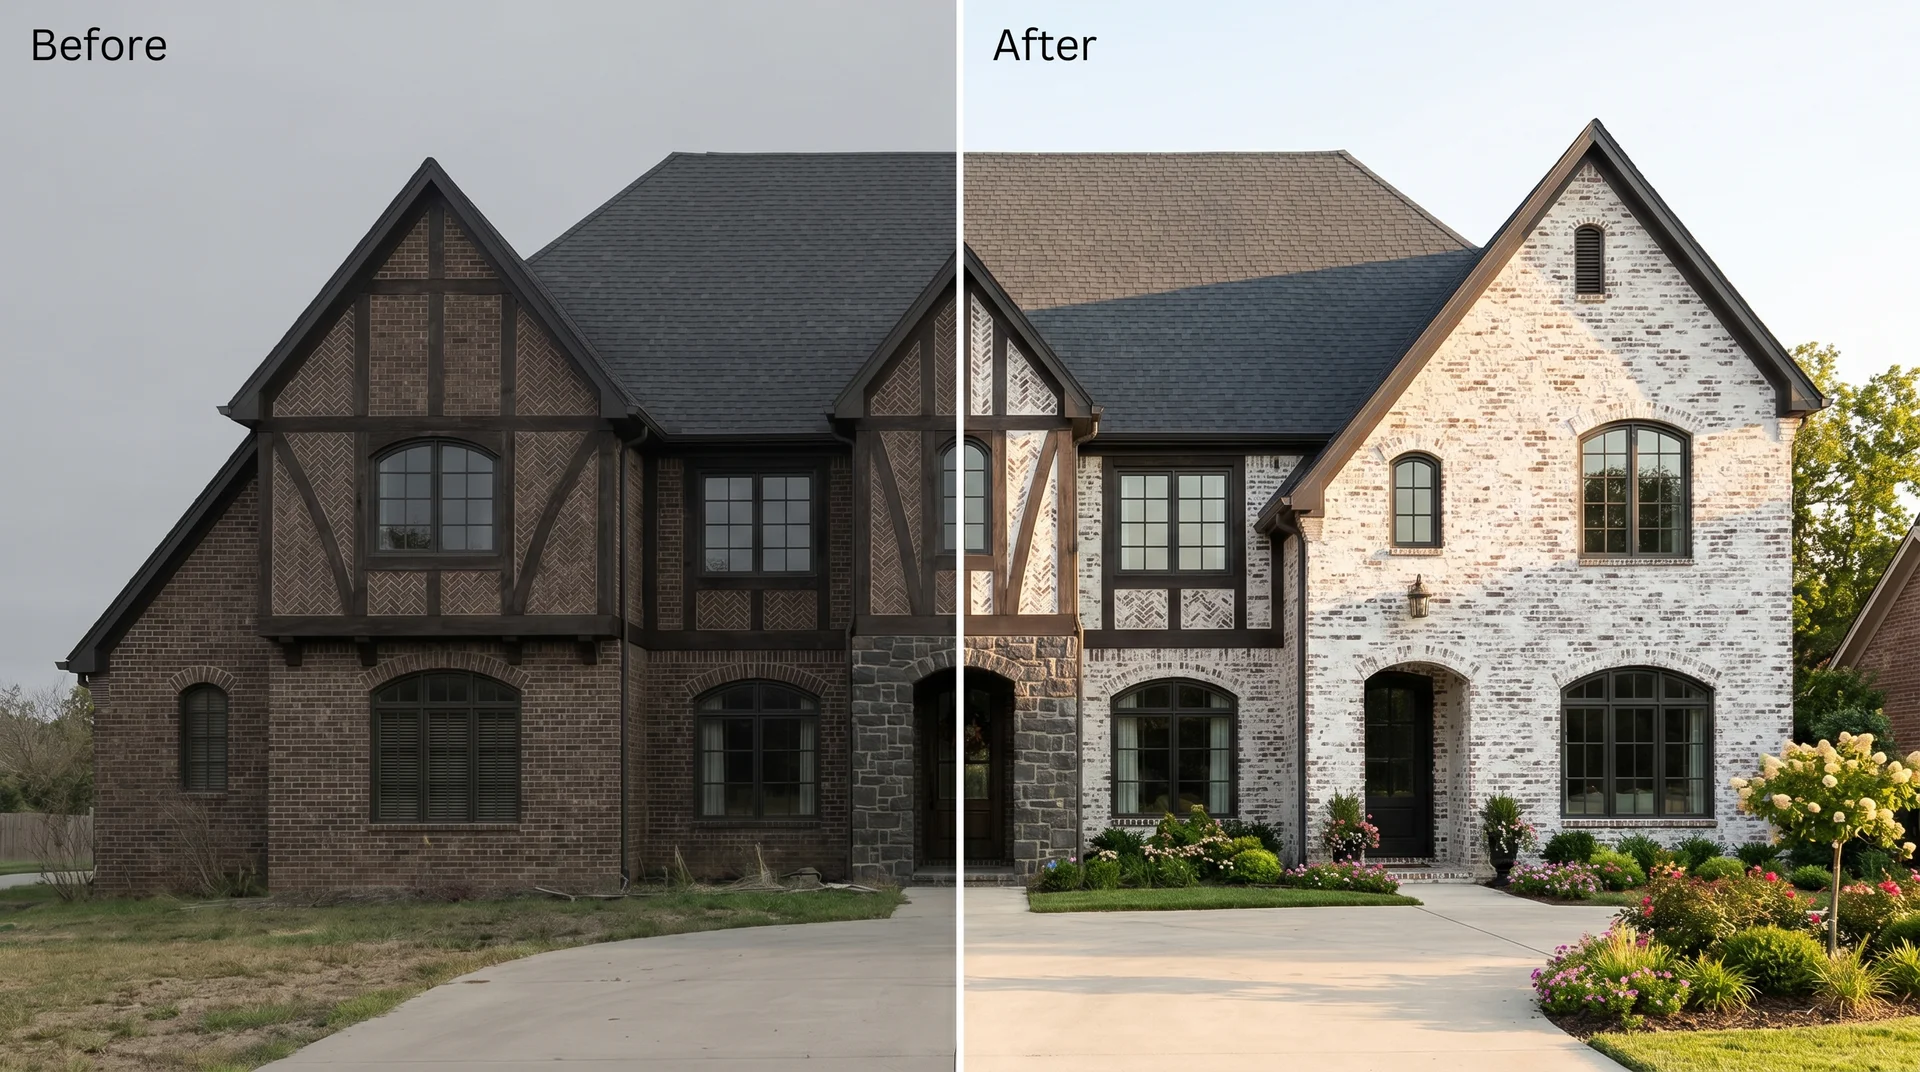
Before: A home with Tudor architectural details finished in very dark brown brick. The architecture had real character, but the heavy color absorbed light and made the house feel closed off.
After: German schmear in white mortar, applied at varying thicknesses to emphasize the mortar joints and create an authentically aged European surface. The Tudor details became focal points instead of afterthoughts.
Important: German schmear on this home was a permanent decision. The mortar bonds with the brick in a way that makes reversal impractical and potentially damaging. If you’re certain of the direction and have the right architectural style for it, the results are striking. If you’re still working through your aesthetic, limewash is the more forgiving path.
New Construction Brick: Adding Age That Wasn’t There
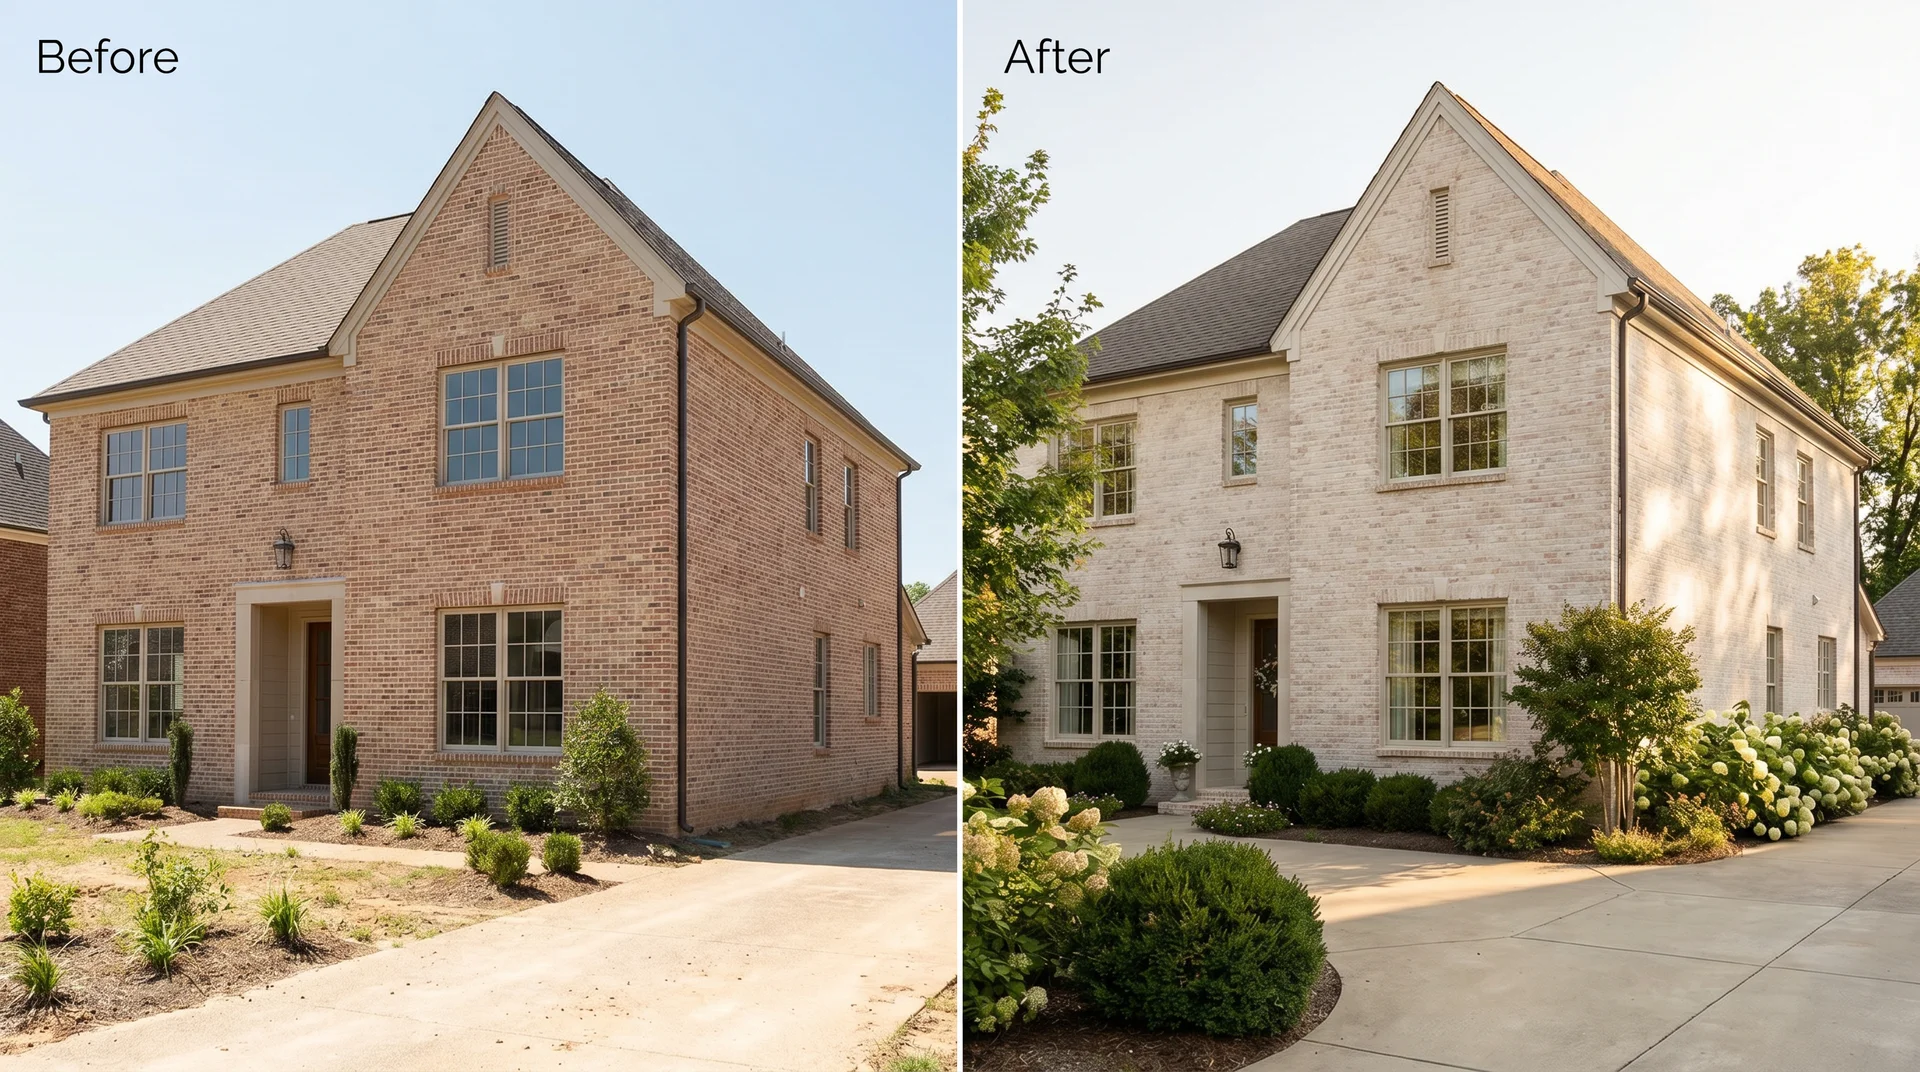
Before: Fresh, perfectly uniform brick with none of the weathering that gives older brick homes their character. Looks new, which sounds like a compliment but can feel sterile.
After: A single light coat of Romabio Classico Limewash at around 20 to 25% opacity. This is where limewash does something almost unexpected. It adds depth and warmth that new brick simply doesn’t have. The result looks like a home that’s been well-maintained for 40 years.
Whitewash vs. Limewash vs. German Schmear: Which Is Right for Your Brick House?
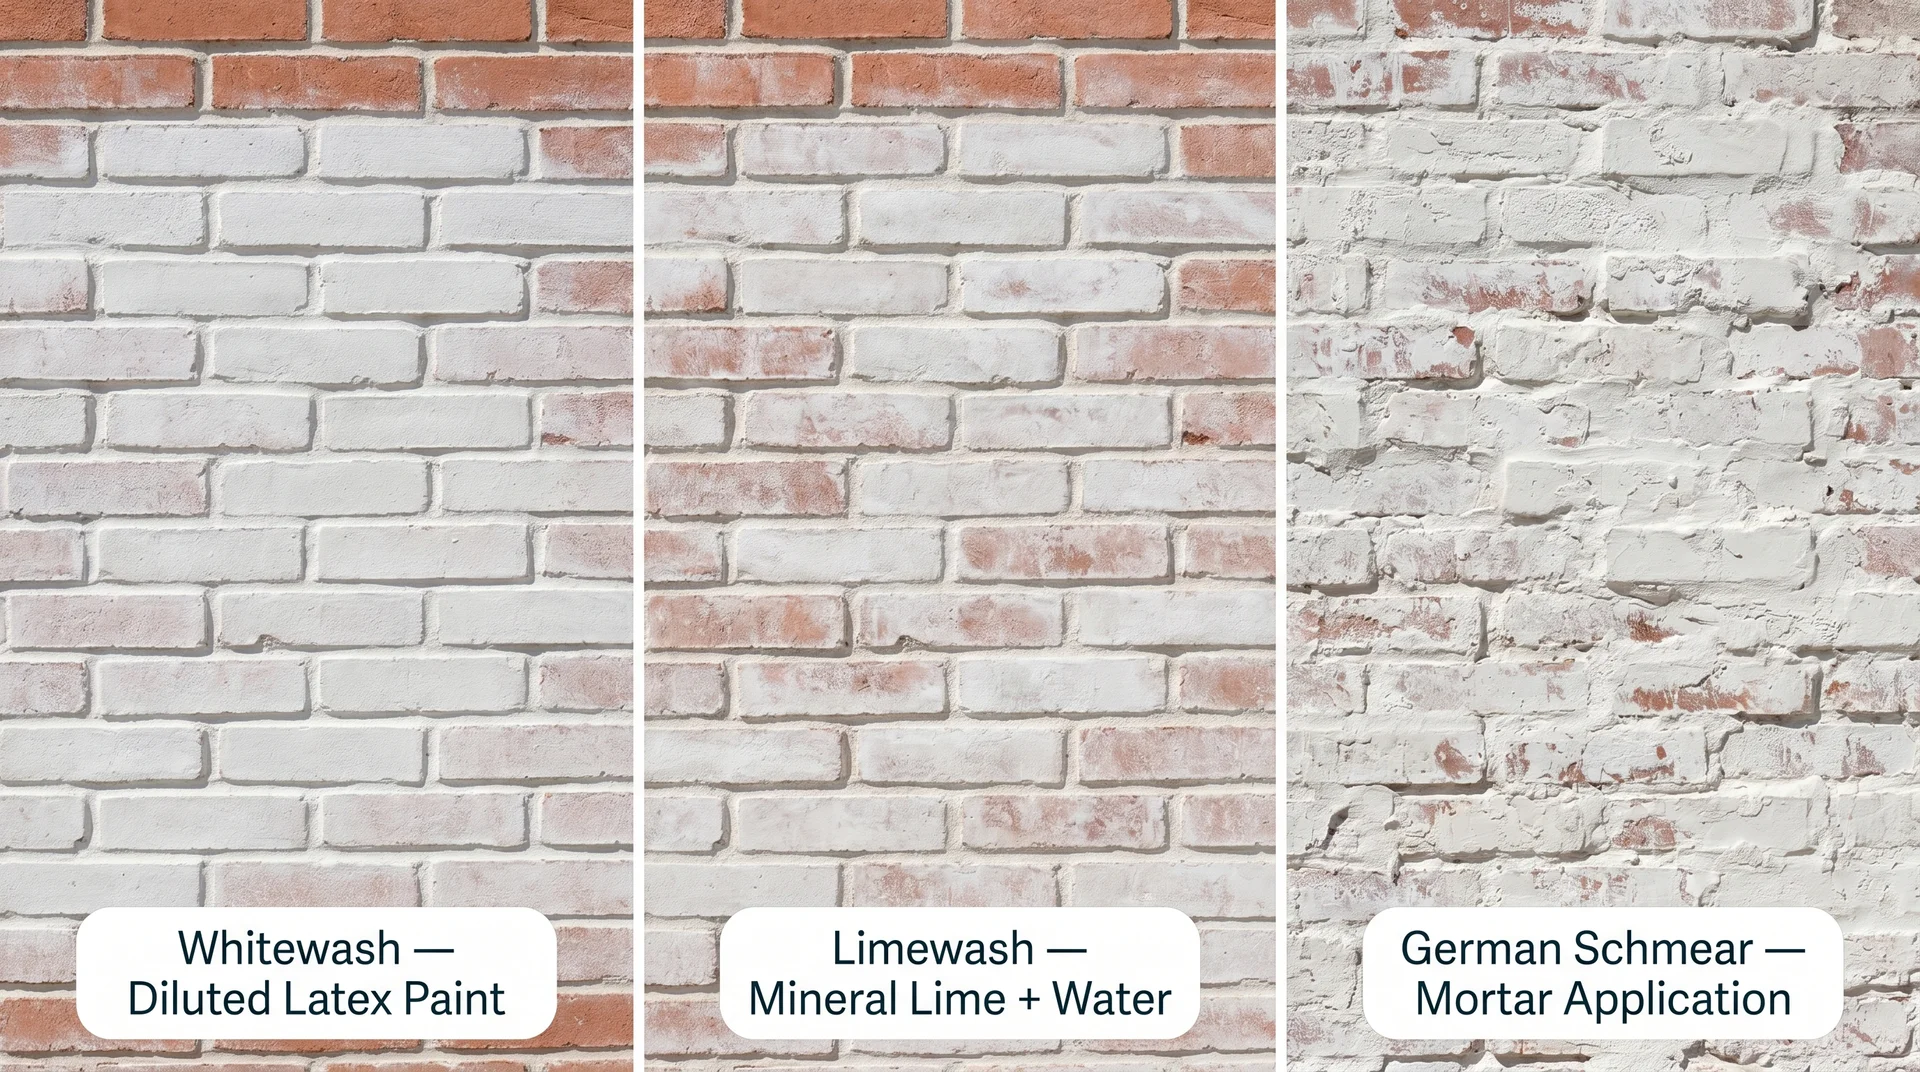
These terms get used interchangeably online, and they describe genuinely different products with different results.
Whitewash: Best for Painted Brick and Interior Projects
Whitewash is diluted latex paint, typically at a 50/50 water-to-paint ratio. It sits on top of the brick’s surface. It’s the right choice for previously painted brick, since limewash can’t bond over paint. It also works well for interior applications like fireplaces and accent walls, where breathability matters less and you want more control over the final color.
The tradeoff: whitewash is harder to remove than limewash once dry and can trap moisture if prep work isn’t done carefully. For large unpainted exterior surfaces, limewash is generally the better option.
Professional cost: $1.50 to $5.00 per sq ft. DIY material cost is very low since you’re working with regular latex paint.
Limewash: The Exterior Brick Default for a Reason
Limewash is made from slaked lime and water. It penetrates the brick’s surface rather than coating it, which means the brick can still breathe after application. This breathability is critical for older homes where moisture management inside the walls matters. Limewash develops a beautiful patina as it ages and can be power-washed off within the first several days if you change your mind.
One firm limitation: limewash requires clean, unpainted brick. It can’t bond correctly with a painted surface. If your brick has been painted at any point, you need whitewash or a full paint application.
Longevity: 5 to 7 years before refreshing. Professional cost: $1.50 to $5.00 per sq ft. DIY cost: $50 to $200 in materials for a single-story home.
German Schmear: Maximum Drama, Total Commitment
German schmear uses mortar, applied over brick in varying thicknesses to create a heavily textured, aged European surface. It adds actual texture to the brick face, not just a color change. The result suits homes with architectural character that the treatment can amplify.
German schmear cannot be applied to painted or varnished brick. It also cannot be practically reversed. This is a once-and-done decision.
Professional cost: $1.00 to $4.00 per sq ft; typical full-home project around $5,000.
Quick-Pick Guide: Which Technique Suits Your Situation
| Your Situation | Best Option |
|---|---|
| Unpainted exterior brick, want flexibility | Limewash |
| Previously painted exterior brick | Whitewash |
| Interior fireplace or accent wall | Whitewash |
| Tudor, cottage, or craftsman with dark brick | German schmear |
| New construction, want aged character | Light limewash (20–25% opacity) |
| Anxious about committing, want an out | Limewash – most forgiving option available |
Before You Start: HOA Approval and Project Timeline
Two things most guides skip entirely.
HOA approval: If you live in a community with a homeowners association, check your CC&Rs before ordering a single bucket of limewash. Many HOAs require approval for exterior color changes, and some have restrictions on painting brick altogether. Submitting a request with a color sample, a reference photo of a finished result, and your proposed trim color tends to move the process faster. Always verify local permit requirements before beginning any exterior modification to your home.
Project timeline: A professional two- or three-person crew takes 2 to 4 days for a full exterior limewash, including prep and cleanup. A DIY single-story project typically takes 1 to 2 full weekends: one for prep and brick repair, one for the application itself. Factor in 24 to 48 hours of drying time between surface washing and the start of application.
The Variables That Decide Whether a Whitewash Brick Transformation Works
Brick Condition Matters More Than Anything Else
Before you buy supplies, look at the brick honestly. Efflorescence (the white mineral deposits that appear on some brick surfaces), cracks in the mortar joints, water damage, and existing paint layers all affect how any wash product will adhere and how long it’ll last.
Limewash over efflorescence won’t bond and will look uneven. Limewash over painted brick won’t penetrate and will eventually peel. Cracked mortar joints need repointing before any surface treatment, or you’re sealing moisture problems in. Power wash the brick thoroughly and let it dry for at least 24 to 48 hours before starting.
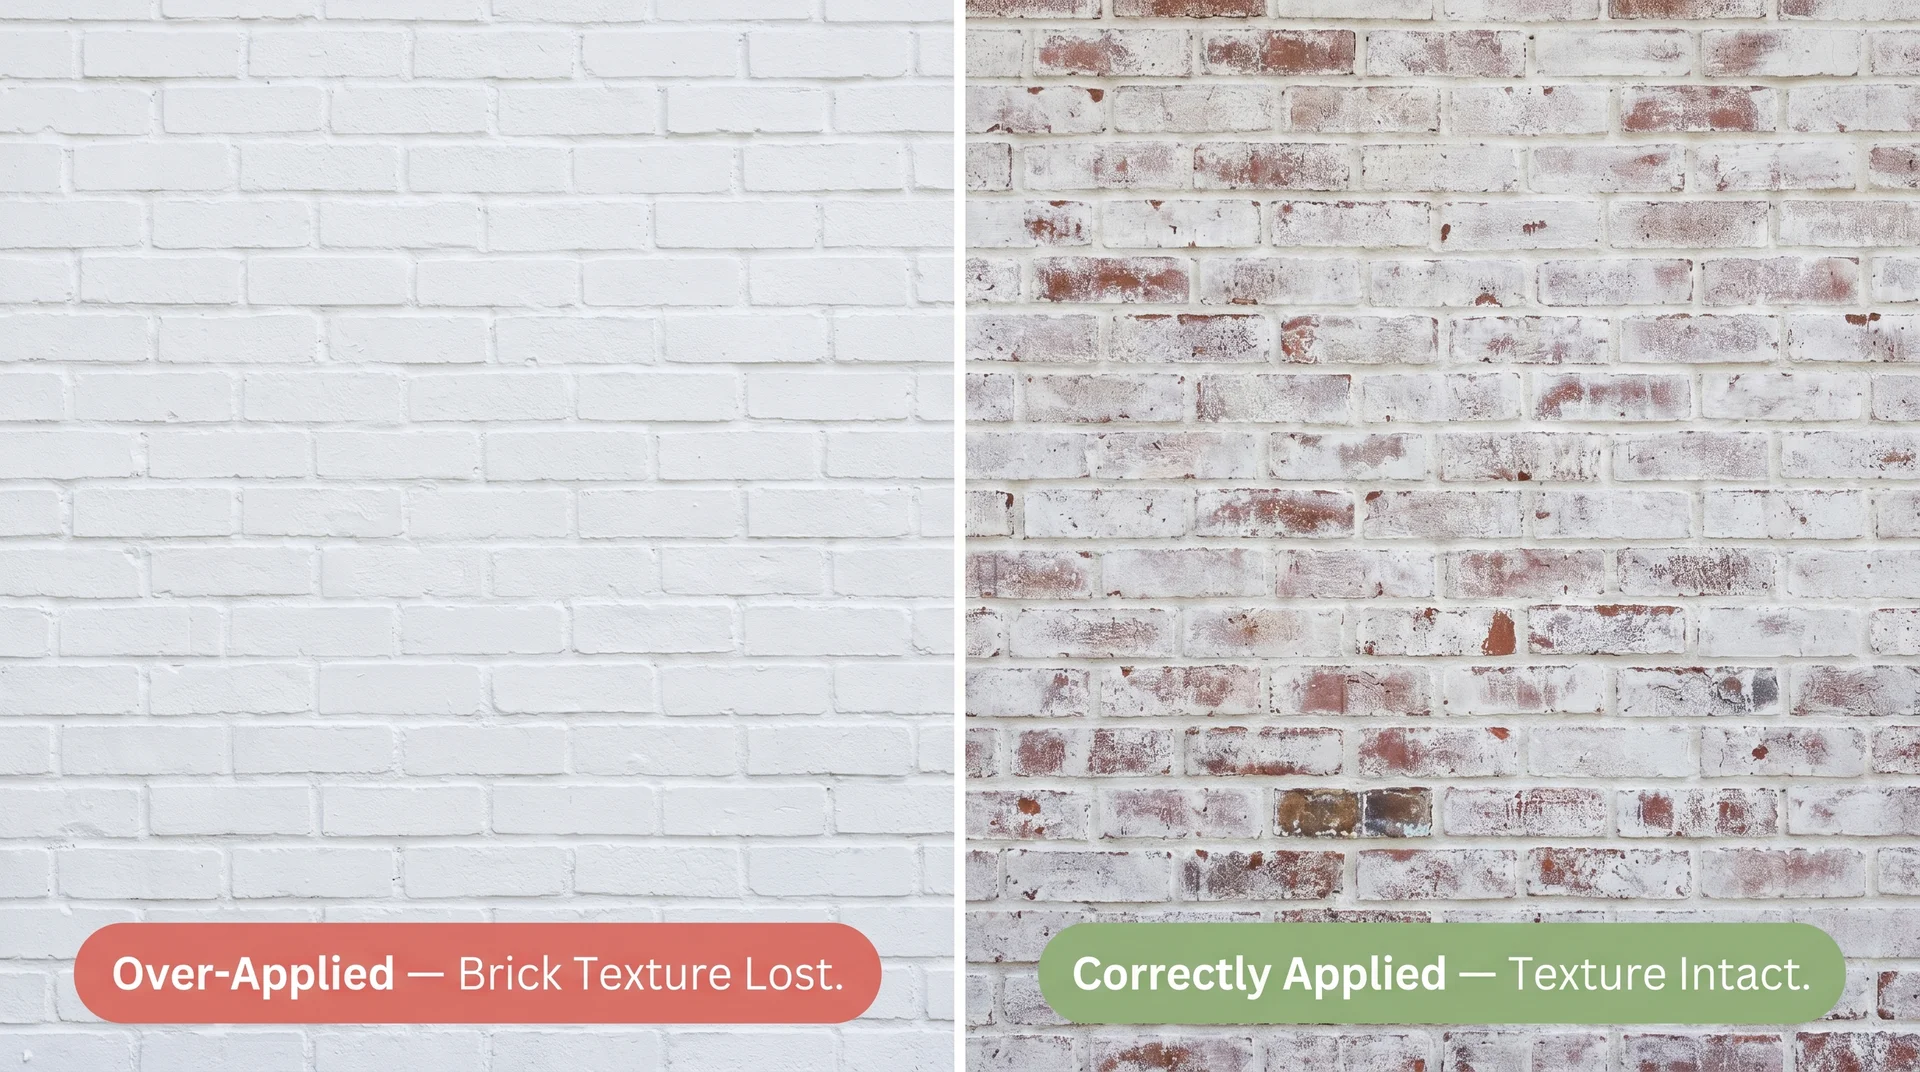
The Opacity Level Decision, Where Most People Go Wrong
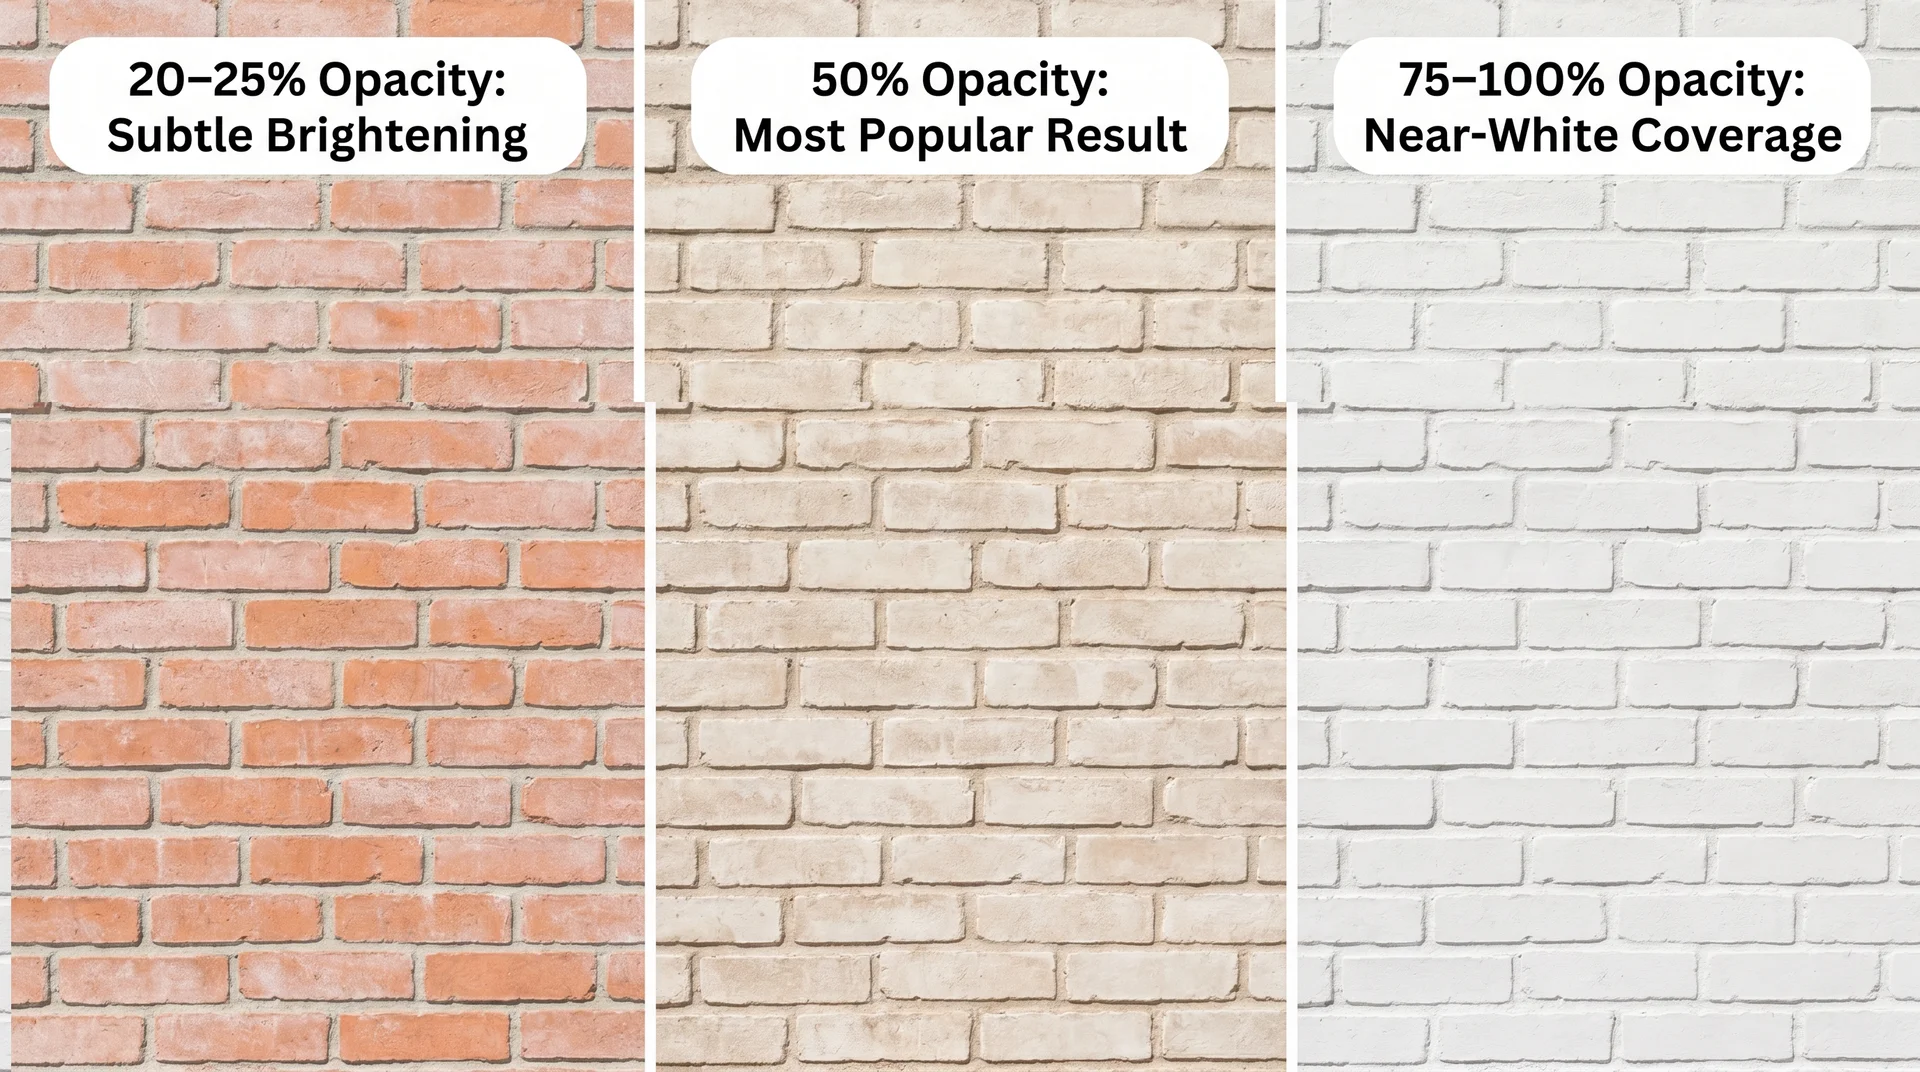
Most people choose an opacity level based on an inspiration photo without realizing that limewash looks significantly different wet versus dry. A wash that looks translucent during application can dry considerably lighter than you expected, or in humid conditions, slightly darker.
The fix is simple: test a 2×2 foot section on the actual wall, let it cure for a full 24 hours, then evaluate. Do this before any full-scale application. As a working reference:
- 20–25% opacity: Barely-there wash; good for new construction or pale brick
- 50% opacity: Most popular for 1990s red brick; brick color shifts significantly, but texture stays full
- 75–100% opacity: Close to paint; brick color nearly disappears
Treat the Trim and Roof as Part of the Same Decision
A whitewashed brick exterior without coordinated trim still looks unresolved. Most homeowners plan the brick treatment without thinking through the full exterior palette, then wonder why the result feels flat. I’ve seen beautiful limewash applications that looked underwhelming because the existing tan trim made the white feel murky.
The most consistently successful exterior combinations:
- Whitewashed brick + Pure White trim + charcoal or black roof: Cleanest and most timeless. Works on almost any architectural style.
- Whitewashed brick + Iron Mountain (soft black) trim + charcoal roof: More contemporary; works well on homes with strong geometric lines.
- Whitewashed brick + warm white trim + slate blue or dark green accents: Coastal and cottage-leaning; works best where the limewash reads creamy rather than stark white.
Plan the full exterior palette before you start. It changes which opacity level and which limewash tone you’ll want.
Climate, Longevity, and Which Finish Holds Up Best
In high-humidity regions like the Southeast, Gulf Coast, or Mid-Atlantic, limewash is almost always the right exterior choice. Its breathability allows moisture to move through the brick wall assembly rather than getting trapped behind a paint or whitewash layer, which accelerates deterioration in humid climates.
In high-UV environments like the Southwest or high-altitude areas, traditional whitewash with latex paint may fade faster and unevenly. Limewash’s chalky mineral finish handles UV aging more gracefully, developing a soft patina over time.
Realistic longevity: limewash needs refreshing every 5 to 7 years. Traditional whitewash with quality diluted latex can last 10 years or longer, and in mild, low-humidity regions, some applications last 20 to 30 years before significant attention is needed.
How Much Does It Cost to Whitewash a Brick House?
Professional vs. DIY: What the Numbers Actually Look Like
| Technique | Cost Per Sq Ft | Typical Full-Home Cost |
|---|---|---|
| Limewash | $1.50 – $5.00 | $1,500 – $6,700 |
| Whitewash | $1.50 – $5.00 | $1,500 – $6,700 |
| German Schmear | $1.00 – $4.00 | $2,500 – $7,000 |
| Full painted brick | $1.50 – $4.50 | $3,500 – $10,500 |
Multi-story homes add 30 to 50% because of scaffolding, extra equipment, and labor time. For two-story or taller homes, a professional quote almost always represents better value than a DIY attempt with rented ladders and scaffolding.
For a DIY single-story limewash project, plan for:
- Romabio Classico Limewash (Bianco White or Avorio White): available at The Home Depot; one bucket typically covers a single-story exterior in one coat
- Stiff masonry brush, pump garden sprayer, masking tape, and plastic sheeting
- Pressure washer rental: $35 to $100 per day
- Ladder rental: $130 to $160
Total DIY materials: $150 to $400 for a single-story home. For DIY painted brick or traditional whitewash, plan $700 to $1,400, depending on home size and paint quality.
Does a Whitewashed Brick Exterior Add or Hurt Home Value?
A well-executed limewash is almost universally viewed as a positive upgrade by buyers. The curb appeal improvement is real, and because limewash is technically reversible, buyers don’t feel locked into someone else’s decision.
Traditional whitewash draws more mixed reactions since some buyers equate it with painted brick, which carries a perception of ongoing maintenance. German schmear gets the most varied responses: buyers who love it really love it; buyers who prefer plain brick may see it as a permanent alteration they’d have to live with.
If resale is a factor, limewash is the safest choice. The curb appeal improvement tends to bring buyers toward the property before they’ve thought about the finish at all.
How to Whitewash Brick: The Steps That Actually Matter
If you want a full step-by-step DIY walkthrough with ratios, tools, and technique specifics, our dedicated guide on how to whitewash brick covers the complete process. Here are the four decisions within the application process that determine your result.
Surface Preparation
Power wash thoroughly to remove all dirt, biological growth, and efflorescence. Let the brick dry completely for at least 24 to 48 hours, longer in humid weather. Check mortar joints and repoint any that are crumbling. This step determines whether the result lasts 3 years or 15. Skipping or rushing prep is the single most common cause of whitewash failure.
If you’re curious about drying and recoat timing in general, our guide on how long to wait between coats of paint is a useful reference for the preparation phase.
Testing Opacity Before Committing
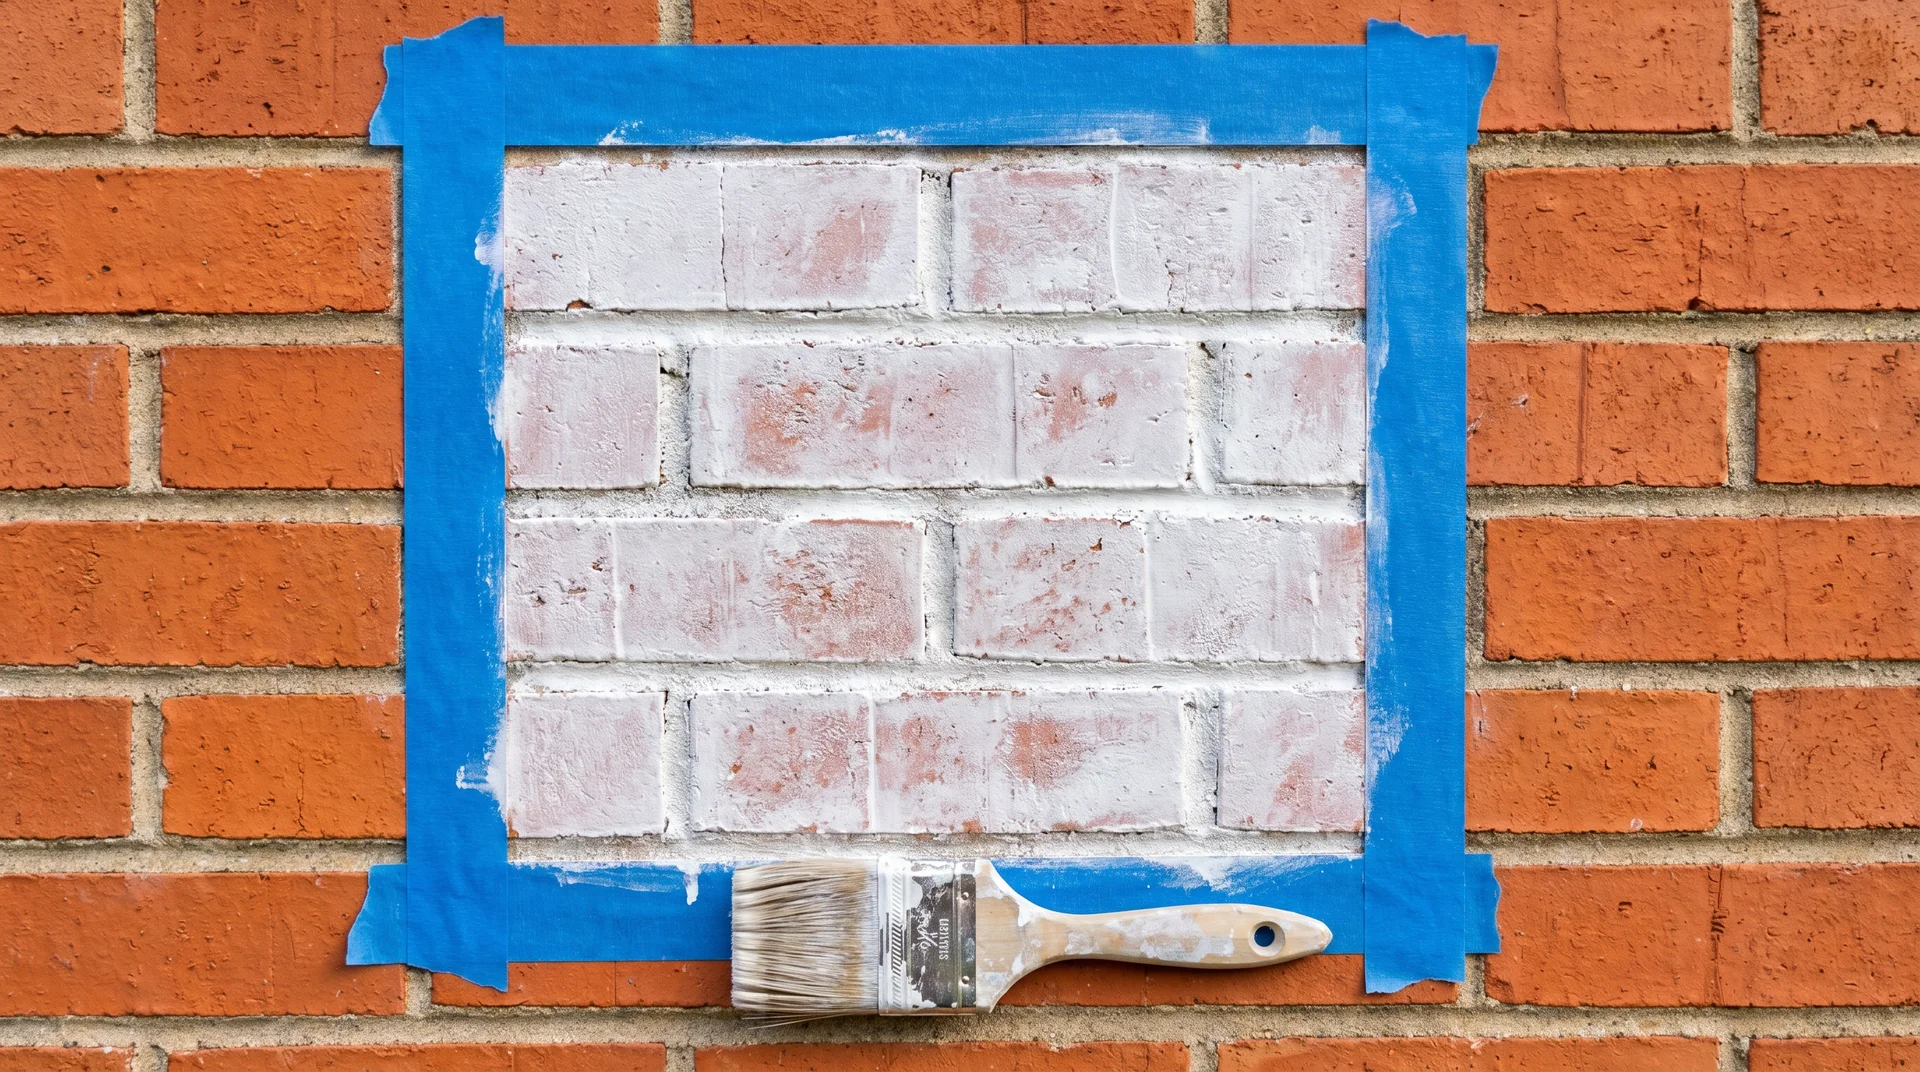
Test your dilution on a 2×2 foot section of the actual wall, not a spare brick. Let it cure fully for 24 hours. Evaluate in both direct sunlight and overcast light. The wet color is not the dry color. Adjust before you scale up.
Application Technique
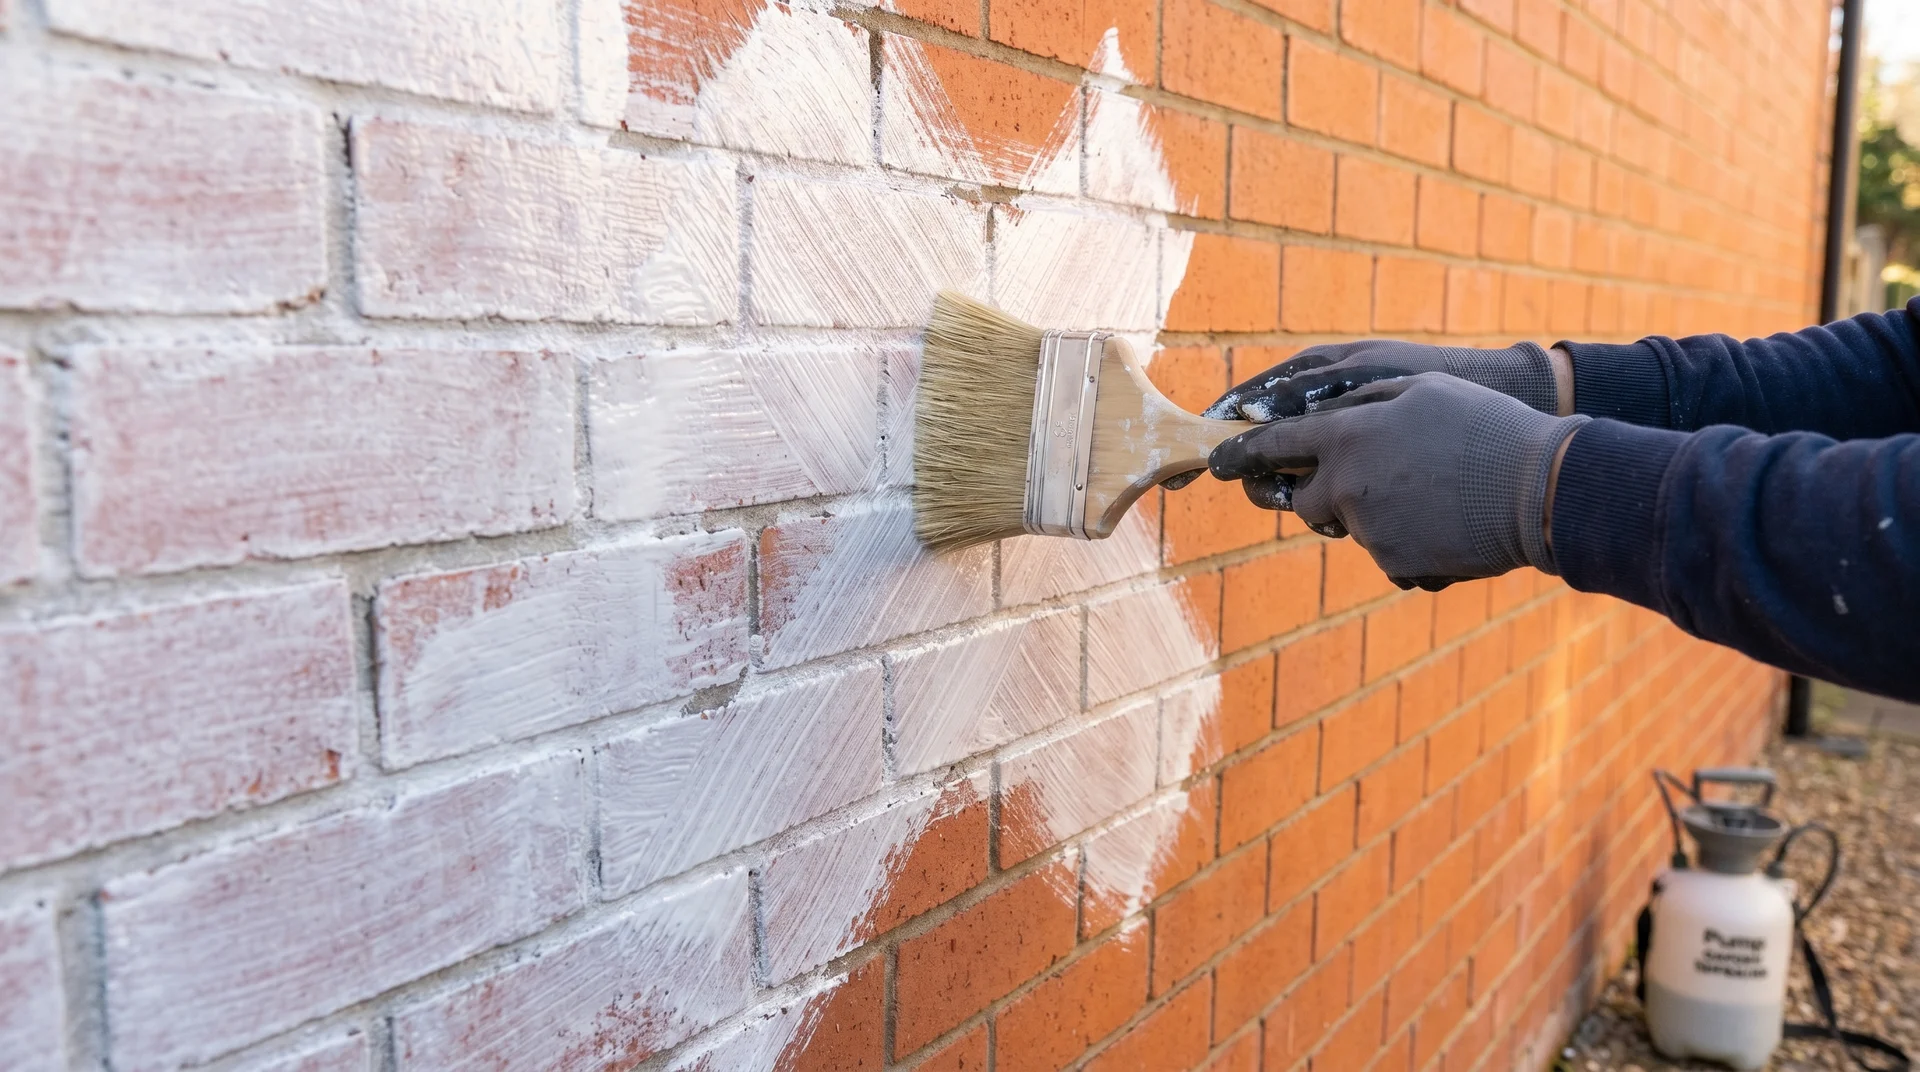
Work in sections of roughly 4 to 6 square feet at a time. Mist the brick lightly with water from a pump sprayer before applying limewash. This slows drying and improves penetration, especially important in warm or direct-sun conditions.
Apply with crosshatch brush strokes and work the material into the mortar joints. Variation in coverage is normal and intentional; it’s what makes the finish look organic. Avoid afternoon direct sun; overcast days or early morning give the most even result.
Trim and Finishing
Paint or touch up trim after the brick cures, not before. This lets you confirm your chosen trim color still works with the actual dried limewash tone, which can shift during curing. If you want a more distressed look, scrub gently with water after the first cure to open up more texture.
Whitewash Brick Mistakes That Ruin the Finish
In twelve years of residential design work, these are the mistakes I see repeatedly.
- Choosing opacity based on an inspiration photo without patch-testing. Every photo is taken in specific light, with specific brick, at a specific dilution. Your brick will respond differently. Test first.
- Applying limewash over previously painted brick. Limewash can’t bond over paint. If your brick has ever been painted, you need whitewash or latex. Applying limewash over paint produces an uneven surface that starts separating within months.
- Working in direct afternoon sun. The product dries too fast. You get lap marks and uneven patches that are nearly impossible to correct once they’ve set.
- Treating the brick decision separately from the trim and roof. The whitewash is one element in a full exterior palette. Plan all of it together. Choosing trim color after the brick is done almost always leaves something feeling off.
- Skipping moisture and crack assessment. Any existing moisture problems or failing mortar joints get sealed in rather than solved. Address the underlying condition first.
- Applying multiple coats of whitewash, trying to get a limewash look. Multiple coats of diluted latex paint read more like paint than whitewash. You lose the translucent, textured quality that made the effect appealing. If you want a limewash finish, use limewash.
Frequently Asked Questions
Is whitewashing brick permanent?
Traditional whitewash (diluted latex) is difficult to remove and should be treated as permanent. Limewash can be power-washed off within the first few days after application. After it fully cures, it becomes semi-permanent. German schmear is fully permanent.
Can you paint over whitewash if you change your mind?
Yes. Standard exterior latex paint can go over a whitewashed brick surface. The original brick color won’t return, but you can repaint if you want a different finish.
How long does whitewash last on a brick exterior?
Limewash: 5 to 7 years before refreshing. Traditional whitewash with quality diluted latex: 10 or more years. In mild, low-humidity climates, some applications last 20 to 30 years.
Does whitewashing brick damage it?
Limewash doesn’t. It’s breathable and mineral-based. Traditional whitewash is low-risk when applied correctly. The most common damage risk comes from skipping prep, which traps moisture and accelerates deterioration.
What’s the best product for whitewashing a brick house exterior?
Romabio Classico Limewash (Bianco White or Avorio White) is the most consistently recommended product among professional painters and experienced DIYers. Available at The Home Depot.
How many coats of limewash does exterior brick need?
One coat is sufficient for most brick types at moderate to full opacity. A second coat gives more coverage. Going beyond two coats can reduce the breathability of the finish.
What’s the difference between whitewash and limewash for brick?
Limewash is made from slaked lime and water; it penetrates the brick, breathes, and is semi-permanent. Whitewash is diluted latex paint; it sits on the surface, can go over painted brick, and is more permanent. Both produce a visually similar translucent white finish but behave differently on the surface and over time.
One Thing Nobody Tells You Before You Start
You don’t just whitewash the brick. You whitewash the brick, then rethink the trim, then swap the front door, and somewhere in that process realize you’ve been driving past a house you didn’t like for years.
That’s the part homeowners consistently don’t expect. The result tends to pull other decisions forward, and those decisions tend to compound the transformation in ways that even a good before/after photo can’t fully capture.
The prep work and the opacity test are the two points where everything gets decided. Get those right, coordinate the full exterior palette, and this project almost always delivers more than people anticipated. It’s one of the few exterior updates where the risk, when you choose limewash, is genuinely low and the upside is genuinely high.
| Disclaimer: Always verify local building codes and HOA guidelines before making any changes to your home’s exterior. For a brick in poor structural condition, consult a licensed masonry contractor before applying any surface treatment. |