
A well-styled room reads as a whole until one element pulls your eye out of it. For tiled spaces, that element is almost always the grout. Clean grout is invisible. That’s actually the goal. The moment it goes black, it rewrites the room.
I’ve walked into homes with beautiful tile choices and carefully chosen fixtures where the grout was the only thing anyone could see. Clients apologized for it before I’d even set my bag down, as though they had failed some basic test of cleanliness. Usually, they hadn’t.
Blackened grout is a material problem as often as it’s a maintenance one, and treating it like a moral failing is exactly why so many people scrub for months with no real result.
Before you reach for a product, you need to know what you’re actually dealing with. The approach that clears embedded dirt won’t fully address active mold growth. The cleaner safe for ceramic can permanently etch marble.
This guide works through the diagnosis first, then the cleaning methods in order of intensity, then what to do when cleaning simply isn’t the right answer anymore.
If you’ve already tried the home remedies and come back here, jump to When Cleaning Black Grout Isn’t Enough.
What’s Actually Making Your Grout Turn Black
Mold and Mildew vs. Embedded Dirt: How to Tell the Difference
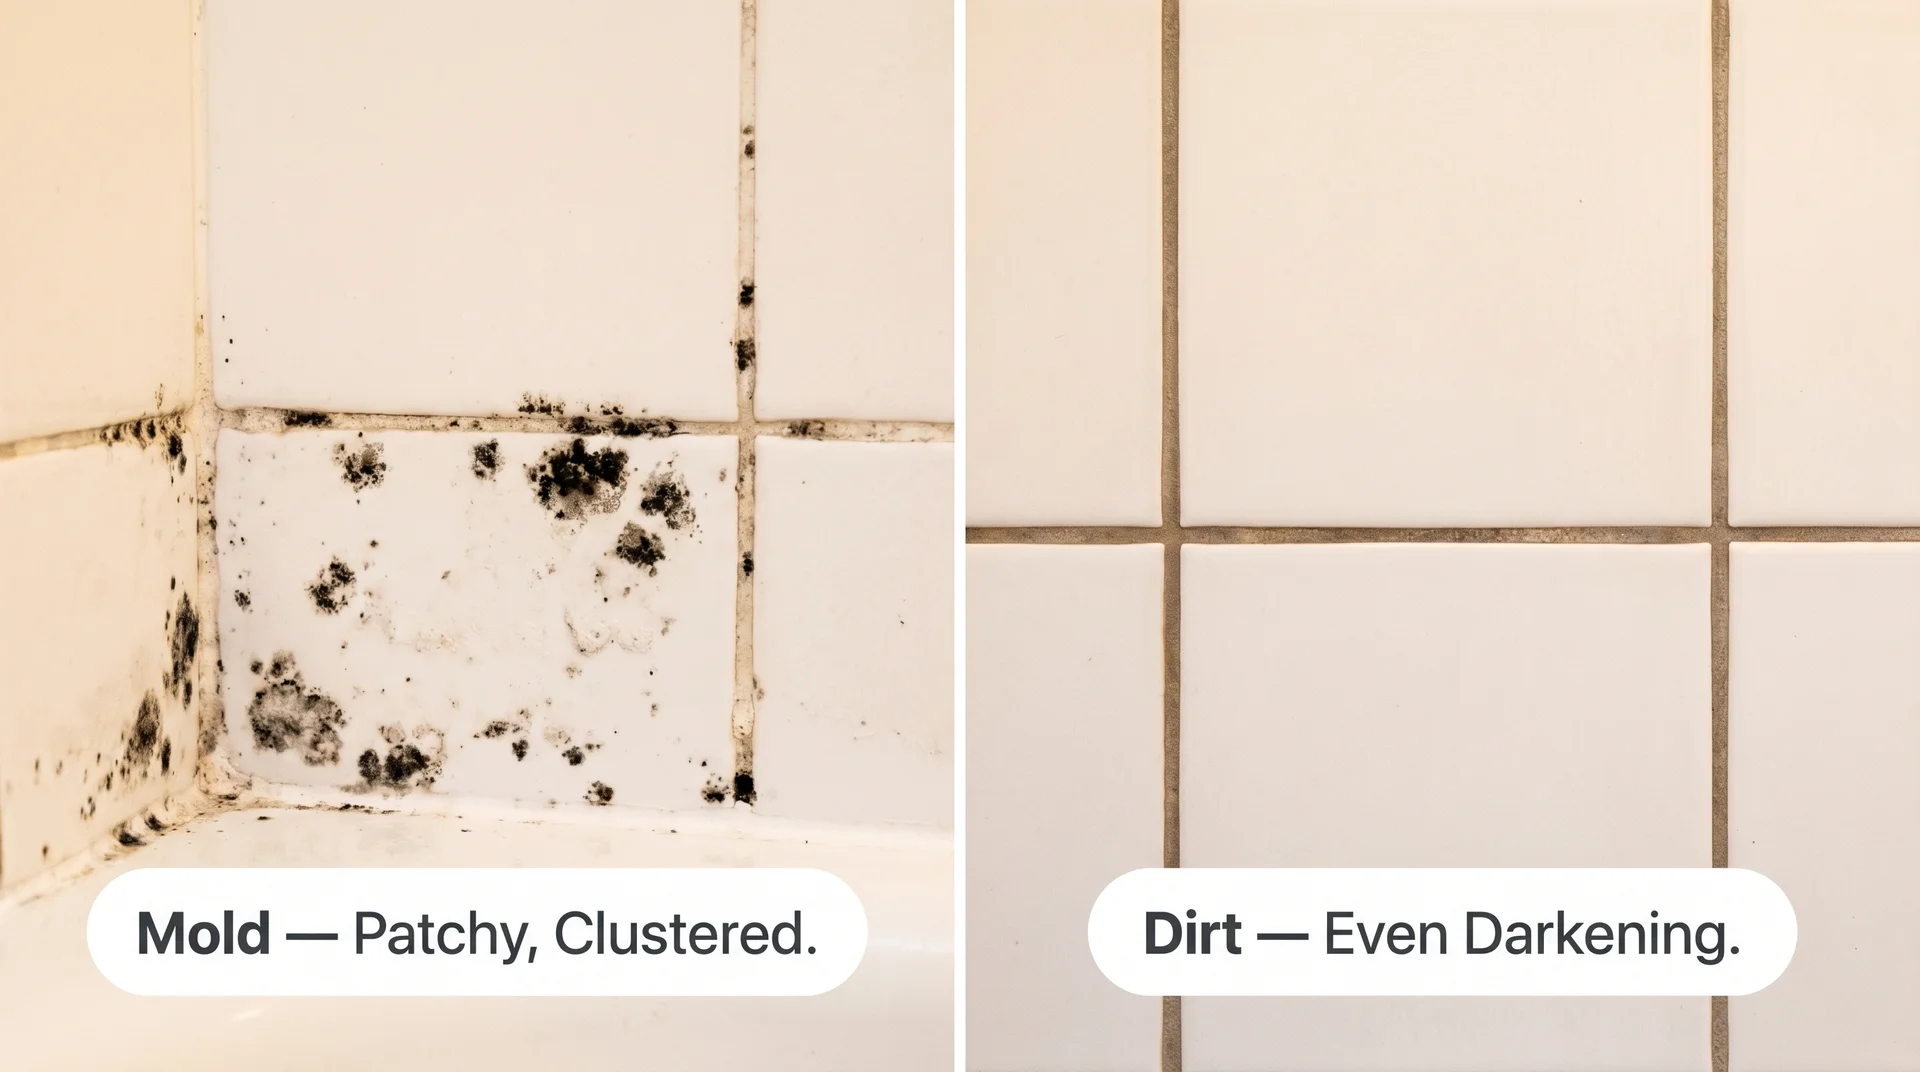
Embedded dirt and soap scum produce even, generalized darkening along the grout lines, particularly in high-traffic kitchen floors and entry areas. The discoloration tends to be consistent in color along each line.
Mold and mildew look different: they appear in patches, often starting at grout intersections, corners, and lower shower walls where moisture lingers. The texture can feel slightly fuzzy or irregular. Mildew runs gray to light black; mold tends darker, sometimes with a faint greenish tint in certain light.
Your nose is a reliable test. A bathroom that smells faintly musty even after a thorough clean has active mold, because the smell comes from spore activity, not surface grime.
The bleach swab test: Dampen a cotton swab with one part bleach and ten parts water. Press it against the darkest grout area for thirty seconds. If the color lightens, you’re dealing with mold or mildew. If the shade doesn’t change, you have embedded mineral staining or compacted dirt, and the treatment path is different.
There’s also a third type of discoloration worth knowing: efflorescence. This shows up as a white or gray powdery film on grout surfaces and comes from mineral salts migrating to the surface as water evaporates.
It’s common in basement or exterior tile and in newly grouted surfaces. Efflorescence responds to a diluted white vinegar solution on ceramic tile (but not on stone or unsealed cement grout), and it requires a different approach than either mold or dirt removal.
A note on toxic mold: Stachybotrys chartarum, the mold most often called “toxic black mold,” requires sustained water damage or a structural leak to establish itself. It’s uncommon in standard bathroom grout without an underlying moisture problem.
If your home has a history of water damage, if walls feel soft near the tile, or if tiles are shifting, contact a certified mold remediation professional before cleaning. The methods in this guide address common household mold in grout, not structural mold infestations.
Why Porous Grout Keeps Turning Dark
Cement-based grout is porous by design. Its structure absorbs whatever it contacts: water, soap, minerals from hard water, body oils, and cooking grease. Once that material oxidizes inside the grout rather than sitting on the surface, water alone can’t lift it back out.
There’s also a cleaning habit that accelerates the cycle. Mopping with dirty water deposits the grime it’s picked up directly into grout lines on every pass.
Rinse and replace mop water more frequently than feels necessary, especially on tile floors with dense grout coverage.
Know Your Grout and Tile Type Before You Clean Anything
Cement-Based Grout vs. Epoxy Grout
Most homes use cement-based grout, which is porous and reactive to acids. Epoxy grout is non-porous and largely self-maintaining.
If you have it (it feels harder and smoother than cement grout, and water beads on its surface), your dark staining is almost certainly surface contamination rather than deep absorption. Milder cleaners work faster on epoxy, and you’re unlikely to need anything beyond Level 1 or Level 2 below.
Ceramic and Porcelain Tile vs. Natural Stone
Vinegar is one of the most recommended grout cleaners on the internet. It also degrades the cement binder in grout with repeated use and etches marble, travertine, and limestone on contact. A couple of uses probably haven’t caused lasting damage.
Using it as a weekly cleaner for a year has almost certainly increased your grout’s porosity, making it faster to stain going forward.
If your tiles are any natural stone, marble, travertine, slate, or limestone, skip every acidic cleaner in this guide. The safe options are hydrogen peroxide and oxygen bleach, both of which are pH-neutral to mildly alkaline and won’t harm the stone or its finish.
How to Clean Grout That Has Turned Black: By Severity Level
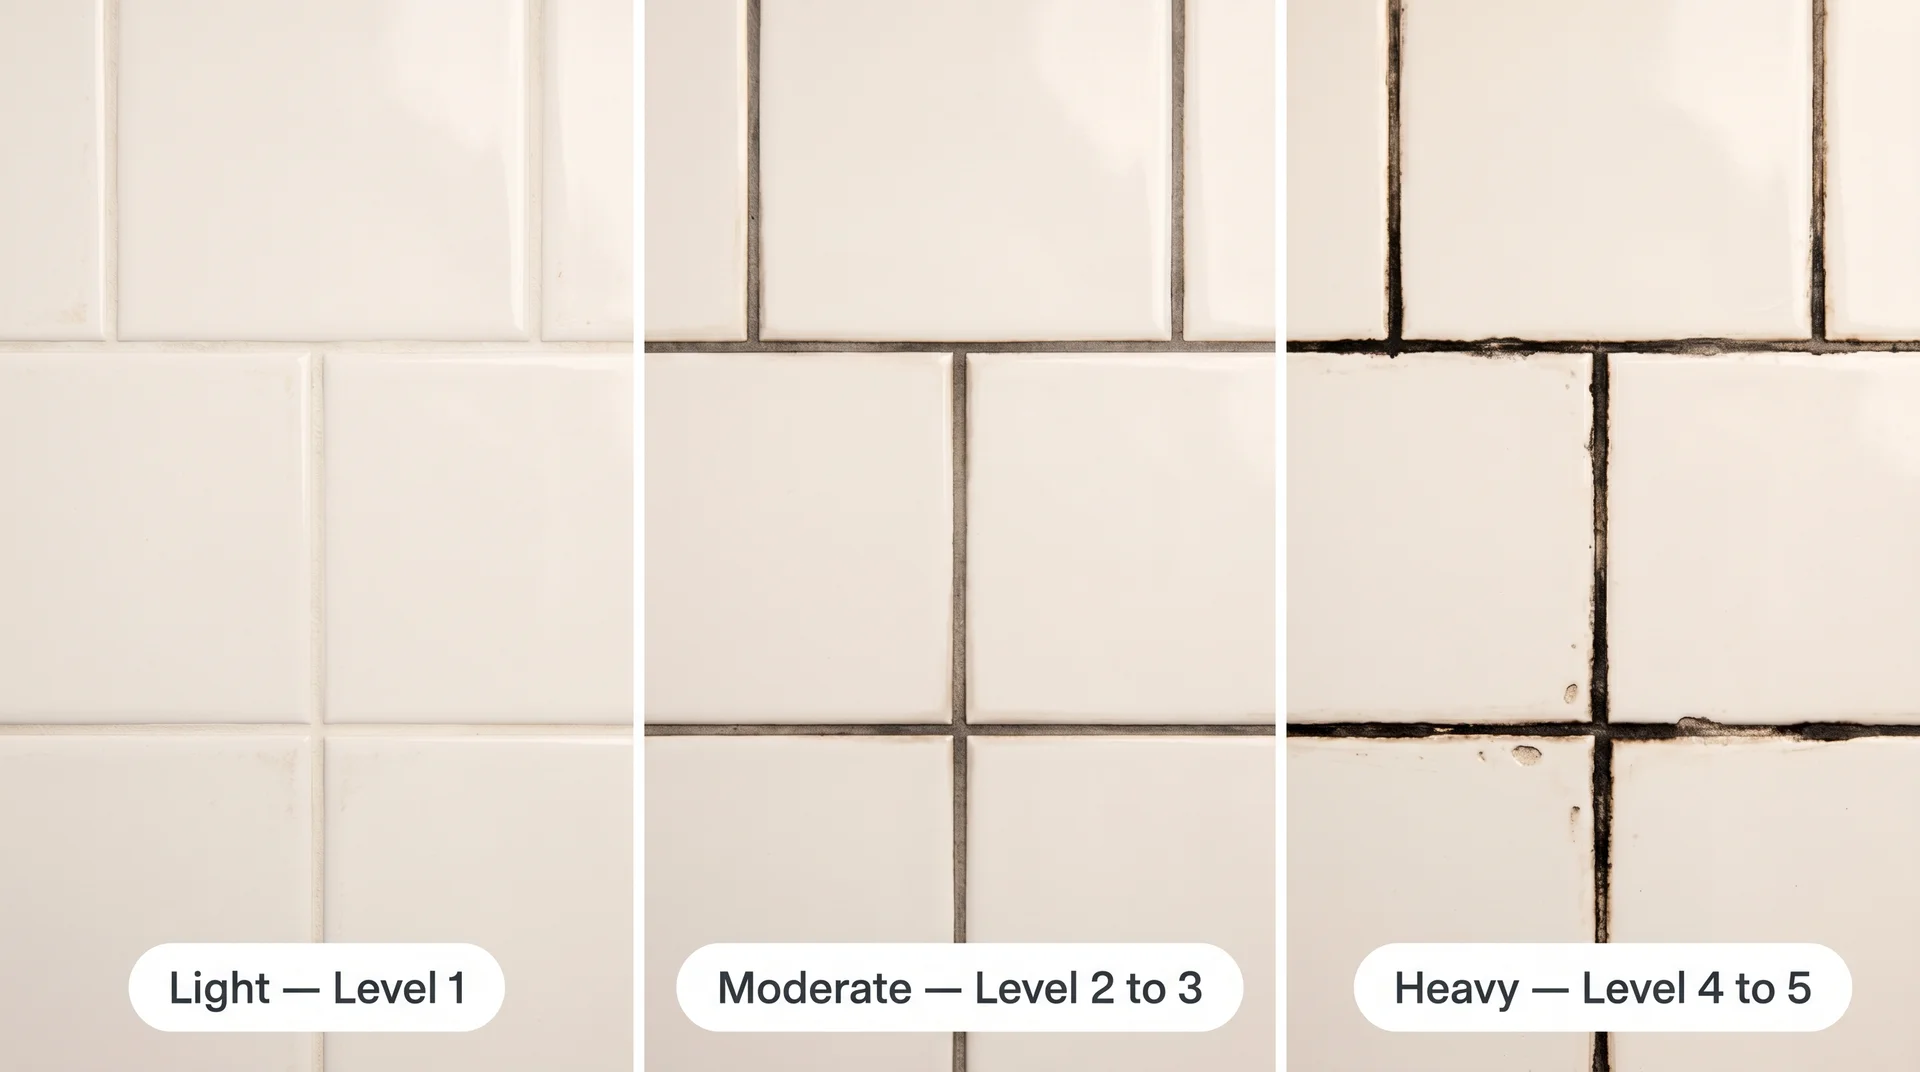
The most common reason home remedies disappoint people is that the cleaning method doesn’t match the severity of the problem. Work through these levels in order rather than jumping to the strongest option first.
Level 1 (Light Discoloration): Baking Soda and Hydrogen Peroxide Paste
This combination outperforms the more popular baking soda-and-vinegar method because hydrogen peroxide is an oxidizing agent that breaks down organic staining without the acidity that degrades cement grout over time. It’s also safe for use near natural stone tile surrounds, where vinegar is not.
What you need: Baking soda, 3% hydrogen peroxide (standard drugstore concentration), a stiff-bristled nylon grout brush or firm toothbrush, and clean water.
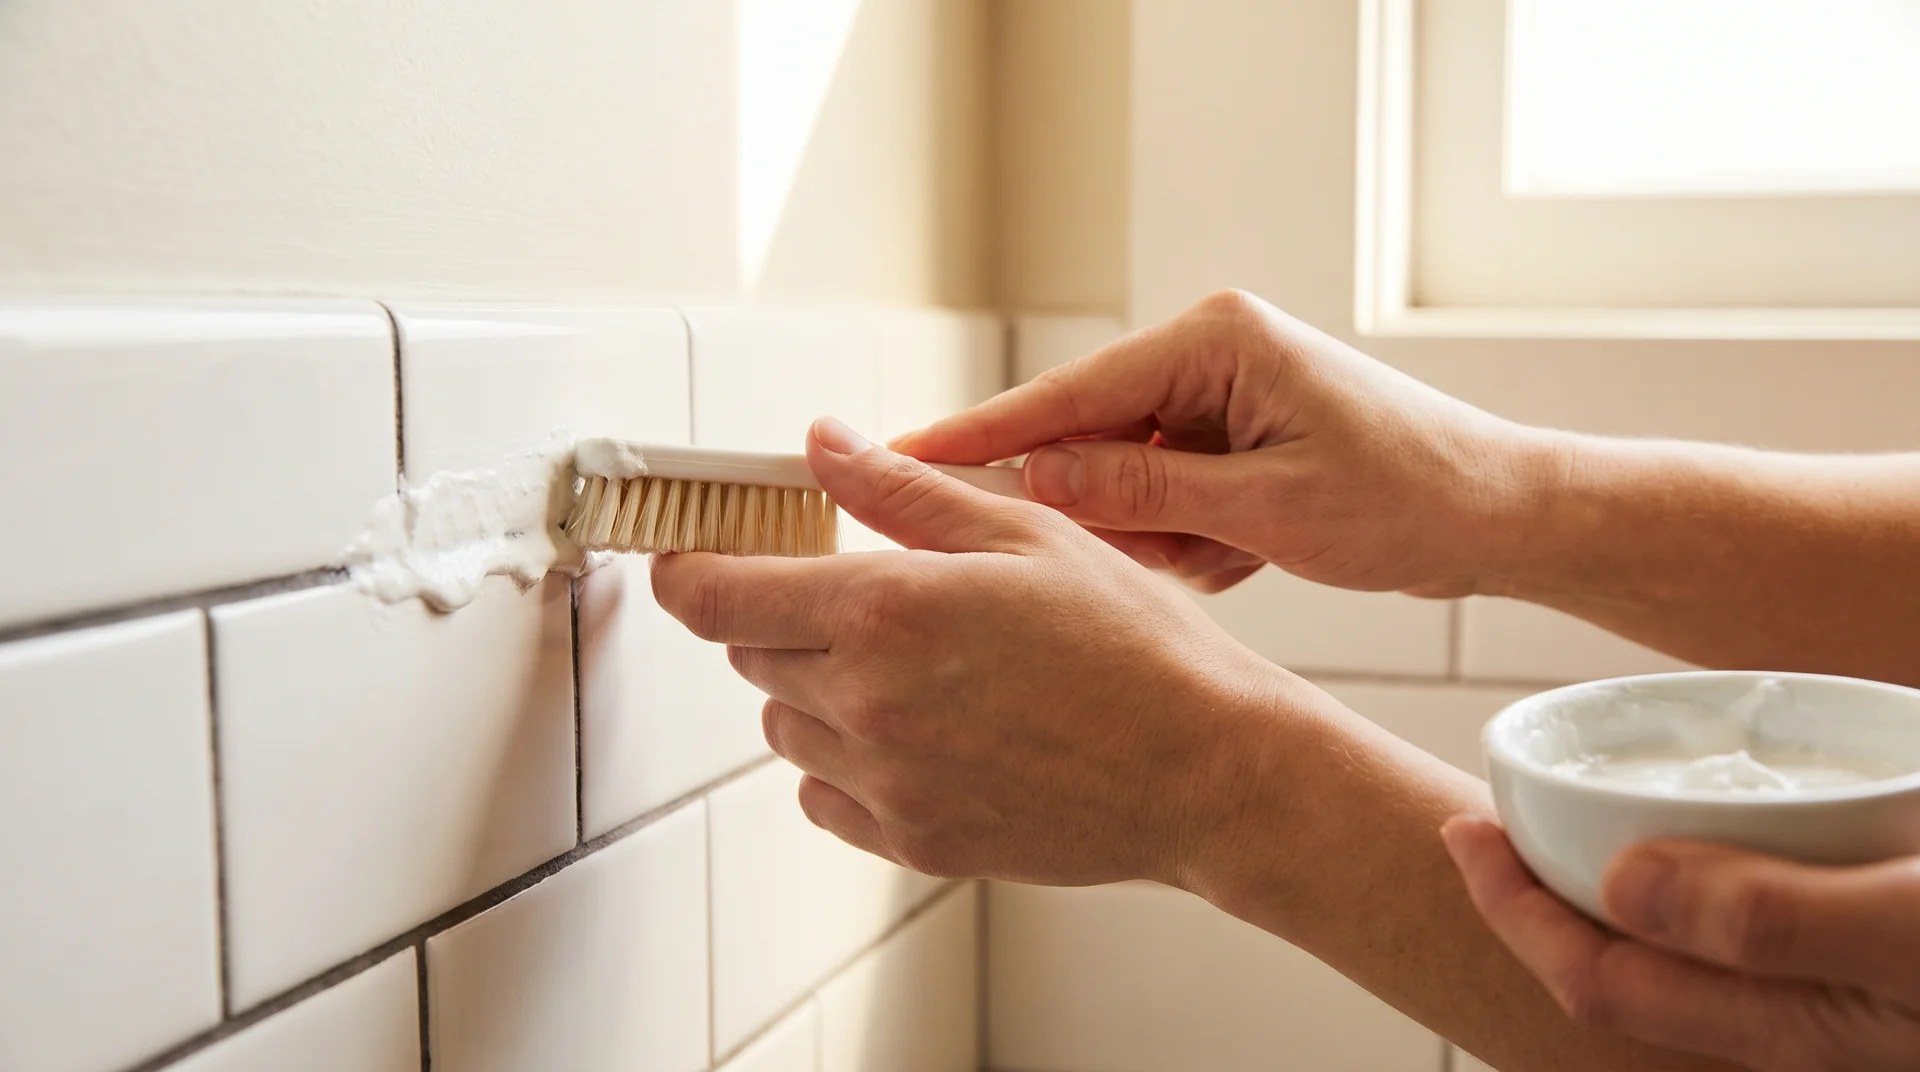
How to do it: Mix one part hydrogen peroxide with two parts baking soda to form a thick paste. Apply it directly to the grout lines and let it sit for fifteen to sixty minutes, depending on severity. Scrub along the grout line rather than across the tile face. Rinse thoroughly with warm water and dry with a cloth rather than leaving the surface wet.
Level 2 (Moderate Black Grout Staining): Oxygen Bleach Solution
Oxygen bleach (sodium percarbonate, found in products like OxiClean) releases oxygen ions that break apart embedded organic staining at a deeper level than surface scrubbing can reach. It’s more powerful than Level 1 and significantly safer in enclosed spaces than chlorine bleach.
How to do it: Mix with warm water to a paste-like consistency and apply to the grout lines. Let it dwell for twenty to thirty minutes before scrubbing. The dwell time is where the actual cleaning happens.
Scrubbing immediately after application produces a fraction of the result. Rinse thoroughly after scrubbing.
For shower wall grout where liquid runs off before it can work, mix one part 3% hydrogen peroxide with two parts washing soda (sodium carbonate, found in the laundry aisle) to form a paste that clings to vertical surfaces.
Level 3 (Heavy Mold and Deep Black Grout): The Chlorine Bleach Method
Chlorine bleach is effective on heavily mold-stained cement grout with ceramic or porcelain tile. Use it deliberately, because it carries enough conditions to matter.
| Surface Situation | Safe to Use Chlorine Bleach? |
|---|---|
| White or light cement grout, ceramic or porcelain tile | Yes, with correct dilution |
| Colored or pigmented grout | No, permanent bleaching risk |
| Natural stone tile surrounds | No, etching or dulling over time |
| Unventilated bathroom | No, fumes concentrate quickly |
How to do it:
- Mix one part bleach to three parts water.
- Apply with a brush or sponge while the exhaust fan runs and a window or door is open.
- Let it sit for no more than five minutes.
- Scrub with a nylon brush, then rinse very thoroughly.
- Wear gloves. If natural stone tile borders the grout you’re treating, apply petroleum jelly to the tile face first as a buffer.
Note: Bleach kills surface mold but doesn’t remove the organic material mold feeds on. If the moisture source isn’t addressed, regrowth follows.
Level 4: Steam Cleaning Black Grout Without Chemicals
Steam cleaning is the right option when your tile is natural stone (which rules out most liquid cleaners), when you have respiratory sensitivities that make bleach or oxygen bleach difficult to use in an enclosed space, or when you want the deepest clean without any chemical residue.
Steam penetrates porous cement grout at high temperature and physically dislodges embedded grime rather than dissolving it chemically. It’s particularly effective on floor grout in high-traffic areas where staining has been compacted by foot pressure over the years.
For home use, look for a unit with at least 40 PSI of steam pressure and a dedicated grout nozzle attachment. Work in short passes close to the grout line and wipe up released grime with a microfiber cloth as you go, before it can resettle.
Level 5: Commercial Grout Cleaners for Black Staining
When home methods aren’t producing results, a purpose-formulated commercial grout cleaner offers concentrated chemistry without the guesswork.
Look for an oxygen-bleach-based or enzyme-based formula with a pH between 8 and 10, and a stone-safe designation if your tile is marble or travertine.
Enzyme-based formulas are particularly effective on mold-related staining because the enzymes break down biological material at the source rather than just bleaching its color. Follow the label’s dwell time exactly; commercial products are calibrated for that window.
Cleaning Black Grout in the Kitchen vs. the Bathroom
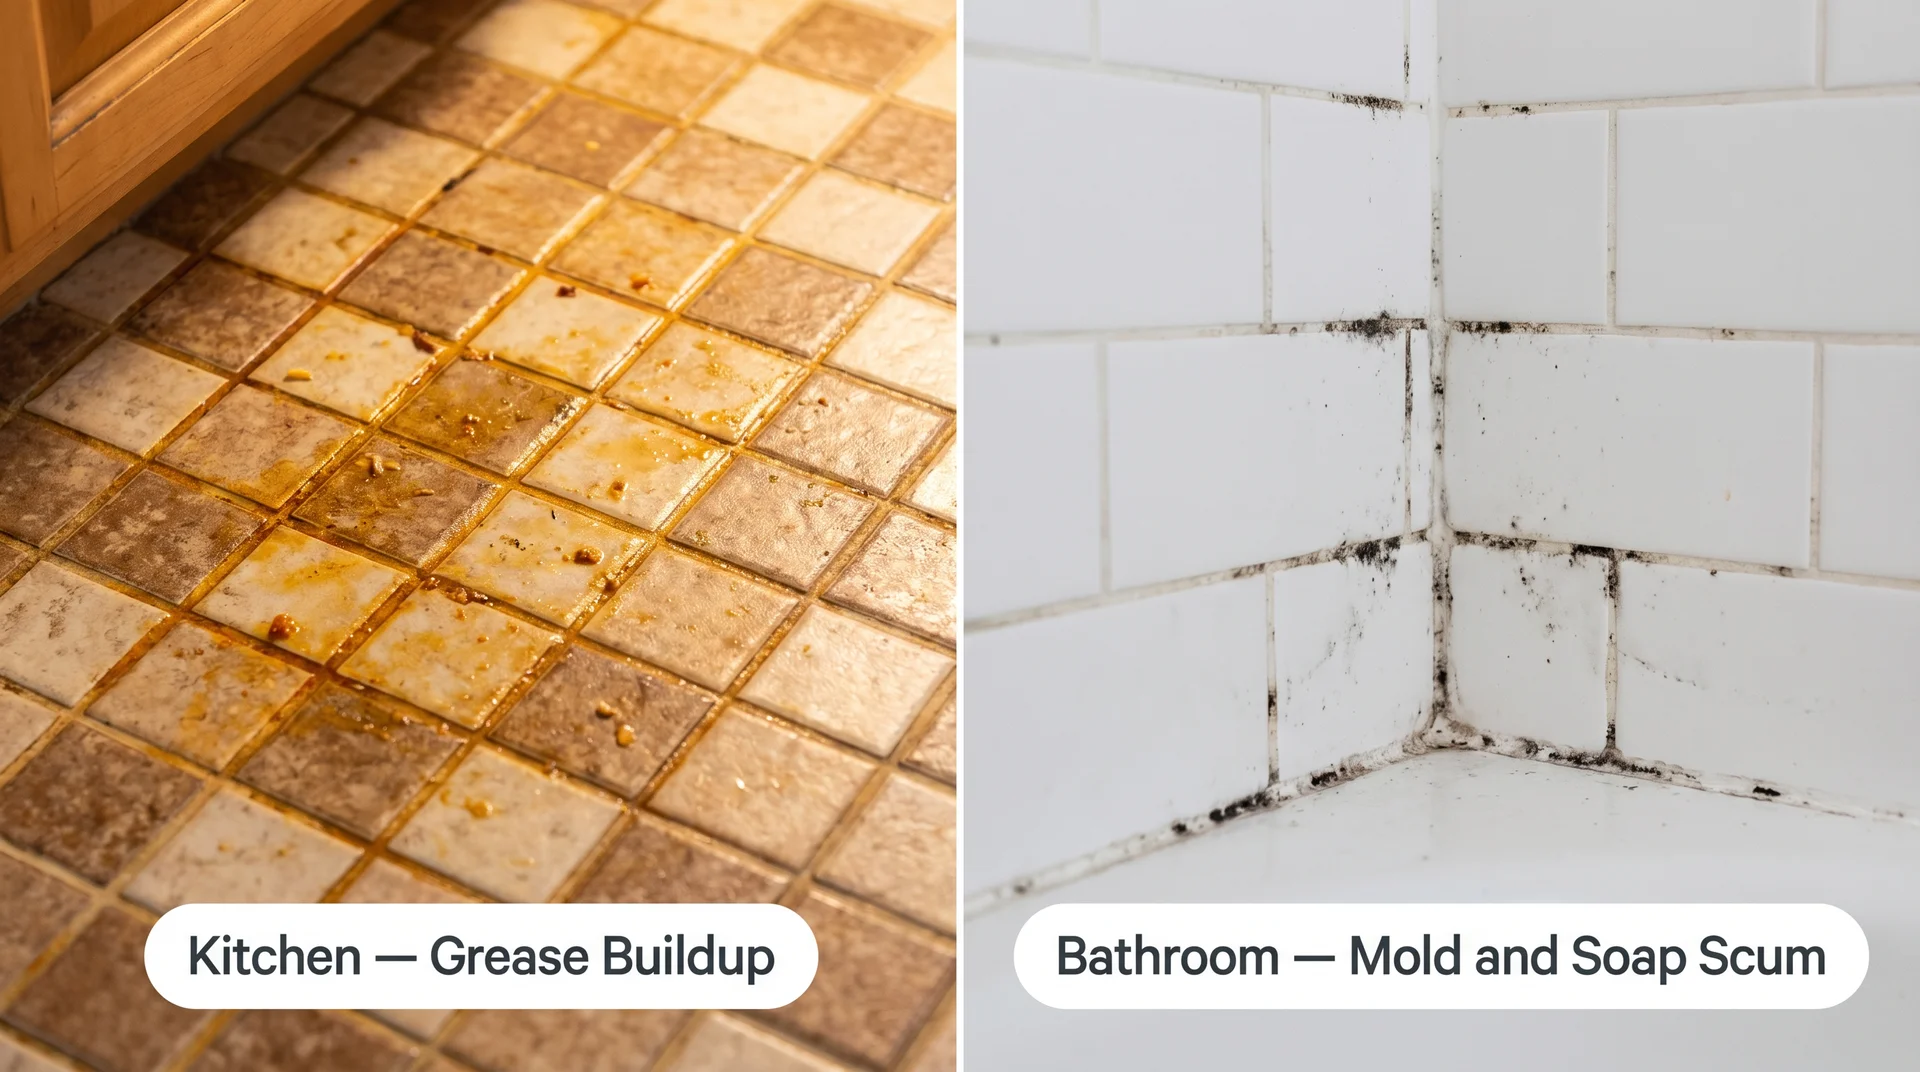
The cause of black grout in a kitchen is meaningfully different from the cause in a bathroom, and the cleaning approach needs to account for that.
Bathroom grout turns black primarily from mold, mildew, soap scum, and mineral deposits from hard water. The chemistry you’re working against is biological and mineral. Oxygen bleach and hydrogen peroxide paste address it well because both target organic compounds.
Kitchen grout turns black from a combination of grease, food particles, and everyday foot traffic. Grease is lipid-based, and lipids resist water-based cleaners far better than mold or soap scum does. For kitchen floor grout specifically:
- Start with a degreasing pre-treatment. A few drops of dish soap mixed into warm water, worked into the grout with a brush, and left to sit for ten minutes, breaks the grease bond before you apply any heavier cleaner.
- Follow with oxygen bleach paste for any residual dark staining after the degreaser rinse. The two-step approach works significantly better than going straight to oxygen bleach on grease-saturated grout.
- For kitchen backsplash grout near the stovetop, grease aerosolizes during cooking and settles into grout lines in a very thin film. A monthly wipe-down with a diluted dish soap solution prevents the buildup that takes serious effort to remove once it’s set.
On grout brush choice: for both kitchen and bathroom grout, a stiff-bristle nylon grout brush with an angled head gives you the most control in the line without abrading the tile face.
Keep a narrow toothbrush for grout intersections and corners where a standard brush doesn’t fit flush. Wire brushes and steel wool are too abrasive for grout and open the surface to faster re-staining.
When Cleaning Black Grout Isn’t Enough
Some grout is stained past the point where cleaning restores it. The discoloration has moved from the surface into the material’s structure, and it’s been there long enough that oxidation has locked it in. If you’ve worked through Levels 1 through 4 and the grout remains visibly dark, you have three practical options.
Grout Colorant and Renew Products for Permanently Stained Grout
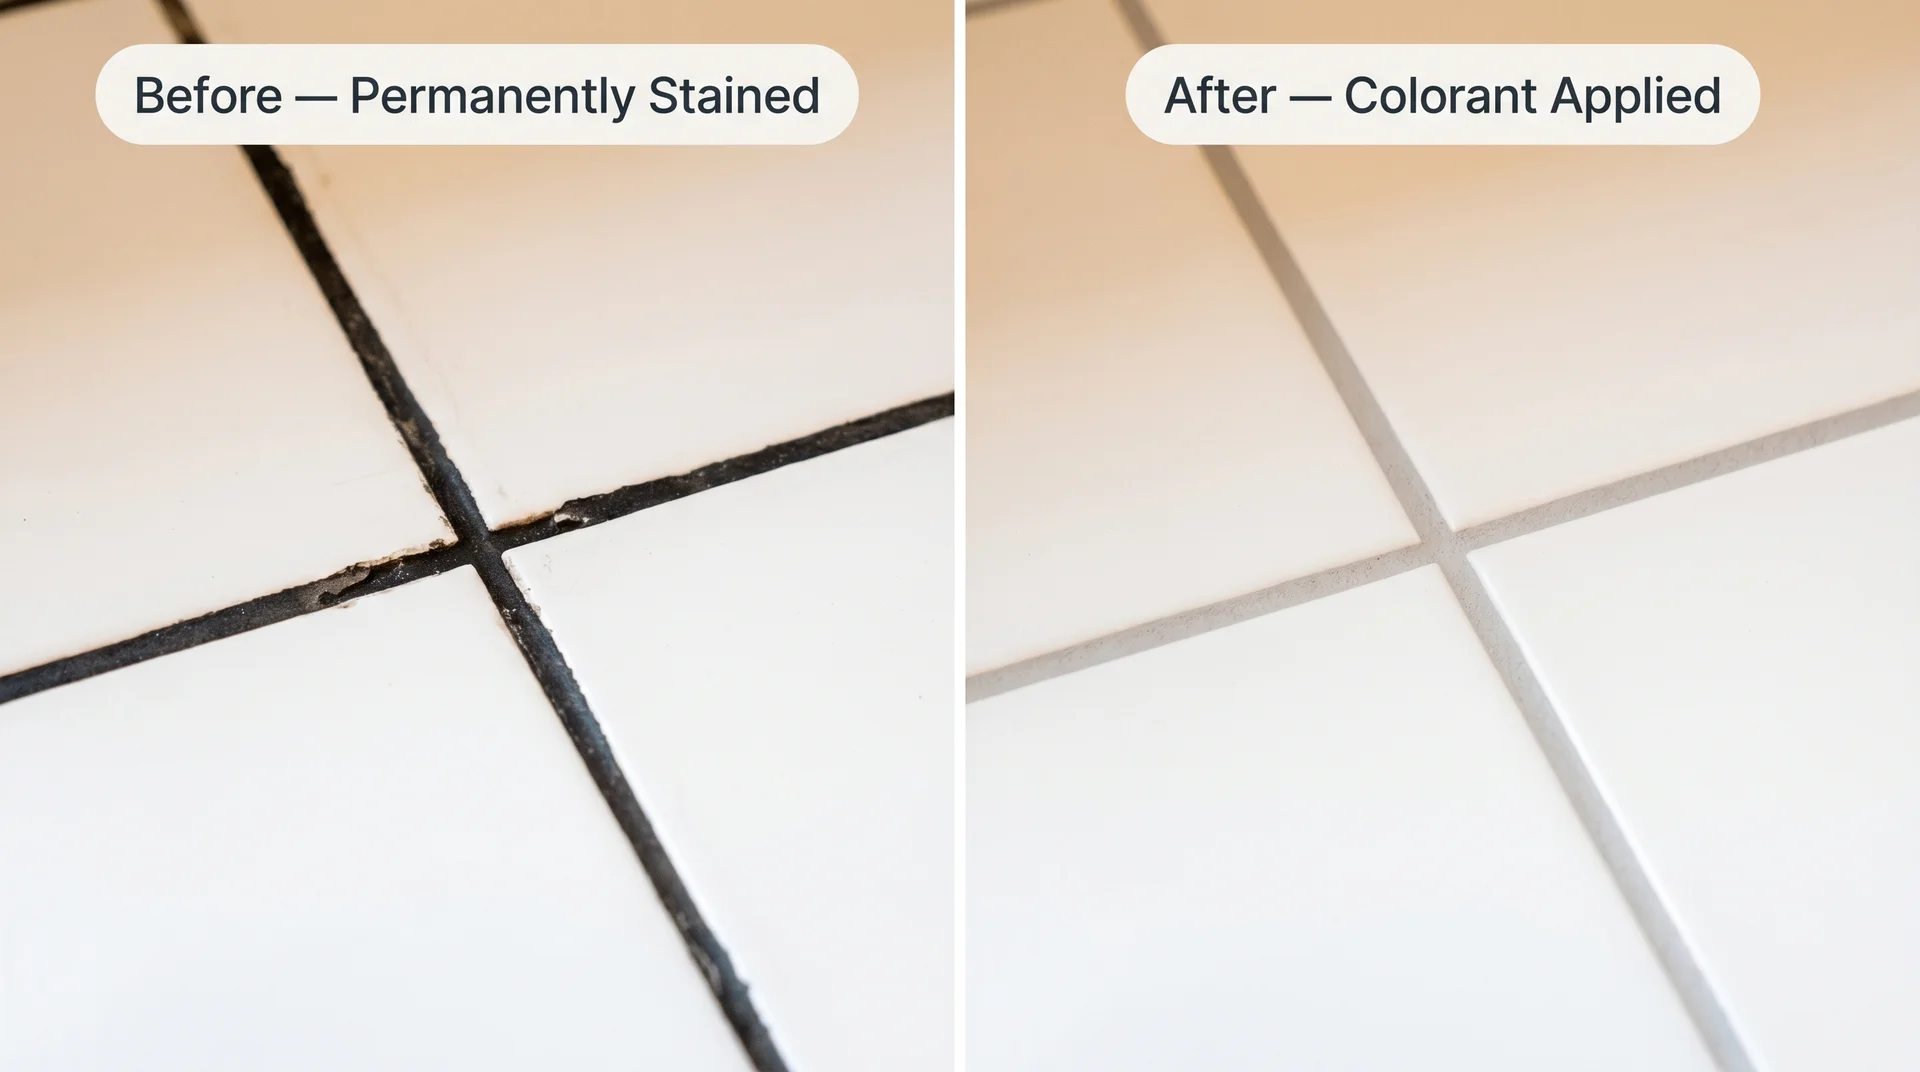
Grout colorant (also sold as grout paint or grout renew) is a pigmented compound applied over cleaned, dry grout to re-pigment the surface. You’re not removing the stain, you’re covering it with a fresh color layer that adheres to intact grout.
On structurally sound grout, the result genuinely looks like clean grout because the color is new and consistent.
Polyblend Grout Renew is the product that comes up consistently in real-world use from homeowners who’ve exhausted other options. It runs $15 to $20 at Home Depot, comes in a range of colors to match original shades, and is applied with a small brush along each line.
Wipe tile faces clean with a damp cloth before it fully dries, then let it cure fully before the surface contacts water.
On a full bathroom floor, it’s a few hours of focused work. Most people who’ve spent months scrubbing report it takes a fraction of the time all those cleaning attempts added up to. Grout pens work the same way at a smaller scale, useful for isolated lines or touch-ups.
One condition applies: colorant bonds to intact grout. If lines are crumbling or cracking, it won’t adhere and will flake off within weeks.
Signs It’s Time to Regrout Instead of Clean
Regrout is a bigger undertaking, and knowing when it’s the correct answer saves you from throwing more effort at the wrong problem.
Consider regrouting when:
- Grout lines are visibly crumbling, cracking, or flaking
- Individual tiles feel loose when pressed or sound hollow when tapped
- Deep staining returns within a few weeks of thorough cleaning
- You notice soft spots or bubbling drywall near the tiled area
Regrouting involves removing old grout with a grout saw or oscillating multi-tool, cleaning the joint, and pressing in fresh grout. For a small shower surround or bathroom floor, it’s a manageable weekend DIY project.
For large surfaces or full enclosures, a professional tile installer produces cleaner, more consistent lines than most first attempts.
The Hidden Moisture Problem Behind Recurring Black Grout
If the grout goes dark again within two to four weeks of a thorough clean, the cleaning method isn’t the issue. Something is keeping the grout consistently damp enough to sustain mold growth between sessions.
Common culprits: an exhaust fan undersized for the bathroom volume, slow shower drainage that keeps tile wet for hours after each use, a slow leak inside the wall near a supply line, or a window that condenses heavily in winter and drips onto the tile surround.
Signals that moisture is structural rather than surface-level: a musty smell that returns within days of cleaning, soft drywall near the tiled area, and tiles that flex slightly when pressed.
These point to water behind the tile, and at that stage, the right professional is a water damage restoration specialist, not a cleaning service.
Grout Cleaning Mistakes That Make Black Staining Worse
Mopping with dirty water. Each pass with contaminated mop water deposits its grime into grout lines rather than lifting them. Replace and rinse mop water more often than feels necessary on tile floors with dense grout coverage.
Using vinegar repeatedly on cement-based or stone grout. Vinegar cuts mineral deposits in the short term because it’s acidic. That same acidity slowly degrades the cement binder and etches soft stone surfaces. A few uses haven’t caused permanent damage. Using it as a regular weekly cleaner for a year or more has likely made your grout more porous and faster to restain.
Rushing the dwell time. The dwell phase is where the chemical work happens. Applying a product and scrubbing immediately captures a fraction of its potential. The scrubbing step removes what the cleaner has already loosened. Skip the wait, and you skip most of the results.
Sealing over dirty grout. Sealer applied over stained or moldy grout traps contamination underneath, making future cleaning harder, and produces a patchy, uneven finish. Clean and fully dry the grout first, then seal.
Using abrasive tools. Wire brushes and steel wool physically open the surface of grout, increasing its porosity and making it faster to restain. A stiff nylon grout brush gives you sufficient mechanical action without breaking down the surface.
How to Keep Black Grout From Coming Back
The Daily Habit That Does Most of the Work
A squeegee on shower walls after each use removes the moisture film that would otherwise sit on grout for hours. Paired with leaving the shower door or curtain open after bathing, this habit alone reduces mold growth substantially.
It takes about twenty seconds and addresses the root condition, prolonged moisture, rather than the symptom. On kitchen backsplashes, wiping cooking splashes before they dry prevents the grease deposits that cement grout absorbs fastest.
Ventilation and Why It Matters More Than You Think
Most residential bathroom exhaust fans are undersized for the room they’re in, particularly in older homes. The standard guideline: a fan with a CFM (cubic feet per minute) rating that matches or exceeds the bathroom’s square footage.
A 60-square-foot bathroom needs at least a 60-CFM fan. Running the fan during your shower helps, but running it for twenty minutes after you exit is where it actually removes the ambient moisture that grout absorbs. A $15 timer switch makes this automatic.
How and When to Seal Grout to Prevent Black Staining
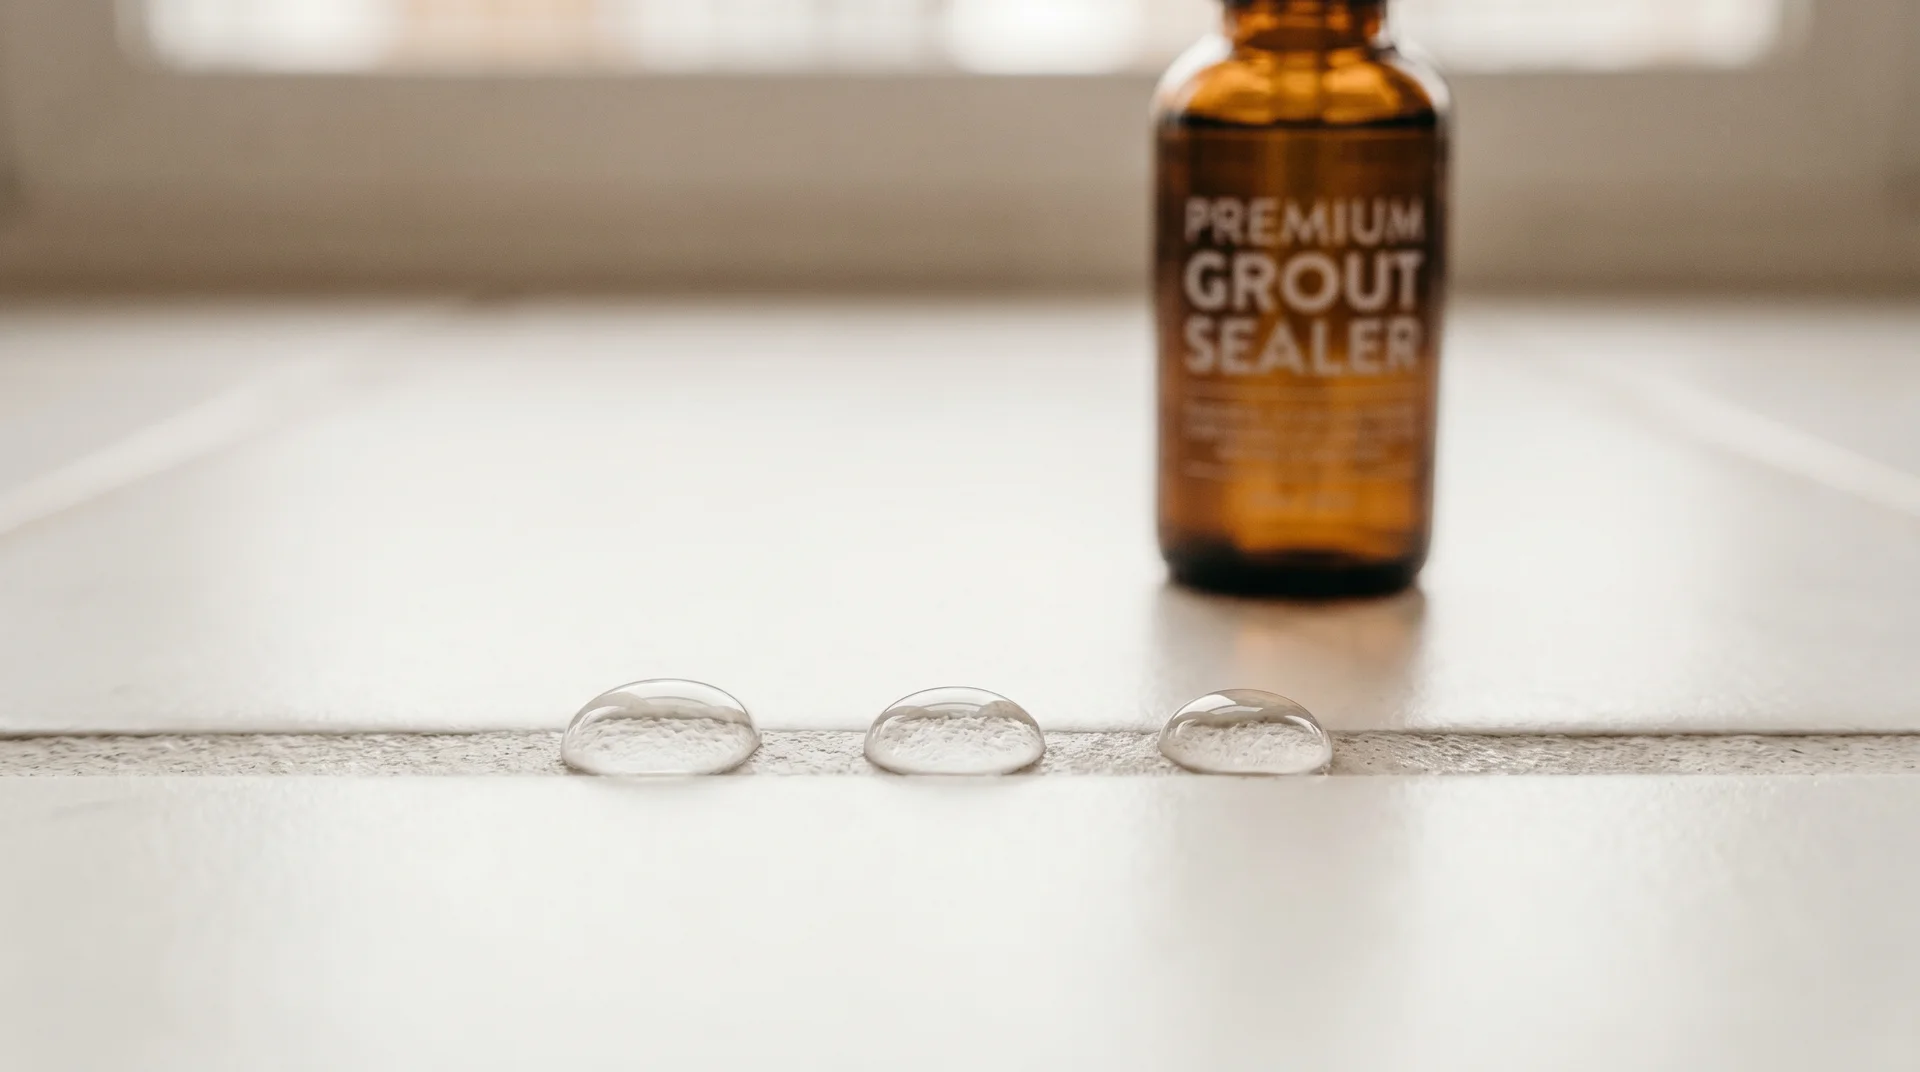
Grout sealer creates a barrier inside the porous structure of cement-based grout that slows moisture and contaminant absorption.
It doesn’t make grout impervious, but it meaningfully extends the time between deep cleaning sessions and makes regular maintenance far less effortful.
Apply sealer only to grout that is fully clean and completely dry. Sealed-over dirty grout traps the problem underneath.
| Sealer Type | How It Works | Best For | Reapplication |
|---|---|---|---|
| Penetrating (impregnating) | Absorbs into grout, protects from within | Showers, wet areas, stone tile | Every 1 to 3 years |
| Surface (topical) | Coats the grout surface | Low-traffic walls, dry backsplashes | Every 6 to 12 months |
Test before resealing: drip a few drops of water onto the grout. If they bead up, the sealer still has protection. If they absorb within thirty seconds, it’s time to reapply.
Frequently Asked Questions
Is Black Grout Always Mold, or Can It Just Be Staining?
It’s often a combination. Even generalized darkening across a floor or backsplash is usually accumulated dirt and soap scum. Spotty, clustered black patches at grout intersections and corners in wet areas are more likely to be mold or mildew. The bleach swab test described earlier in this guide reliably distinguishes between the two before you commit to an approach.
Can I Seal Over Grout That Has Already Turned Black?
No. Sealer applied over stained or moldy grout traps the contamination underneath, prevents future cleaning from reaching it, and produces a patchy finish. Clean the grout completely and let it dry for at least 24 hours before sealing.
How Often Should Grout Be Cleaned to Prevent Blackening?
In a primary bathroom with daily use, a focused grout cleaning every four to six weeks is reasonable for maintenance. A full deep clean at Level 2 or Level 3 intensity is appropriate once or twice a year. The squeegee habit reduces how often heavier sessions are necessary.
Will Chlorine Bleach Damage My Tile?
It depends on the tile. Ceramic and porcelain tolerate diluted bleach well. Natural stone tile, including marble, travertine, slate, and limestone, can be dulled or etched even with diluted bleach. Colored grout can be permanently bleached. When in doubt, test in a hidden spot first, and use oxygen bleach as the safer alternative for mixed or uncertain tile types.
When Should I Regrout Instead of Clean Black Grout?
If the grout is physically deteriorating, if tiles feel unstable when pressed, or if heavy staining returns within weeks of thorough cleaning, regrouting is the appropriate solution. If the grout is structurally intact with no crumbling or cracking, cleaning or grout colorant will address the visual problem. Scrubbing structurally compromised grout tends to accelerate the breakdown rather than improve the appearance.
Is It Safe to Clean Black Grout in a Bathroom Without Ventilation?
For hydrogen peroxide paste and oxygen bleach, yes, though opening a window or door is still worthwhile. For chlorine bleach, no. Fume concentration in a small, unventilated bathroom reaches irritating and potentially harmful levels quickly. Run the exhaust fan, open what you can, and work in short sessions if ventilation is limited.
What Is the Fastest Way to Clean Severely Blackened Grout?
For cement-based grout with ceramic or porcelain tile: diluted chlorine bleach (one part bleach to three parts water), five-minute dwell, firm nylon brush, thorough rinse. For surfaces where bleach isn’t appropriate, an enzyme-based commercial cleaner with the full label-recommended dwell time is the next most effective option. In both cases, speed depends more on respecting the dwell time than on scrubbing harder.