
If you’ve been saving “board and batten” images and “wainscoting” images into the same folder without fully knowing the difference, you’re not alone.
Most people don’t realize they’re sometimes looking at the same thing described two ways, and sometimes at completely different treatments with different costs, difficulty levels, and design histories.
Before you buy materials or call a contractor, it’s worth understanding what actually separates them, because the right choice isn’t about which looks better in someone else’s house. It’s about which fits your room.
What Each One Actually Is
Wainscoting is a category of wall treatment, not a single style. Board and batten is one style that falls within it.
Board and Batten
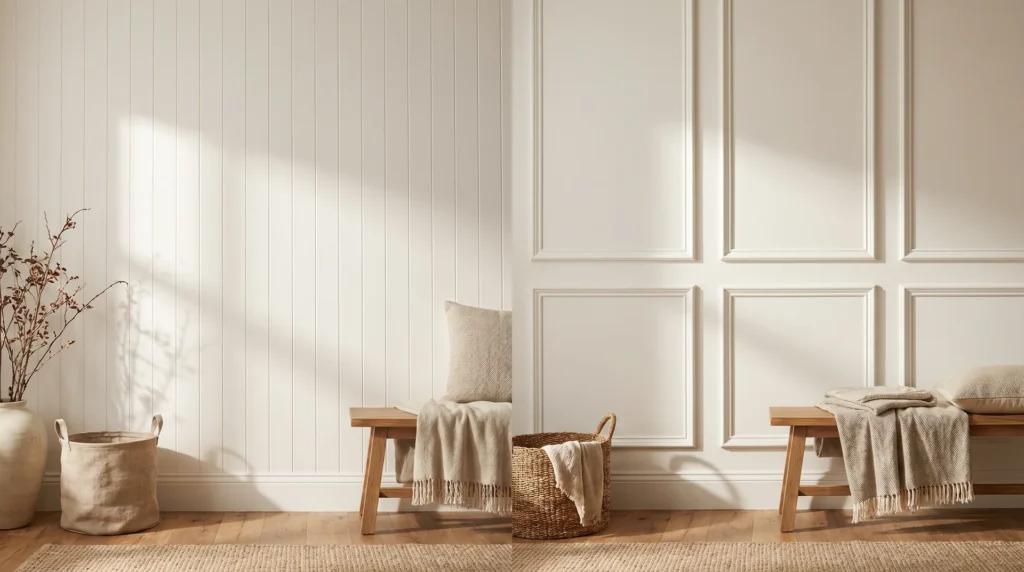
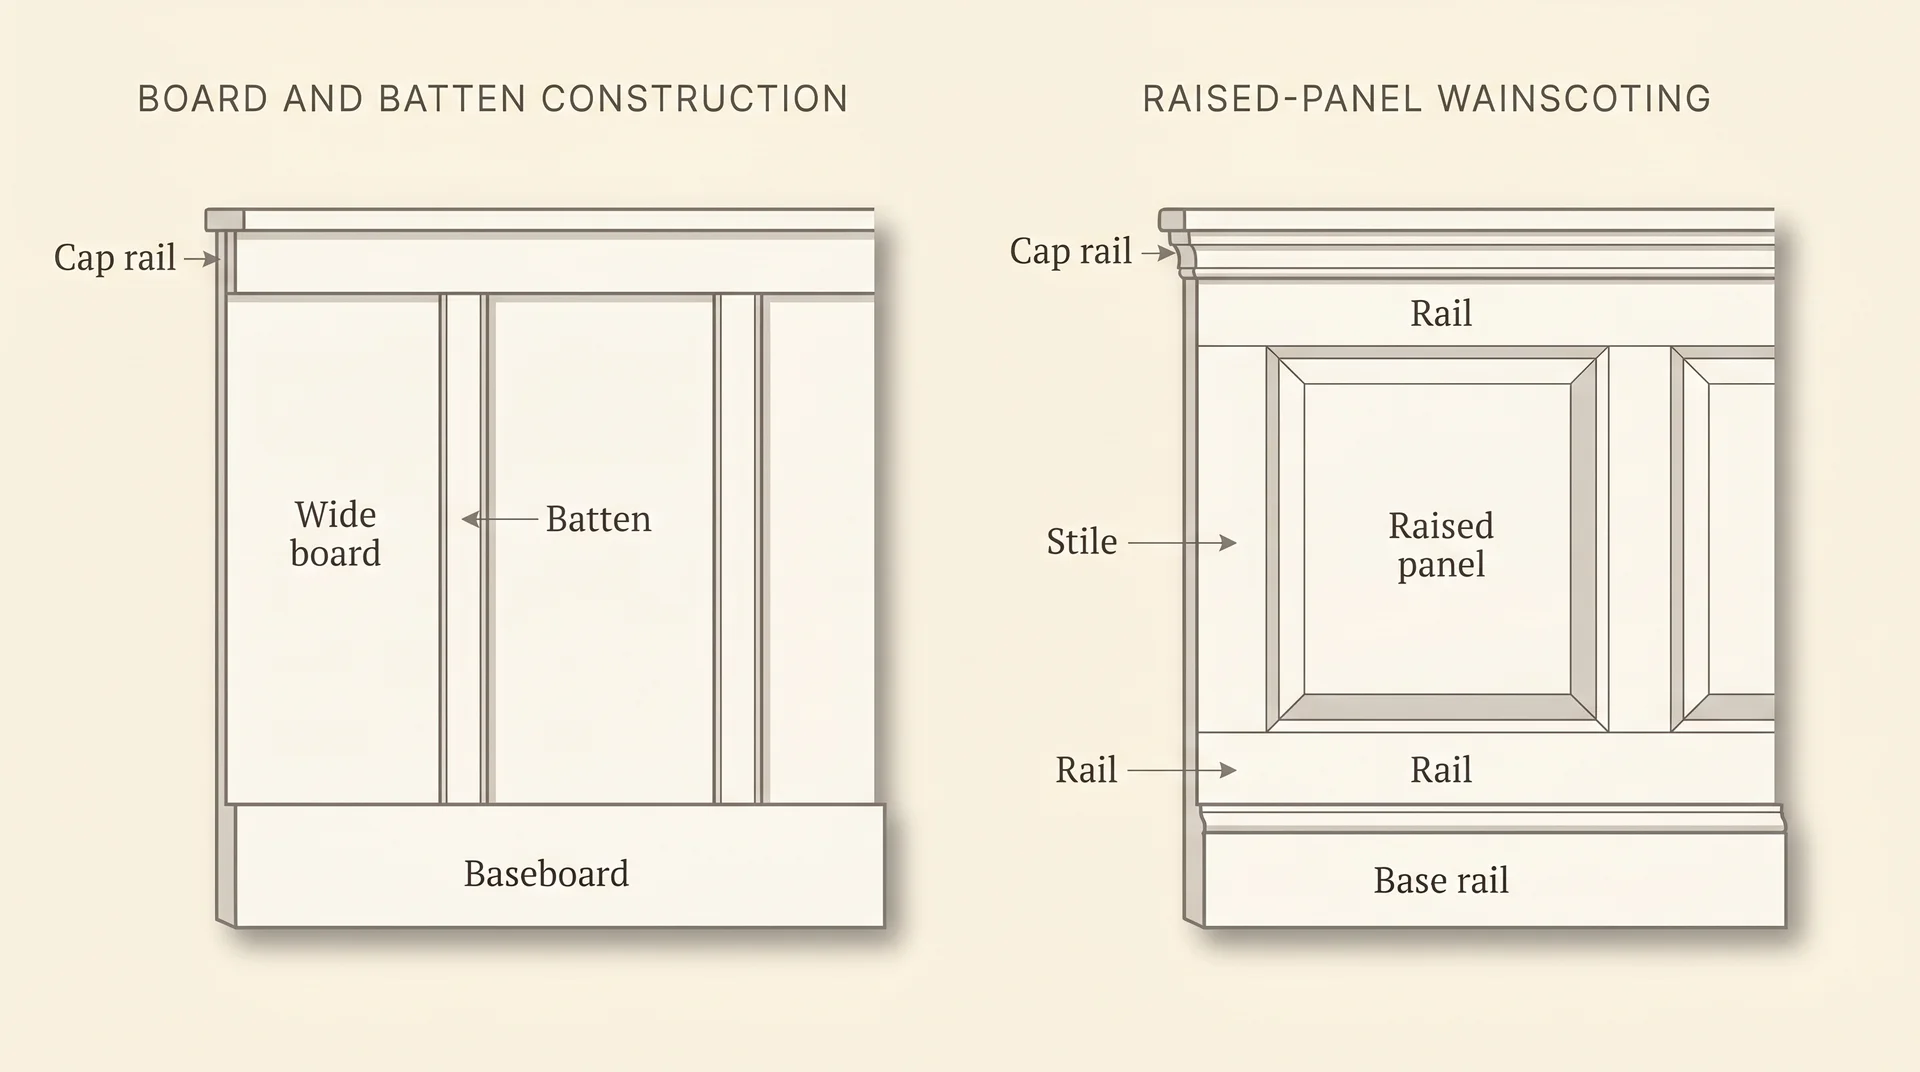
Board and batten is a wall paneling style built from wide flat boards installed vertically, with narrower strips of wood, the “battens,” placed on top at regular intervals.
The battens cover the seams between boards and create a clean, rhythmic vertical pattern that runs from the baseboard up to a horizontal cap rail.
The look is graphic and structured. It reads very differently depending on your room’s proportions, which we’ll get into in detail later.
Wainscoting
Wainscoting is a broader term for decorative paneling applied to the lower portion of a wall, typically from the baseboard up to chair rail height or just above.
It covers several distinct styles:
raised-panel wainscoting (the most formal version, with three-dimensional panels framed by rails and stiles),
- flat-panel wainscoting
- beadboard wainscoting
- board and batten wainscoting
So when someone asks “board and batten versus wainscoting,” they’re usually comparing board and batten to raised-panel or traditional flat-panel styles specifically.
How Board & Batten and Wainscoting Look Side by Side
The visual differences come down to pattern, architectural formality, and the feeling each treatment creates in a room.
| Feature | Board and Batten | Traditional Wainscoting (Raised Panel) |
|---|---|---|
| Pattern | Vertical stripes at regular spacing | Framed rectangular panels with dimensional depth |
| Typical height | 32 to 48 inches; sometimes floor-to-ceiling | 36 to 48 inches; rarely floor-to-ceiling |
| Visual weight | Lighter, graphic, contemporary | Heavier, architectural, formal |
| Design styles it suits | Farmhouse, transitional, casual contemporary | Traditional, colonial, period, formal interiors |
| DIY difficulty | Beginner to intermediate | Intermediate to advanced |
| Approximate material cost | $3 to $8 per linear foot | $8 to $20+ per linear foot (pre-made panels) |
Which One Fits Your Room?
The right choice depends heavily on where you’re putting it. These two treatments behave very differently across room types, and the material considerations matter as much as the aesthetic ones.
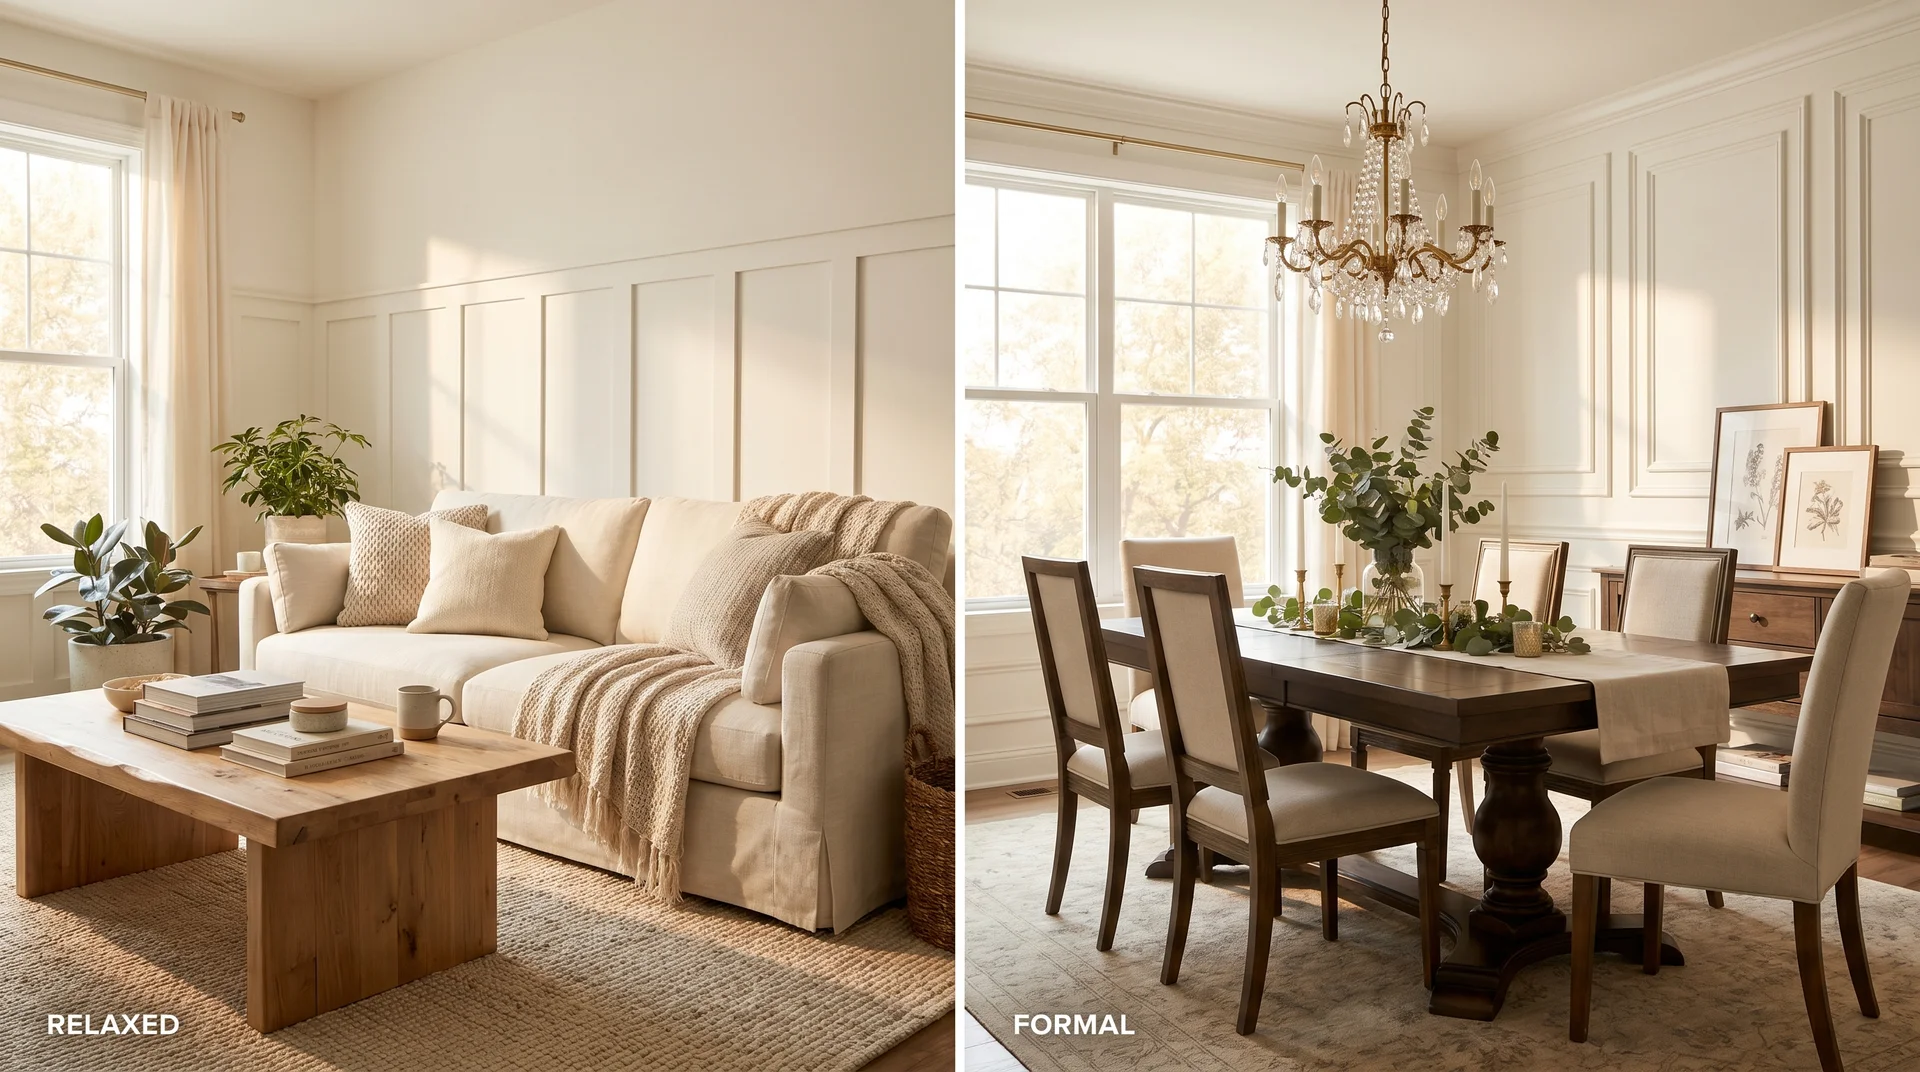
Living Rooms and Dining Rooms
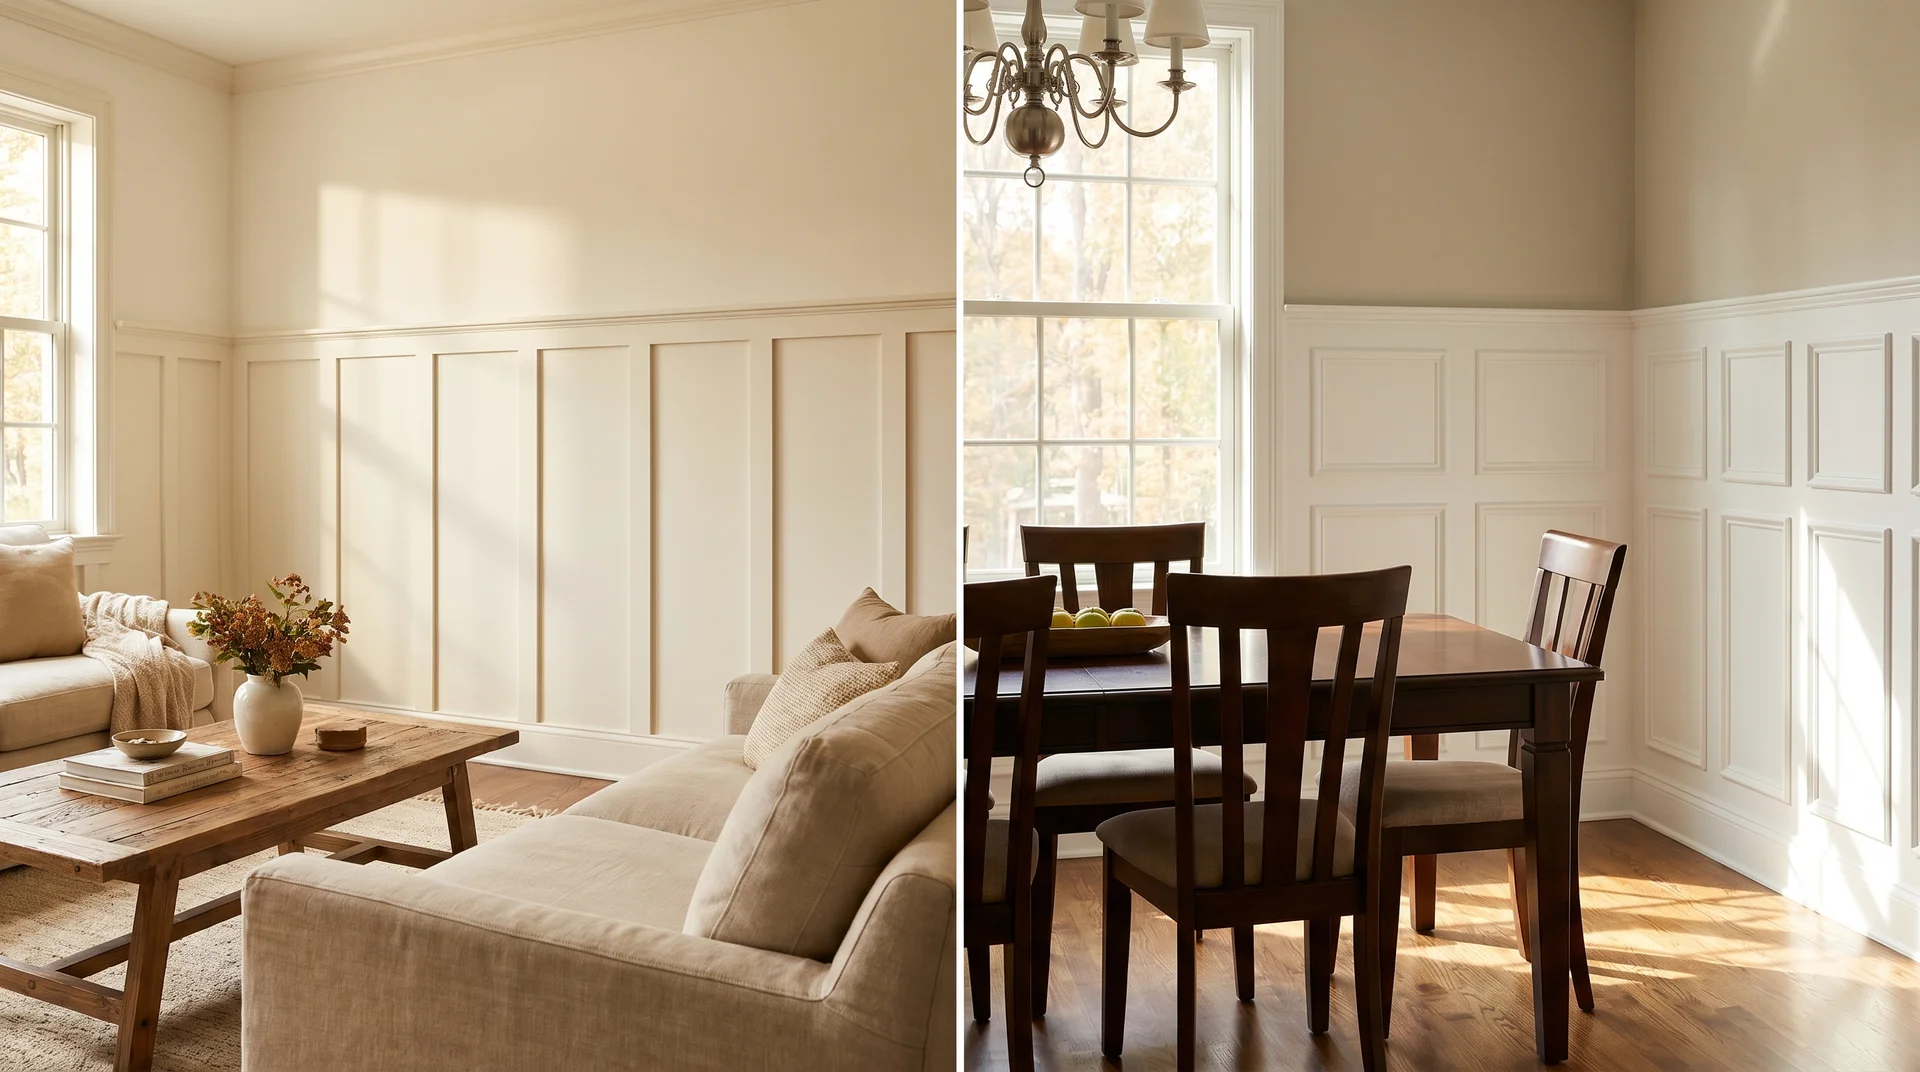
Both styles work in living and dining rooms, but they pull the space in different directions.
- Board and batten adds an informal, warm quality that suits casual living rooms, especially when there’s natural wood or neutral color elsewhere in the space.
- Traditional raised-panel wainscoting adds formality and architectural weight. It suits dining rooms with higher ceilings and classic furniture better than it suits a relaxed family room.
In open-plan spaces, the visual rhythm of board and batten can feel busy if the battens are spaced too closely.
On a 14-foot wall, spacing battens at least 12 to 16 inches apart lets the pattern read at a distance without creating visual noise. Tighter spacing can work, but it needs to be intentional and consistent with narrower batten widths.
Hallways and Entryways
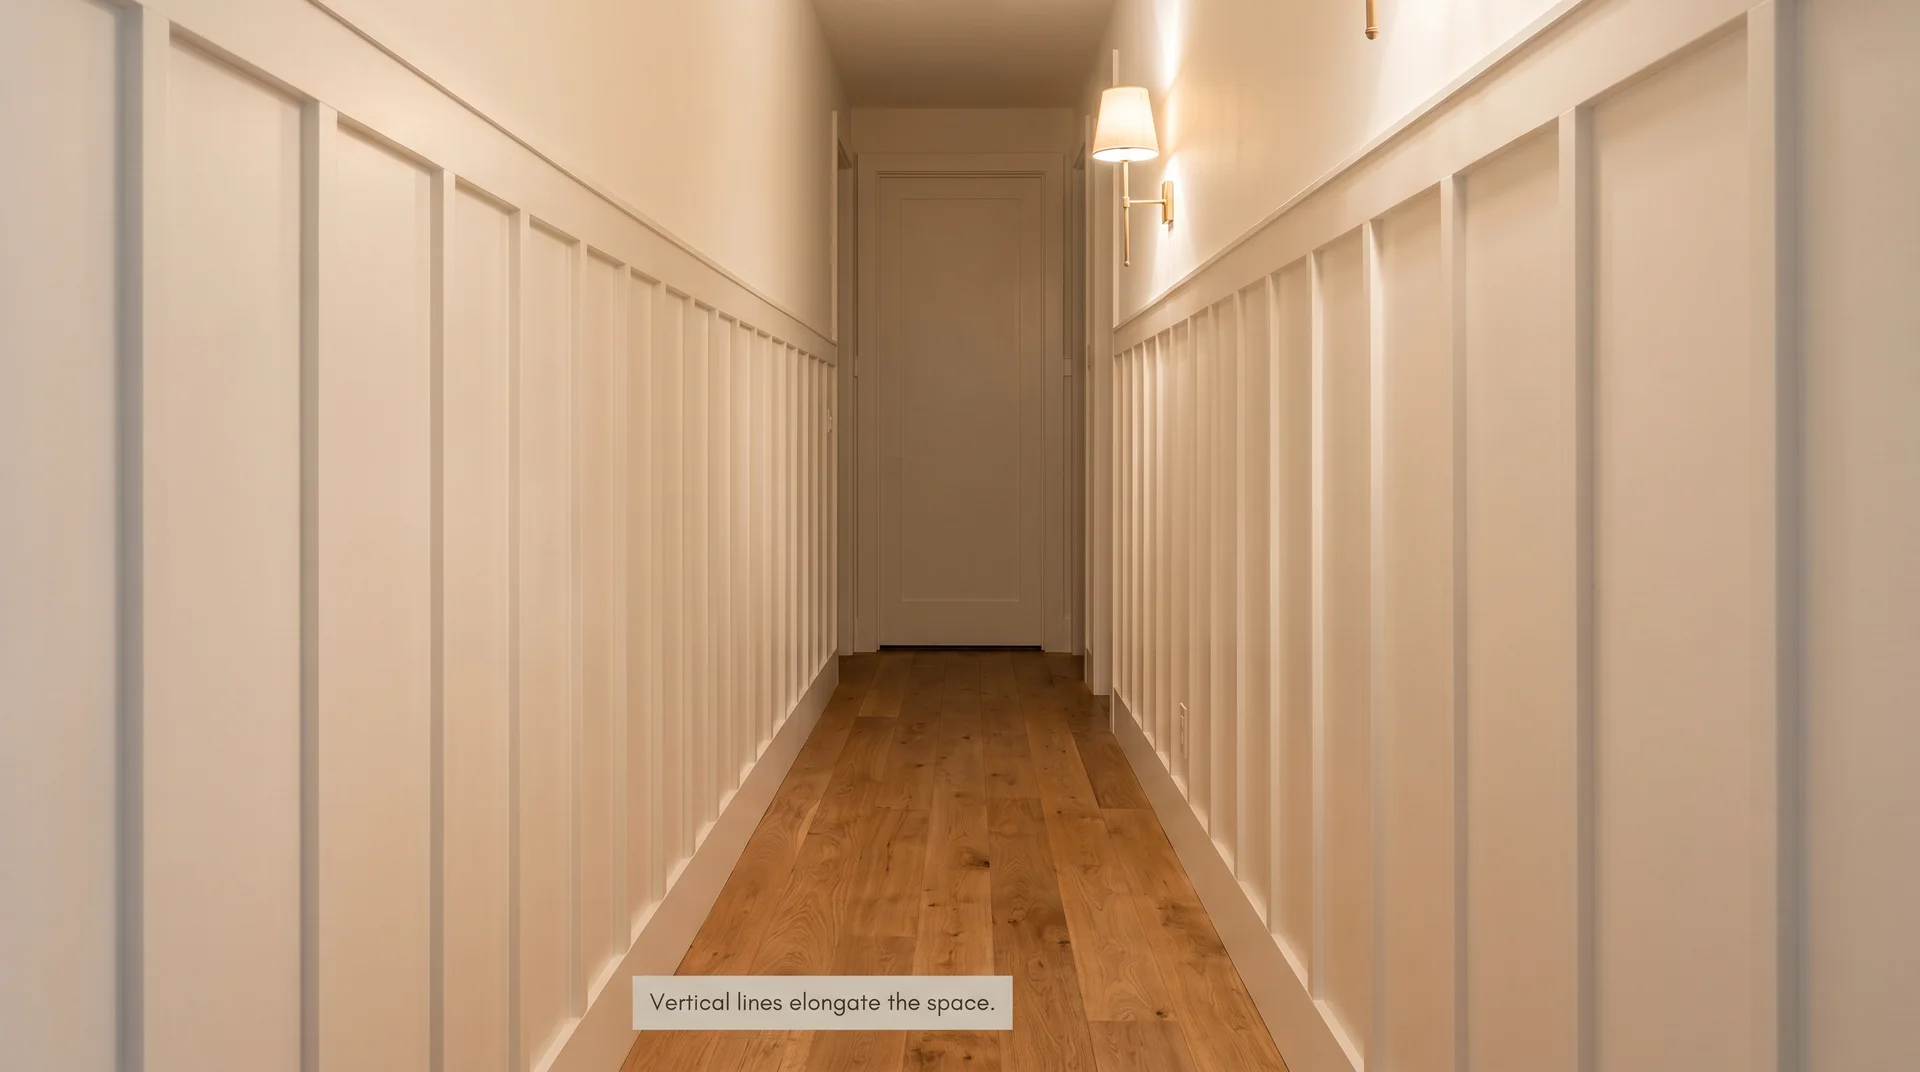
Board and batten genuinely shines in hallways. The vertical lines elongate narrow spaces, and the treatment creates a finished look without adding visual bulk.
Traditional wainscoting’s heavier frames and shadow lines can feel crowded in a narrow hall, particularly if the hallway is under 5 feet wide.
Bathrooms and Powder Rooms

Both styles work inbathrooms, but material choice matters here more than anywhere else.
If you’re using real wood in a bathroom with a shower, you need proper priming, a moisture-resistant paint finish, and good ventilation, or you’ll see paint failure and wood movement within a year or two.
This applies to both board and batten and wainscoting.
MDF is popular for bathroom board and batten because it’s more dimensionally stable than solid wood in humid environments and is less expensive. But it’s not moisture-proof, particularly at cut edges. Seal all cut ends with primer before installation.
- Powder rooms with no shower: Either style performs fine. The compact scale of a powder room makes board and batten’s simpler lines easier to execute cleanly.
- Full bathrooms with a shower in the same room: Use moisture-resistant MDF or PVC trim boards for the battens, regardless of which style you choose. Seal cut ends before installation, prime everything, and use a satin or semi-gloss finish for easy cleaning.
- Master bathrooms with a separate shower enclosure: Either style can be elevated here. Traditional wainscoting adds a spa-like formality if the room is large enough to carry the heavier framing.
Bedrooms and Stairwells
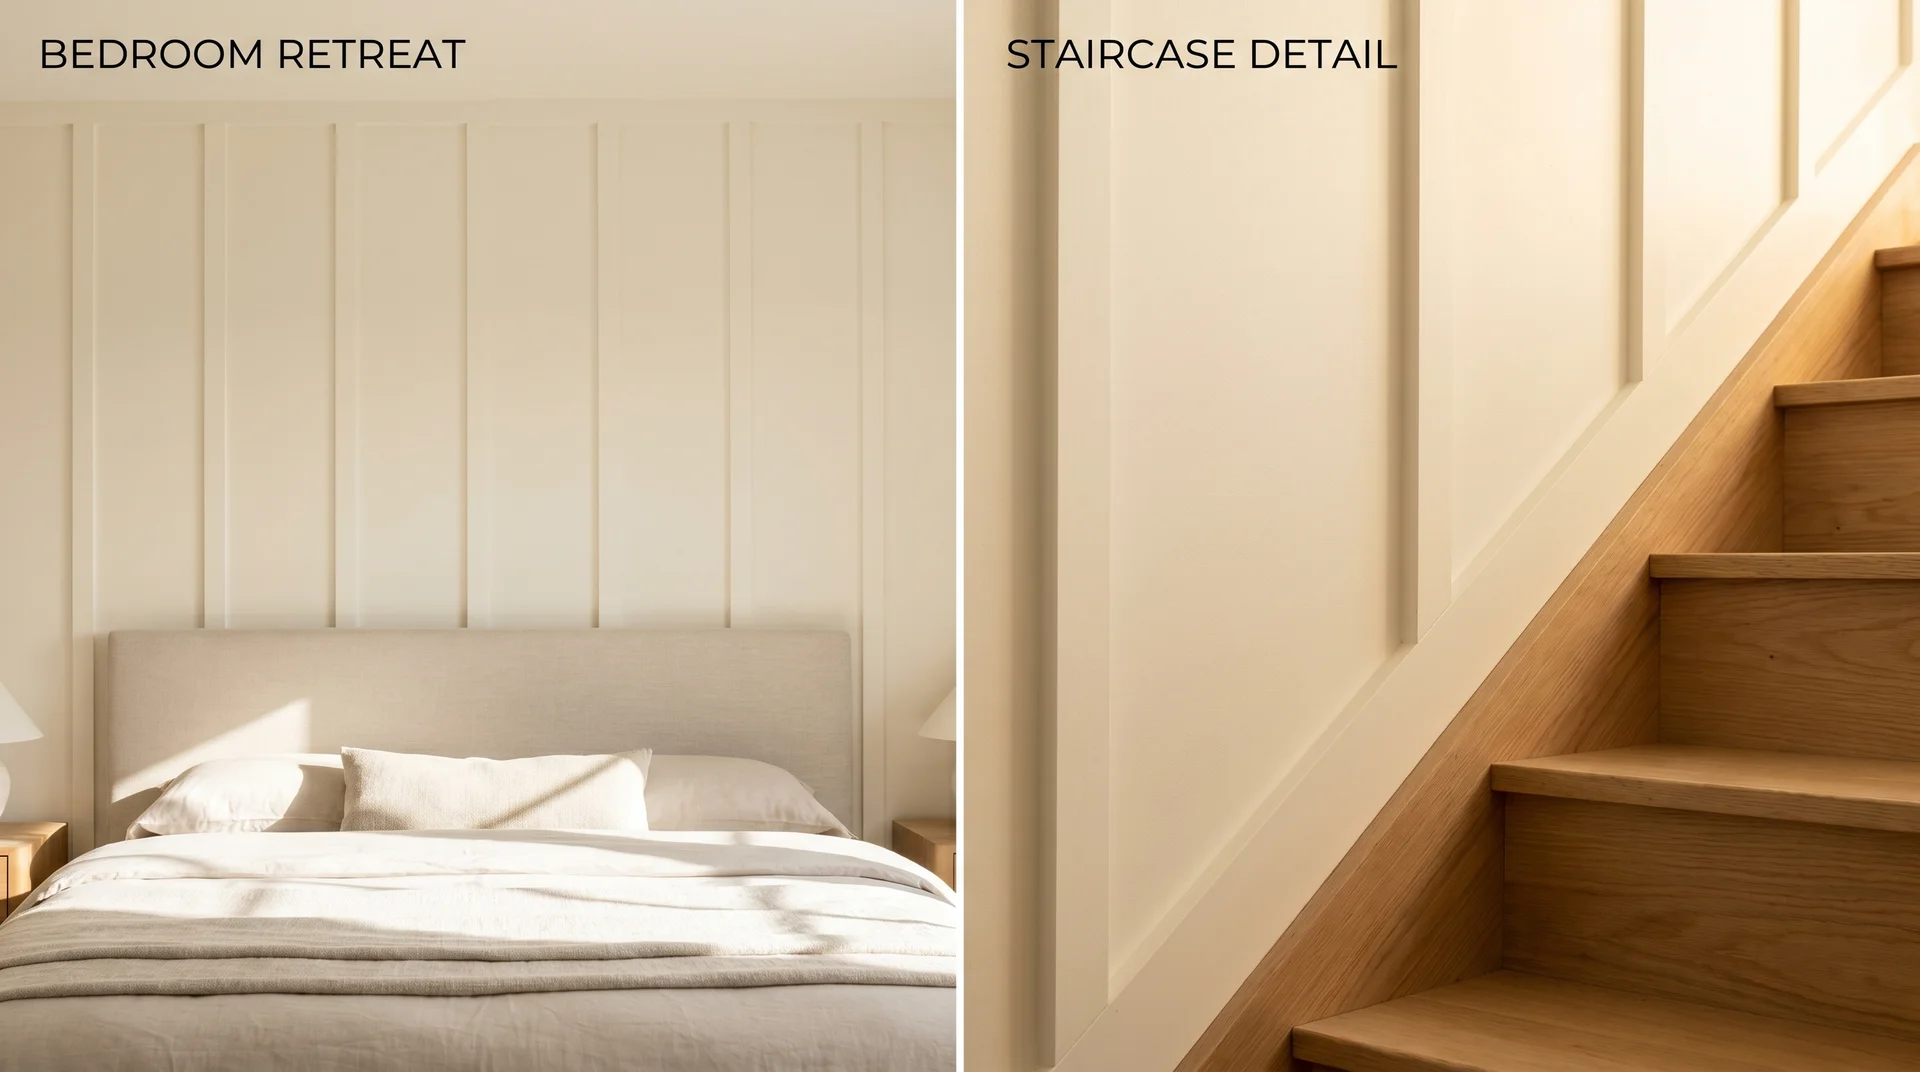
Bedrooms are a natural fit for board and batten on an accent wall behind the bed. Stairwells are where things get more complicated.
The angled cuts where board and batten meet a staircase rake line require more precision than a flat wall installation.
Budget extra time and more waste material than you think you’ll need. Traditional wainscoting on a stairwell is a significant carpentry project, not a beginner DIY.
The Proportions Question Nobody Answers
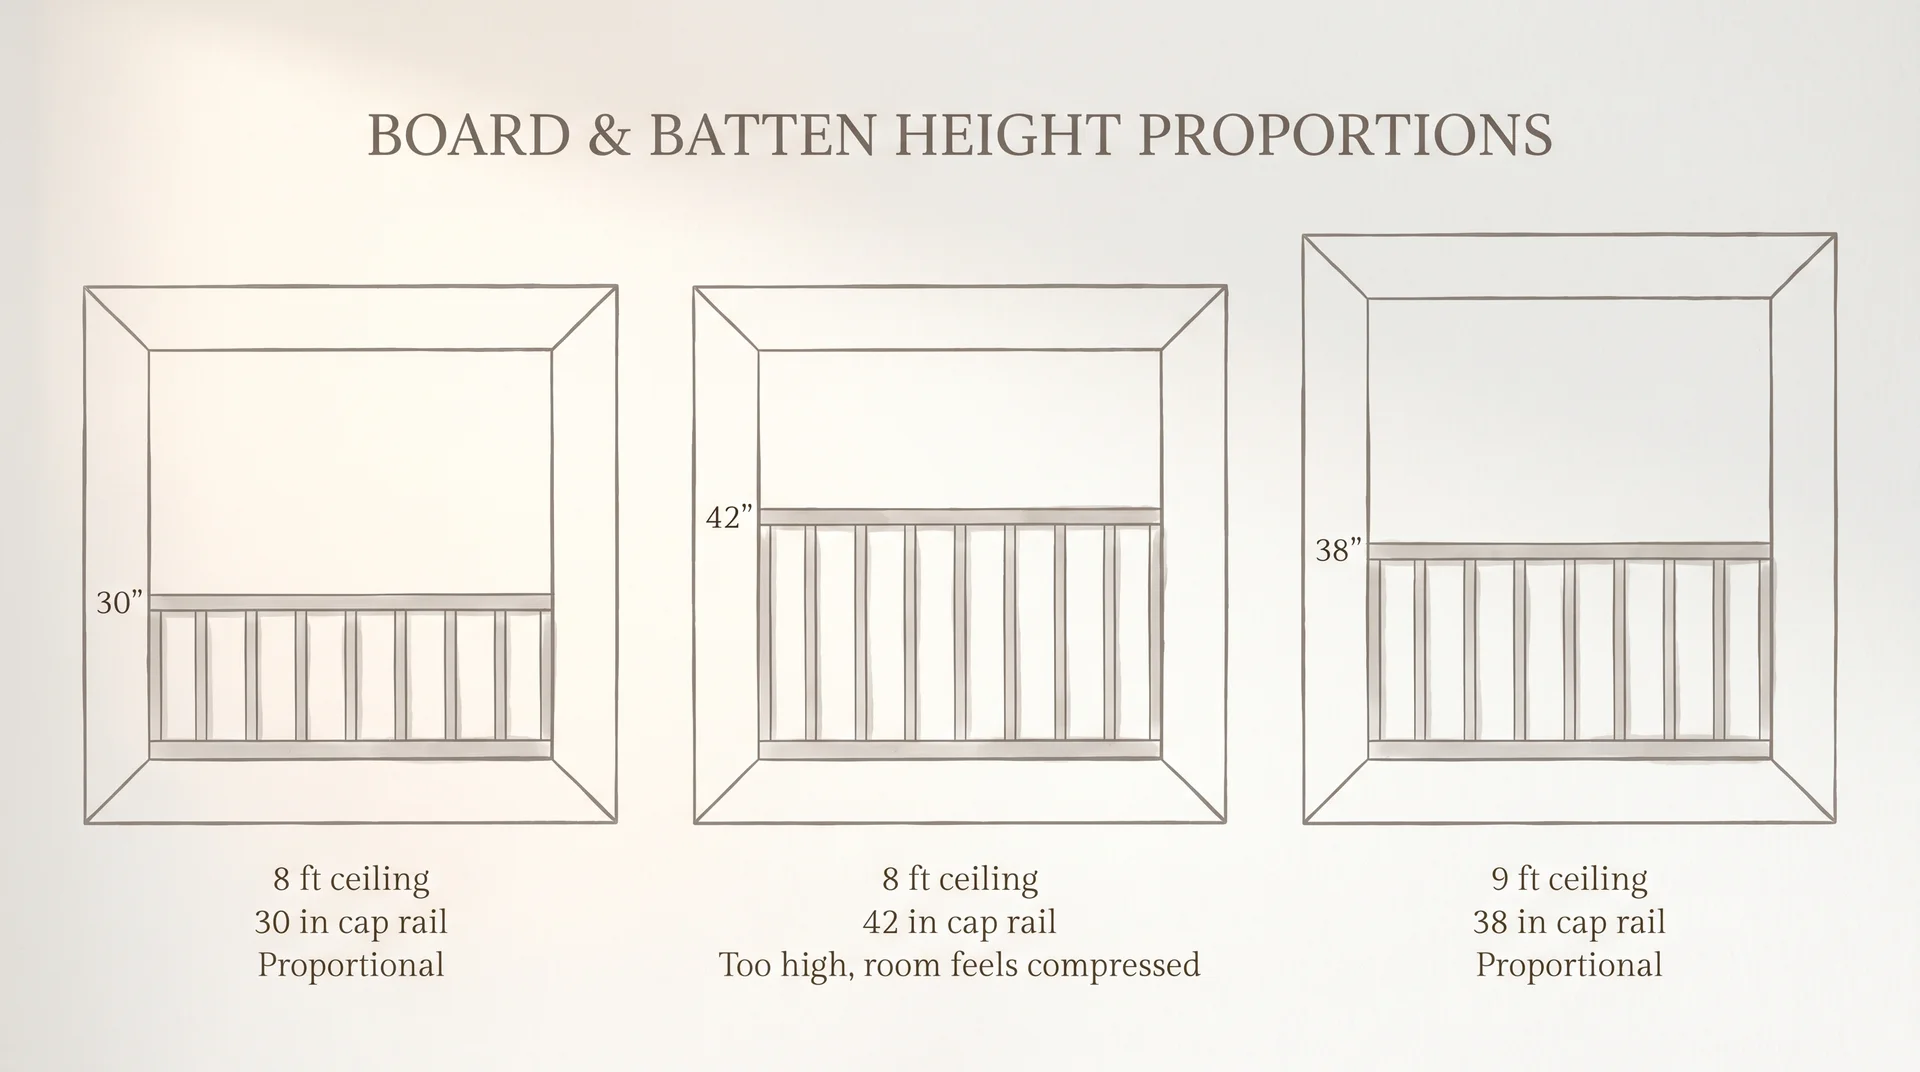
Here’s the variable that changes everything: the height of your cap rail relative to your ceiling height.
After working through this decision with clients in actual rooms, I found that Cap rail placement is a proportional rule with measurable consequences.
Honestly, this matters more than whether you choose board and batten or raised-panel wainscoting. Get it wrong, and even a beautifully installed treatment will feel off in the room.
The cap rail should occupy roughly one-third of the total wall height in standard rooms. In rooms with 8-foot ceilings, that means keeping the rail at 30 to 32 inches. In rooms with 9-foot or higher ceilings, 36 to 42 inches gives the treatment room to breathe without visually splitting the wall unevenly.
Here’s what that looks like across ceiling heights:
| Ceiling Height | Recommended Cap Rail Height | What Goes Wrong Above This Range |
|---|---|---|
| 8 feet | 28 to 32 inches | The room feels compressed; treatment dominates the wall |
| 9 feet | 34 to 40 inches | Standard range; most flexible for either style |
| 10 feet or higher | 40 to 48 inches | Below 36 inches, the treatment looks small and lost |
Traditional raised-panel wainscoting is more sensitive to this than board and batten.
The framed panel sections need to feel balanced internally, and a raised-panel section that’s too short looks like a mistake rather than a design choice.
Board and batten is more forgiving, because the vertical batten lines guide the eye upward regardless of the cap rail height.
Batten width and spacing follow the same proportional logic.
- In smaller rooms with low ceilings, narrow battens at 1.5 to 2 inches keep the pattern light.
- In larger rooms with high ceilings, wider battens at 2.5 to 3 inches add presence without overwhelming the space.
Most of the board and batten installations that look awkward in photos have the same problem: either the battens are too narrow for the scale of the room, or the cap rail sits too high for the ceiling height.
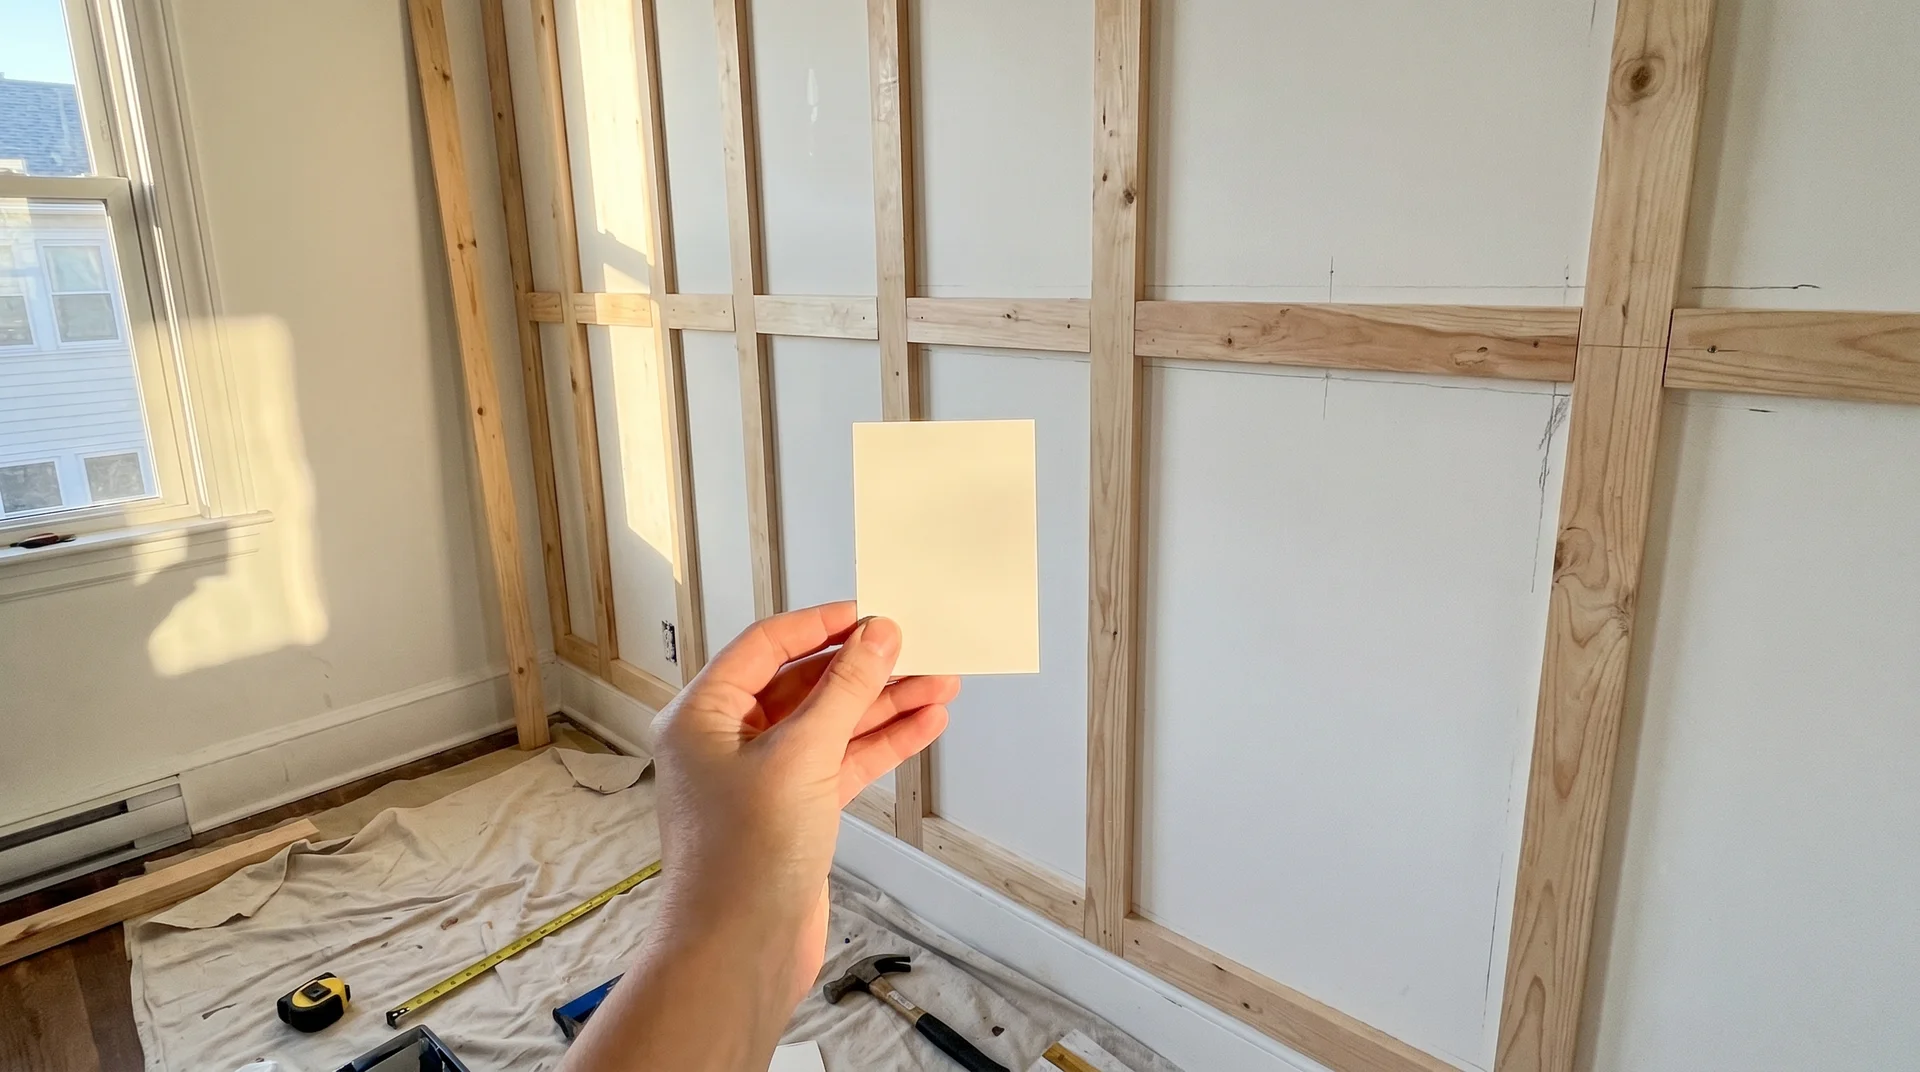
One note on paint color: whatever treatment you choose, the color you paint it matters almost as much as the proportions.
A crisp warm white like Sherwin-Williams Alabaster is a consistent choice for either board and batten or wainscoting because its warm undertone keeps millwork from reading cold against natural light.
A true bright white can make the treatment feel stark and overbuilt, especially in rooms with warm wood floors.
Design Style and Trend Longevity
Board and batten is a modern farmhouse staple. Traditional raised-panel wainscoting is associated with colonial, Georgian, and formal American interiors.
Board and batten peaked around 2020 to 2022. If you’ve spent any time on home renovation forums, you know there’s a real conversation about whether it now reads as dated.
My take is straightforward: if you love it, do it. The concern about it looking trendy applies far more to cheap, thin MDF installations with battens spaced too tightly than to well-proportioned work done with quality materials.
A poorly executed board and batten accent wall will look like 2021 in five years. A properly proportioned one will look like a design decision. The quality of execution is what separates one from the other.
Traditional raised-panel wainscoting is genuinely underrated right now. It fell out of favor partly because it’s harder to DIY, and partly because the farmhouse aesthetic dominated renovation media for so long that anything formal felt out of step.
But in homes with crown molding, traditional casing profiles, and period architecture, raised-panel wainscoting reads as permanent and considered in a way that board and batten can’t match.
- Home with clean lines, minimal molding, relaxed aesthetic: Board and batten fits the existing language of the space.
- Home with crown molding, traditional door casings, formal architecture: Raised-panel wainscoting will feel cohesive, where board and batten would feel like an import from a different house.
- Transitional home (modern structure, some traditional details): Either works. The quality of execution matters more than the style you pick.
Cost and DIY Difficulty
Board and batten is significantly easier to DIY than traditional raised-panel wainscoting. That’s not a critique of wainscoting; it’s just accurate, and it affects the total project cost considerably.
| Board and Batten | Traditional Wainscoting (Raised Panel) | |
|---|---|---|
| Material cost (12-foot wall, painted finish) | $80 to $200 | $200 to $500+ (pre-made panel systems) |
| Professional labor (per room) | $400 to $900 | $800 to $2,000+ |
| DIY feasibility | Yes, for the most comfortable DIYers | Possible, but requires precision miter cuts and careful layout planning |
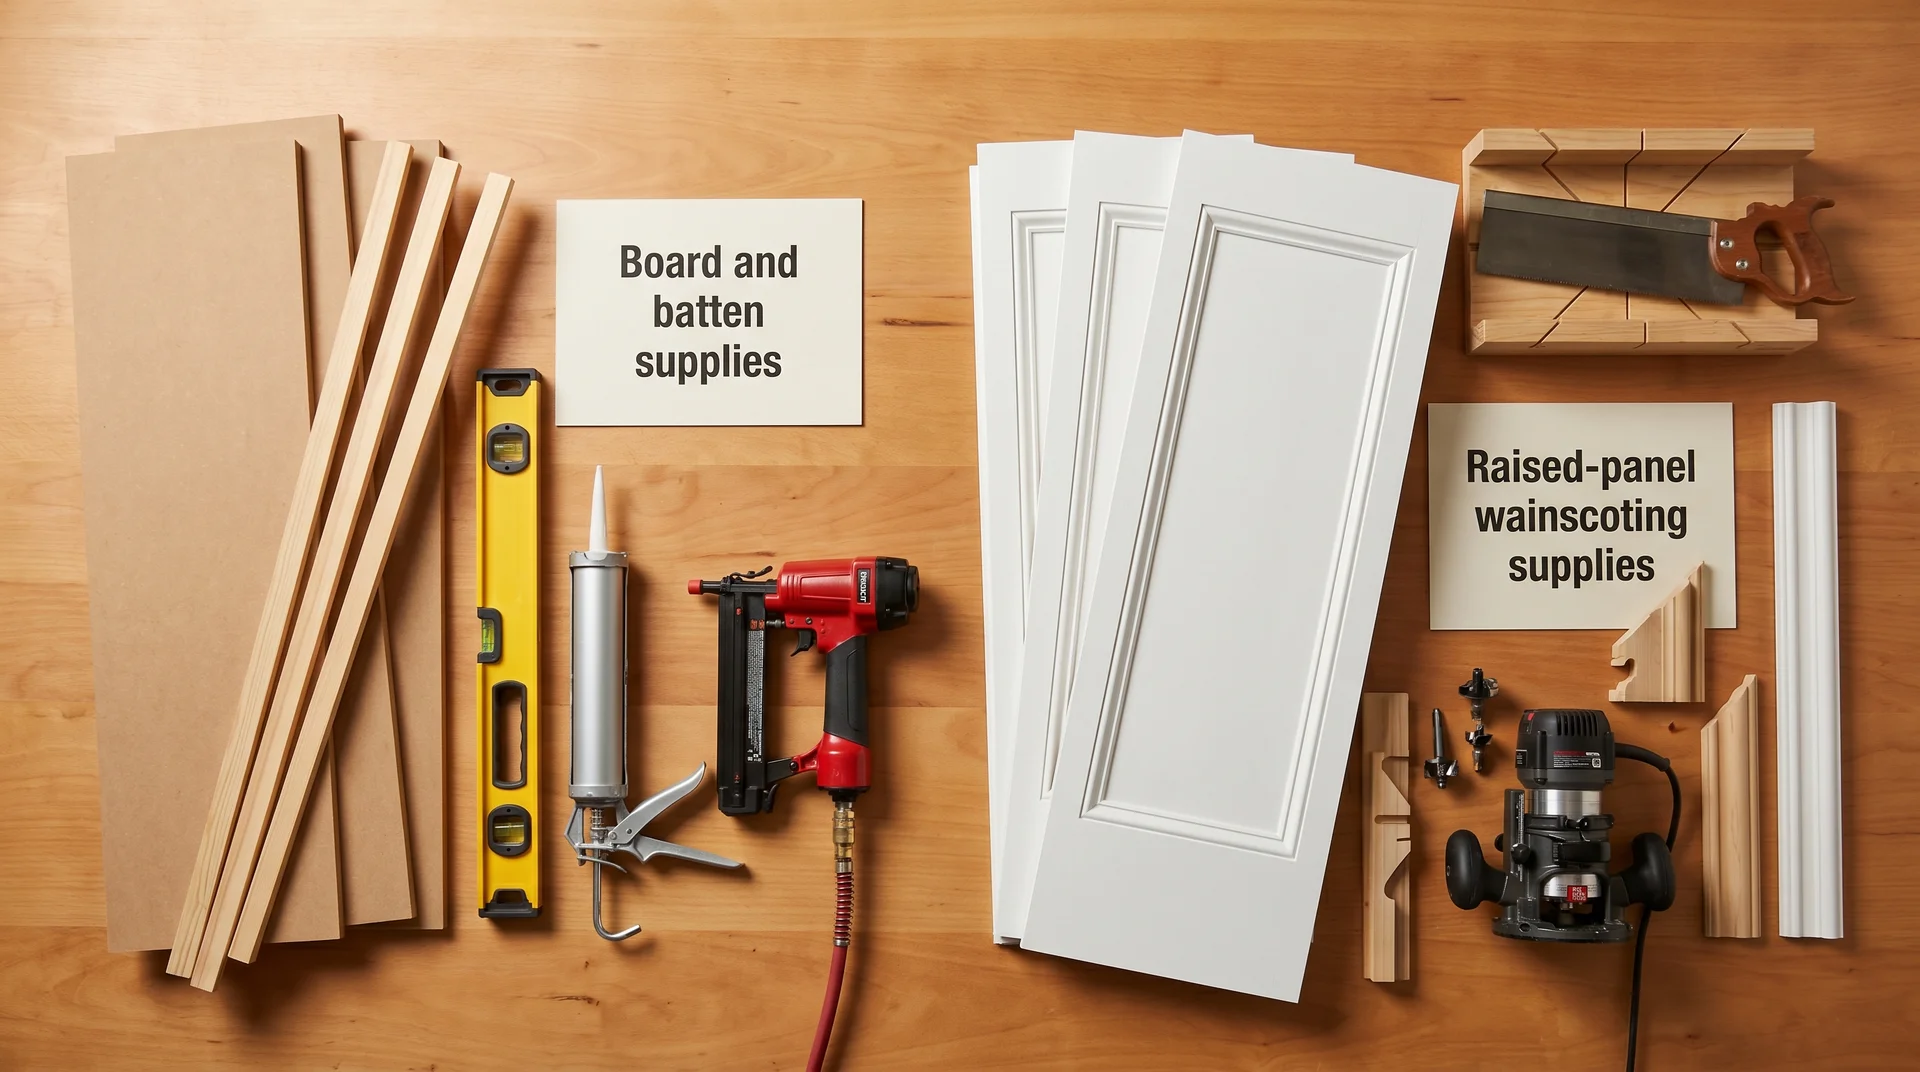
| Tools required | Miter saw, nail gun, level, caulk, primer | All of the above, plus router (or pre-made panel components) |
| Typical project time (one room) | 1 to 2 days | 2 to 4 days |
The real DIY variable for board and batten is the nail gun and compressor. Renting them typically adds $60 to $80 to your costs, but it’s the difference between a clean, fast installation and a frustrating weekend of hammer-and-nail work that leaves the wood marked up.
For traditional wainscoting, the challenge isn’t the installation technique itself. It’s the layout planning.
Each panel section needs to be sized so the internal proportions stay balanced, and in rooms with inside corners, windows, outlets, and doorways, that planning step takes longer than most first-timers expect.
Getting the math right before you cut anything is where the project succeeds or fails.
Which One Holds Its Value?
Honest answer: the data on this is thinner, and I’d rather say that than invent a clean comparison that doesn’t exist.
The National Association of Realtors’ cost-vs-value report covers major renovation categories, not trim-level decisions.
No study cleanly separates “board and batten” from “raised-panel wainscoting” in terms of resale return. What I can say from working with clients preparing homes for sale: quality wall treatments done well tend to register as a positive to buyers in markets where finishes matter.
A sloppy installation of either style will hurt more than help. In mid-range homes, buyers are more likely to notice well-executed millwork as a general positive than to specifically prefer one style over the other. This is one of the few places in this article where I don’t have a confident answer, and I think that’s worth naming.
How to Choose Between Board and Batten and Wainscoting
Use these as starting points, not final answers. The same proportional logic from the ceiling height section applies here: your room’s dimensions matter more than any general rule.
- Your ceiling is 8 feet: Board and batten with a cap rail at 30 to 32 inches is the safer proportional choice. Raised-panel wainscoting can work, but needs careful panel sizing to avoid feeling boxy.
- You’re DIYing on a budget: Board and batten. The material savings and reduced labor time are real and significant.
- Your home has formal architectural details, crown molding, or period trim: Traditional wainscoting. It will feel cohesive; board and batten will feel incongruous.
- You’re doing a bathroom: Either works. Prioritize moisture-resistant materials over style choice in any room with a shower.
- You want the treatment to feel permanent rather than of-the-moment: Traditional wainscoting, done well. It’s less susceptible to trend cycles.
- You want a high-impact weekend project: Board and batten. It has the better effort-to-result ratio of the two.
- Your room has low ceilings, and you want it to feel taller: Board and batten with taller, narrower battens and a low cap rail. The vertical lines do real spatial work.
- You’re considering a neutral wall color to unify the whole treatment: A warm, slightly off-white works best for either style. Something like Agreeable Gray on the upper wall with a crisp white on the millwork gives you clear separation without the room feeling stark.
Final Thoughts
One thing I keep coming back to when clients work through this question: the quality of execution matters more than the style you pick.
Both treatments look worse when they’re done poorly than they do when the “wrong” style is done with care. Get the proportions right. Use a level. Spend the extra money on pre-primed MDF if you’re painting it.
The style decision is actually the last thing to figure out, not the first.